28
e) App controls
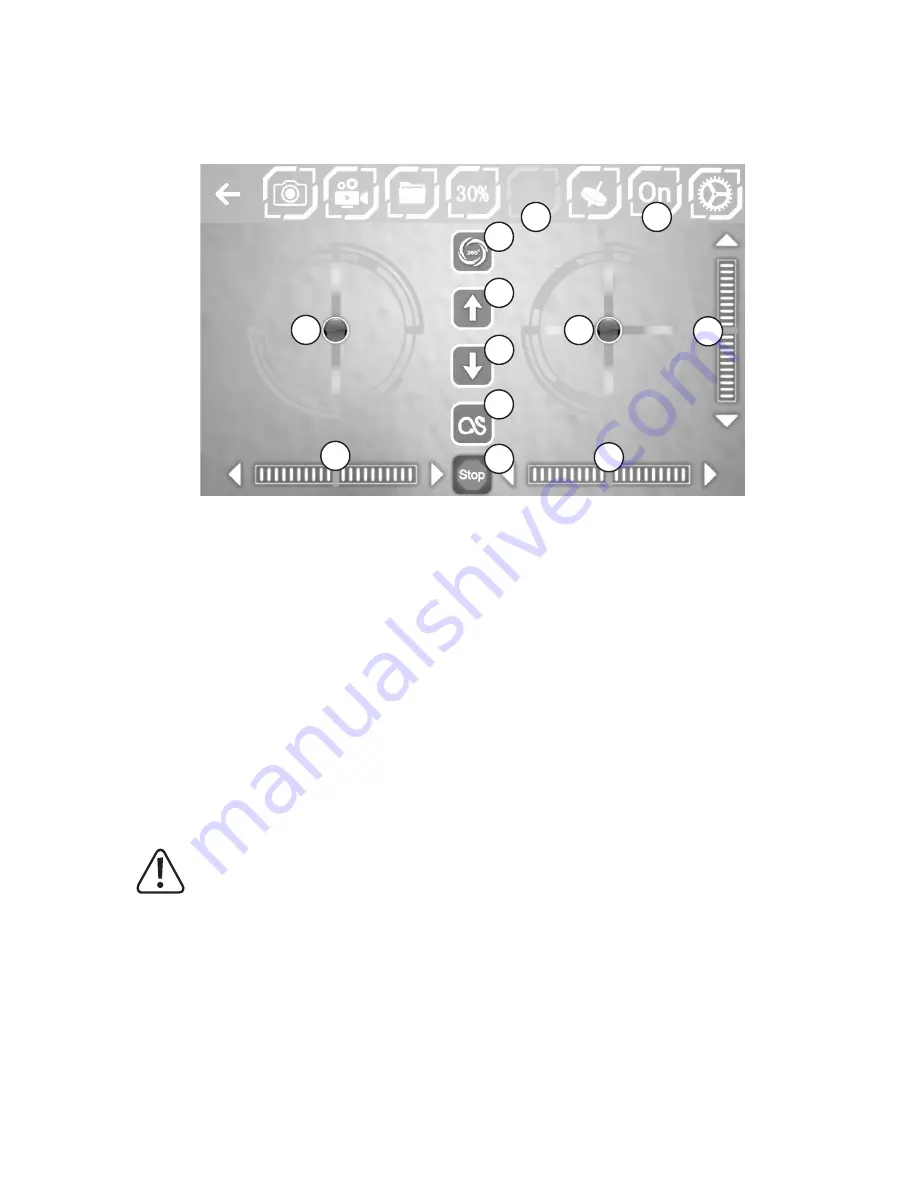
In order to start the model with the app, you must first tap icon #8 (”OFF”). Once selected, the icon changes to "On"
and the controls are displayed. Now select icon #6. More icons are displayed in the centre of the screen.
Figure 16
The icons that now appear allow you to control the model with the app. The icons have the following meanings:
10 Start rotors
11 Automatic landing (model drops to ground automatically and stops rotors after landing)
12 Control lever for "ascent/descent" and "yaw"
13 Control lever for "nod" and "roll"
14 Trimming element for "yaw"
15 Trimming element for "roll"
16 Trimming element for "nod"
17 Stop rotors immediately (e.g. after a crash)
18 Flip (activation of function, see chapter 14. c)
19 Flight route (shapes drawn on the display (e.g. a circle) or routes are flown by the quadrocopter automatically)
Attention!
For the automatic flight of a route, the model requires a barrier-free space in all directions. This function
can therefore only be used in very large rooms/halls or outdoors. People and objects must be at least 10
metres away from the takeoff site. Failure to ensure that this is the case may result in damage to the model
or other nearby objects, as well as posing a risk of injury to any nearby people/animals!
16
6
8
10
11
13
18
12
14
17
19
15
Summary of Contents for Gravity FPV RtF
Page 1: ...Operating Instructions Electrical quadrocopter Gravity FPV RtF Item No 1642419 ...
Page 38: ...38 ...
Page 39: ...39 ...


