73
d) Operating the FPV goggles
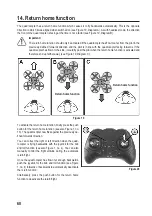
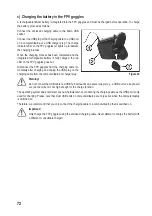
To operate the FPV goggles, the battery in the goggles and the flight battery in the quadrocopter must be charged.
Start up the quadrocopter.
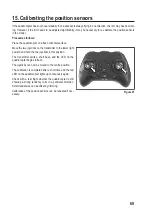
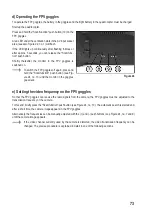
Press and hold the "Scan/function" push button (10) on the
FPV goggles.
A red LED under the ventilation slots in the AV input socket
area (see also Figure 22, no. 1) will flash.
If the LED lights up continuously after flashing 6 times or
after approx. 3 seconds, you can release the "Scan/func-
tion" push button.
Shortly thereafter, the monitor in the FPV goggles is
switched on.
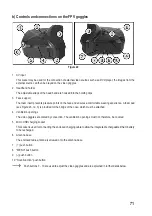
To switch the FPV goggles off again, press and
hold the "Scan/function" push button (see Fig-
ure 24, no. 10) until the monitor in the goggles
goes dark.
e) Setting the video frequency on the FPV goggles
So that the FPV goggles can receive the radio signals from the camera, the FPV goggles must be adjusted to the
transmission frequency of the camera.
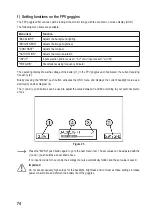
To this end, briefly press the "Scan/function" push button (see Figure 24, no. 10). The automatic search is started and,
after a short time, the camera image appears in the FPV goggles.
Alternatively, the frequencies can be manually adjusted with the (+) and (-) push buttons (see Figure 24, no. 7 and 9)
until the camera image appears.
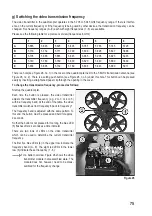
If the video channel currently used by the camera is distorted, the video transmission frequency can be
changed. The precise procedure is explained in detail in one of the following sections.
Figure 24

