IMPORTANT-BATTERY-INFORMATION
Charge the battery:
Fully charge the battery before first use. To charge the built in
battery, plug in the power adapter into the device and into your
house electricity. The LED-charging indicator starts to flash green.
When the charging process is completed, the charge indicator lights
up in a steady green. The charging process can take about 3-4
hours.
FIRST-TIME-INSTALLATION
1.
Check again that all connections are correctly connected
and fold the device.
2.
Slide the power switch on the unit to the
“ON”
position.
3.
Press the
“SOURCE”
button.
4.
Navigate to the menu item
„Digital TV“
.
5.
Press the
„OK“
button.
6.
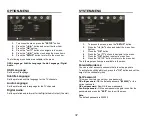
When the unit is first switch to Digital TV or has been
reset, the following settings menu appears on the screen.
1.
Select the OSD language.
2.
Select the installation country for the DVB-T/T2HD tuner.
3.
Press the
“OK”
button to start the automatic channel
search.
4.
After the channel search, the device changes to the first
installed channel.
Note:
If an active DVB-T antenna is used, switch the menu item
“ANTENNA POWER”
to
“ON”
.
Note:
Make sure that the antenna cable and power supply are correctly
plugged into the device.
Note:
The number of programs received depends on the signal quality and
can vary from side to side.
Note:
The device always starts in DVD mode after switching on and must
be switched to
“DIGITAL TV”
for TV reception via the
“SOURCE”
button.
Note:
In the menu navigate with the buttons
„▲ / ▼ / ◄ / ►“
.
Press the
“OK”
key to confirm the entry.
Note:
If no channels is found, the device goes back to the first time
installation screen.
28


