IMPORTANT-BATTERY-INFORMATION
Charge the battery:
Fully charge the battery before first use. To charge the built in
battery, plug in the power adapter into the device and into your
house electricity. The LED-charging indicator starts to flash green.
When the charging process is completed, the charge indicator lights
up in a steady green. The charging process can take about 3-4
hours.
MENU-NAVIGATION-DVD-MODE
The device starts automatically in DVD mode. Press the
„SETUP“
button to open the setup menu for the DVD mode.
1.
Press the
„▲ / ▼ / ◄ / ►“
buttons to navigate in the
menu.
2.
Press the
„ENTER“
button to confirm a menu entry.
3.
Press the
„◄“
button to return to the previous menu item
in the setup menu.
4.
Press the
„Setup“
button
to close the setup menu.
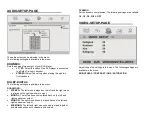
GENERAL-SETUP-PAGE
TV Display:
Select the display format to match the media being played. The
following settings are available:
4:3 Panscan / 4:3 LetterBox / 16:9 / Wide Squeeze
ANGLE MARK:
Display the currently set angle at the right corner on the screen, if
available on the DVD.
OSD LANGUAGE:
Set the menu language of the setup menu.
CLOSED CAPTIONS:
Closed captions are data that are hidden in the video signal of some
discs. Before you select this function, please ensure that the disc
contains closed captions information and your TV set also has this
function.
SCREEN SAVER:
This function is used to turn the screen saver
“ON”
or
“OFF”
.
AUTO-STANDBY:
Sets the time after which the unit should automatically go into
standby mode. The following settings are available:
3 hours / 4 hours / Off
Note:
If the option is set to 3 hours, the device automatically goes into
standby mode after 3 hours if no button is pressed.
Note:
If a button on the remote control or on the device is pressed within
the set option, the setting is reset and the time starts from the
beginning.


