background image

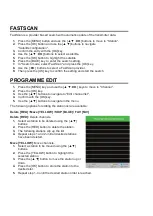
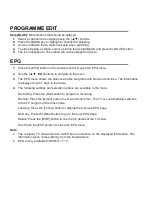
PROGRAMME EDIT    


Skip [BLUE]: 

Mark stations that should be skipped. 

1. 

Selec

t a channel to be skipped using the [▲ ▼] buttons. 

2. 

Press the [BLUE] key to highlight a channel for skipping. 

3. 

An icon indicates that a station will skip when switching. 

4. 

To stop skipping a station, select a station that is highlighted and press the [BLUE] button. 

5. 

The icon disappears. The station will not be skipped anymore. 

EPG   


1. 

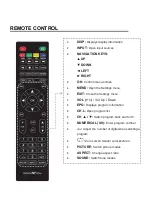
Press the [EPG] button on the remote control to open the EPG menu. 

2. 

Use the [▲ ▼ ◄►] buttons to navigate in the menu. 

3. 

The EPG menu shows the stations and the programs with start and end time. The information 
is displayed up to 7 days in the future. 

4. 

The following settings and selection options are available in the menu. 

Recording: Press the [Red] button to program a recording. 

Remind: Press the [Green] button to set a reminder timer. The TV set automatically switches 
to the TV program at the time shown. 

Last day: Press the [Yellow] button to display the previous EPG page. 

Next day: Press the [Blue] button to go to the next EPG Page. 

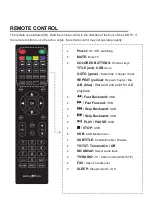
Details: Press the [DISP] button to see the full details of the TV show. 

Exit: Press the [EXIT] button to close the EPG menu. 

Note: 


The company TV Grawe Service GmbH has no influence on the displayed information. The 
information given comes directly from the broadcasters. 


EPG is only available for DVB-S / T / C 


Summary of Contents for LEDW160

Page 1: ...esamte Anleitung des Fernsehers sorgf ltig durch bevor Sie das Ger t benutzen Bewahren Sie die Anleitung f r den weiteren Gebrauch gut auf 16 40cm TFT LED Fernseher mit DVB T T2HD DVB S S2 DVB C CI SL...

Page 2: ...3 SENDER MEN SATELLIT 17 LNB EINSTELLUNGEN 21 FASTSCAN 21 KANALLISTE BEARBEITEN 22 EPG 23 PVR AUFNAHME FUNKTION 23 HDMI CEC ARC 25 BILD MEN 25 TON MEN 27 ZEIT MEN 28 KONFIGURATION MEN 29 SCHUTZ MEN 31...

Page 3: ...hten Sie das Ger t gem der mitgelieferten Schnellstartanleitung und dieser Bedienungsanleitung ein Sorgen Sie daf r dass das Netzkabel weder eingequetscht noch darauf herumgelaufen wird besonders beim...

Page 4: ...Netzsteckdose an die der Fernseher angeschlossen ist nicht zu viele andere Ger te mit an Halten Sie Nagetiere vom Ger t fern Nagetiere lieben es am Netzkabel zu nagen Ziehen Sie das Netzkabel am Stec...

Page 5: ...s Ger tes Sie w rden Ihren Garantieanspruch verlieren Das Ger t darf nur von Herstellerservice gewartet werden Schlagen oder sch tteln Sie niemals den Bildschirm weil dies die internen Schaltkreise be...

Page 6: ...EIBUNG Ger te Vorderseite Beschreibung der Tasten und deren Funktion am Fernsehger t INPUT Zeigt die Eingangsquellen an MEN ffnen schlie en des OSD Men s CH Programme vor und zur ckschalten VOL Lauter...

Page 7: ...Antenne TV2 T2HD C Kabel Antenne Anschluss der DVB T Antenne oder der Kabelanlage COAX S PDIF Digitaler Ausgang f r externe Audioger te z B AV Receiver Soundbars HDMI Anschluss eines externen HDMI Ger...

Page 8: ...lten FARBIGE TASTEN Schnellwahltasten TITLE rot USB Men GOTO gr n Titel Kapitel Track w hlen REPEAT gelb Kapitel Titel wiederholen A B blau Start und Endpunkt f r A B Wiedergabe SCHNELLER R CKLAUF USB...

Page 9: ...ungen ffnen EXIT Men Einstellungen schlie en VOL Lauter Leiser EPG Programm und Sendungsinformationen CH L Programmliste ffnen CH Programm vor und zur ckschalten ZIFFERNTASTEN 0 9 Programm Nummer eing...

Page 10: ...her aus bevor Sie Module in den CI Slot stecken Schieben Sie danach die Smart Card in das Modul 1 Schalten Sie den Fernseher ein und vergewissern Sie sich dass als Quelle DTV ausgew hlt ist 2 Wenn das...

Page 11: ...t einzuschalten 2 Dr cken Sie die Taste um dem Men zu navigieren 3 Dr cken Sie die Taste um die Men einstellungen zu ndern W hlen Sie die Men sprache das Land und den Aufstellungsort aus 4 Mit der Tas...

Page 12: ...r DVB T gew hlt und die Einstellungen mit der Taste OK best tigt Startet der Automatische Suchlauf 7 Ist der Suchlauf abgeschlossen wechselt das Ger t in den TV Modus und die Erstinstallation ist abge...

Page 13: ...angen zum n chsten Men punkt 4 Mit der Taste MEN kehren Sie zum letzten Men punkt zur ck 5 Mit der Taste EXIT verlassen Sie die Men einstellungen Hinweis Schalten Sie die Option 5V Aktivantenne im Men...

Page 14: ...t der Taste OK 4 Der Suchlauf beginnt 5 Um den Sendersuchlauf zu unterbrechen dr cken Sie die Taste EXIT 6 Folgende Einstellungsm glichkeiten und Men punkte stehen zur Auswahl DVB C Automatische Sende...

Page 15: ...llungen zu best tigen und den Suchlauf zu starten Aktueller Sender W hlen Sie den Sender der angepasst werden soll aus Farb System PAL NTSC SECAM NTSC 44 PAL M PAL N PAL 60 Audiosystem DK MN I BG Fein...

Page 16: ...t Kanalliste bearbeiten aus und dr cken Sie die OK Taste 2 Mit den Tasten navigieren Sie in dem Men punkt Hinweis Eine genaue Beschreibung finden Sie unter dem Punkt Kanalliste bearbeiten Signalinform...

Page 17: ...ieren Sie zu Sender 5 Best tigen Sie die Eingabe mit der Taste OK 6 Folgende Men punkte stehen im Sender Men zur Auswahl Automatische Sendersuche Kanalliste bearbeiten Signalinformation CI Information...

Page 18: ...aus und dr cken Sie die OK Taste 2 Mit den Tasten w hlen Sie die verschiedenen Men punkte aus 3 Best tigen Sie die Eingabe mit der Taste OK 4 Um das Men zu verlassen dr cken Sie die Taste EXIT Hinweis...

Page 19: ...er den Sie bearbeiten m chten mit den Tasten aus 2 Dr cken Sie die OK Taste um den Satelliten oder Transponder zu markieren 3 Dr cken Sie die Gr ne Taste um in die Satelliten und Transponder Einstellu...

Page 20: ...uenz Geben Sie eine neue Frequenz ein Symbol ks s Geben Sie eine neue Symbolrate ein Polarit t H Horizontal V Vertikal Suche Blau 1 W hlen Sie mit den Tasten einen Satelliten oder Transponder aus mit...

Page 21: ...0 09750 10600 10750 11300 11475 User Single User Dual Unicable LNB Versorgung 13 18V 13V 18V Aus 22KHz Auto Aus Ein Toneburst Kein BurstA BurstB DISEqC 1 0 Kein LNB1 LNB2 LNB3 LNB4 DISEqC 1 1 Kein LNB...

Page 22: ...der runter zu bewegen 3 Dr cken Sie die OK Taste um den Sender auf den gew nschten Sendeplatz abzulegen 4 Wiederholen Sie die Schritte 1 3 bis die gew nschte Sender Reihenfolge erreicht ist berspringe...

Page 23: ...rinnerungs Timer zu stellen Das TV Ger t schaltet automatisch zur angezeigten Zeit auf das TV Programm um Letzter Tag Dr cken Sie die Gelbe Taste um die vorherige EPG Seite anzuzeigen N chster Tag Dr...

Page 24: ...sten navigieren Sie und suchen die gew nschte TV Sendung aus 5 Dr cken Sie die Rote Taste um die TV Sendung f r eine Aufnahme zu markieren 6 Durch mehrfaches Dr cken k nnen Sie die Aufnahme Funktion v...

Page 25: ...ste und gehen Sie in das Konfigurations Men 3 W hlen Sie den Men punkt HDMI CEC aus 4 In dem Men haben Sie folgende Einstellungsm glichkeiten HDMI CEC Ein Aus Aktivieren deaktivieren Sie die HDMI CEC...

Page 26: ...ein NTSC Signal anliegt Farbtemperatur Warm Kalt Normal Bildformat Automatisch 4 3 16 9 Zoom1 Zoom 2 Rauschunterdr ckung Niedrig Mittel Hoch Aus PC Einstellungen Der Men punkt in nur aktiv wenn ein PC...

Page 27: ...gung Hinweis H hen und B sse sind nur im Ton Profil PERS NLICH verf gbar Ist ein Audio Ger t in die Kopfh rerbuchse gesteckt werden die integrierten Lautsprecher stumm geschaltet Ton Profil Standard...

Page 28: ...ufenthaltsortes ein Ausschaltzeit Stellen Sie die Automatische Ausschaltzeit Ein oder Aus Einschaltzeit Stellen Sie die Automatische Einschaltzeit Ein oder Aus Folgende Einstellungen k nnen Sie f r di...

Page 29: ...n stehen Ihnen in dem Men zur Verf gung Men Sprache Stellen Sie die Men sprache ein Deutsch English Franz sisch Niederl ndisch Italienisch usw Videotext Zeichensatz W hlen Sie den Zeichensatz f r den...

Page 30: ...de f r den H ndler Werkseinstellungen Starten Sie die Werkseinstellung Alle Tuner Bild und Ton Einstellungen werden zur ckgesetzt Software Update USB Starten Sie ein Software Update Software Updates s...

Page 31: ...tz Tastensperre Hotel Modus Kennwort ndern Passen Sie in diesem Men das Passwort an 1 Altes Passwort eingeben Geben Sie das aktuelle Passwort ein 2 Neues Passwort eingeben Geben Sie ein neues Passwort...

Page 32: ...HOTEL MODUS 1 Dr cken Sie die Taste MEN 2 Mit den Tasten navigieren Sie zu dem Men punkt SCHUTZ 3 Dr cken Sie die Taste OK 4 Navigieren Sie mit den Tasten auf zu dem Men punkt HOTEL MODUS 5 Dr cken S...

Page 33: ...le ber die INPUT Taste nicht mehr anw hlen Startquelle 1 Dr cken Sie die Tasten um eine der verschiedenen Quellen als Startquelle auszuw hlen 2 Folgende Auswahlm glichkeiten stehen zur Verf gung Aus S...

Page 34: ...en zur cksetzen Setzen Sie die getroffenen Hotel Modus Einstellungen auf die Standardeinstellungen zur ck 1 Dr cken Sie die Taste um alle in dem Hotel Modus getroffenen Einstellungen zur ck zu setzen...

Page 35: ...it der Taste OK 5 Navigieren Sie mit den Tasten zu der gew nschten Datei 6 Best tigen Sie die Eingabe mit der Taste 7 Die Wiedergabe beginnt nun in der Vollbild Ansicht 8 Um mehrere Dateien f r die Wi...

Page 36: ...eine Bedienleisten Men eingeblendet HINWEIS Dr cken Sie die Taste OK um die Bedienleiste einzublenden Dr cken Sie die Taste um das Men Auszublenden Dr cken Sie die Tasten um in dem Men zu navigieren...

Page 37: ...MPEG 1 MPEG 2 H 265 VC 1 MP1 MP2 MP3 AAC mpg mpeg MPEG 1 MPEG 2 MP1 MP2 MP3 AAC PCM mkv MPEG 2 4 H 265 Xvid RV30 RV40 VC 1 MP3 AAC PCM COOK mov MPEG 4 H 265 MJP EG MP3 AAC PCM AMRNB dat MPEG 1 MP1 vo...

Page 38: ...Vergewissern Sie sich dass der Kanal richtig abgestimmt ist Ver ndern Sie die Bildeinstellungen Helligkeit Farbe Bildsch rfe Kontrast Farbton Stellen Sie sicher dass der Fernseher nicht in der N he an...

Page 39: ...ast 3000 1 Helligkeit cd m 200 cd m Farben 262K Farben Betrachtungswinkel Horizontal 178 Vertikal 178 TV Funktion TV Standard BG DK I L L Kan le ATV DVB T C S 100 1000 T C 5000 S Videotext ATV DTV 100...

Page 40: ...INFACHTE EU KONFORMIT TSERKL RUNG Hiermit erkl rt die UltraMedia GmbH Co Handels KG dass der Funkanlagentyp LEDW160 der Richtlinie 2014 53 EU entspricht Der vollst ndige Text der EU Konformit tserkl r...

Page 41: ......

Page 42: ...Fremdzubeh r Sturz Staub Wassersch den und Verschlei erscheinungen z B Kratzer optische Abnutzungen die durch den Kunden oder Fremdeinwirkungen hervorgerufen worden sind Um die Gew hrleistungsanspr ch...

Page 43: ...che und elektronische Altger te sowie Batterien nicht mit dem Hausm ll entsorgt werden d rfen und separat entsorgt werden m ssen Als Endverbraucher ist es notwendig dass Sie Ihre ersch pften Batterien...

Page 44: ...Read the entire instructions for the TV carefully before using the device Keep the manual for further use 16 40cm TFT LED TV with DVB T T2HD DVB S S2 DVB C CI SLOT Model No LEDW160 User Manual...

Page 45: ...not use this TV near water Use a lightly moistened cloth for cleaning Do not cover any of the ventilation holes Set up the unit according to the supplied Quick Start Guide and this manual Be careful n...

Page 46: ...ding the AC outlet to which the TV is connected Keep rodents away from the device Rodents love to nibble on the power cord Unplug the power cord from the power outlet Never pull on the power cord itse...

Page 47: ...circuitry Gently handle the remote control and do not drop it Never place hot objects or naked flames in the immediate vicinity of the TV Clean the appliance with a soft cloth Never use solvents or li...

Page 48: ...D remote receiver keep free Description of the buttons and their function on the TV INPUT Displays the input sources MEN Open Close the OSD on screen menu CH Switch programs back and forth VOL Vol Up...

Page 49: ...C Cabel Antenna Connection of the DVB T antenna or cable system COAX S PDIF Digital output for external audio devices such as AV receivers soundbars HDMI Connecting an external HDMI device Blu ray pl...

Page 50: ...RED BUTTONS Shortcut keys TITLE red USB menu GOTO green Select title chapter track REPEAT yellow Repeat chapter title A B blue Start and end point for A B playback Fast Backward USB Fast Forward USB S...

Page 51: ...Settings menu EXIT Close the Settings menu VOL Vol Up Down EPG Displays program information CH L Open program list CH Switch program back and forth NUMERICAL 0 9 Enter program number Adjust the number...

Page 52: ...n off your TV before inserting modules into the CI slot Then insert the smart card into the module 1 Turn on the TV and make sure source DTV is selected 2 When the CAM is detected the following text i...

Page 53: ...navigate the menu 3 Press the button to change the menu settings Select the menu language the country and the site 4 Press the OK key to confirm the entry and enter the tuner selection Note If you hav...

Page 54: ...can Network Scan Cannel Type All Channels FTA Channels Service Type All DTV Radio 12 If you have selected DVB C or DVB T and confirmed the settings with the OK key Starts the automatic search 13 When...

Page 55: ...proceed to the next menu item 4 Use the MENU key to return to the last menu item 5 Press the EXIT key to exit the menu settings Note In the Channel menu set the 5V antenna power option to On when the...

Page 56: ...are available DVB C Auto Tuning Tune Type DTV ATV Scan Type Full Network Scan Netzwork ID The menu item is only active if network search is selected Frequency The menu item is only active if network...

Page 57: ...DK MN I BG Fine Tune Press the button to fine tune AFC On Off Search Go to Search and press the OK key to start the search CADTV Manual Tuning DVB C T T2HD 1 Select the menu item Manual DVB T C Search...

Page 58: ...ality Signal Network Modulation 1 Select the menu item Signal Information and press the OK key 2 Use the MENU key to return to the Station menu 3 Using the EXIT key Note The menu item can only be sele...

Page 59: ...owing setting options and menu items are available Country Select the country Satellite Select the satellite Astra 19 2E is set as default Scan Mode Default blind Scan Network Scan Channel Type All Ch...

Page 60: ...the EXIT key In the Dish Setup menu you have three menu columns to choose from In the satellite and transponder list you will see a list of all satellites and the associated transponders In the right...

Page 61: ...nter a new longitude angle Band Ku C Transponder edit Frequency Enter a new frequency Symbol ks s Enter a new symbol rate Polarity H Horizontal V Vertical Add Yellow 1 In the transponder or satellite...

Page 62: ...nd are only required for multi switch configurations or if a motorized SAT system is used without its own control unit The following setting options should only be changed by experienced persons or by...

Page 63: ...se the keys to move to Channel 2 Press the OK key 3 Use the buttons to navigate to Edit channel list 4 Confirm with the OK key 5 Use the buttons to navigate in the menu The following options for editi...

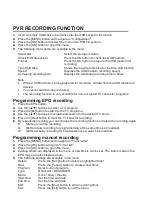
Page 64: ...h start and end time The information is displayed up to 7 days in the future 4 The following settings and selection options are available in the menu Recording Press the Red button to program a record...

Page 65: ...s to select a TV program 3 Press the button to switch to the TV programs 4 Use the buttons to navigate and search for the desired TV show 5 Press the Red button to mark the TV show for recording 6 By...

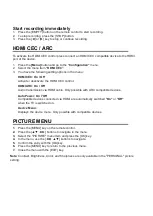
Page 66: ...l HDMI ARC On Off Audio transmission via HDMI cable Only possible with ARC compatible devices Auto Power On 7 Off Compatible devices connected via HDMI are automatically switched On or Off when the TV...

Page 67: ...olor Sharpness Set the sharpness value of the TV set Tint Adjust hue only if an NTSC signal is present Colour Temp Warm Cold Normal Nois Reduction Off Low Medium High Screen The menu item in only acti...

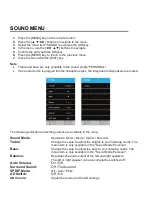
Page 68: ...udspeakers are muted The following selection and setting options are available in the menu Sound Mode Standard Music Movie Sports Personal Treble Change the value to adjust the heights to your listeni...

Page 69: ...made for the switch on time in the menu Hour Minute Source Channel Volume Sleep Timer Set the time after which the unit automatically switches to standby mode Off 10min 20min 30min 60min 90min 120min...

Page 70: ...aracter set for teletext Audio Language Select the audio language one and two Subtitle Language Select the subtitle language one and two Hearing Impaired Select Deafness Aid to turn On or Off auto sub...

Page 71: ...picture and sound settings are reset The device turns off After the next switch on the device starts with the first installation Software Update USB Start a software update via USB stick VERSION Disp...

Page 72: ...a new password 3 Confirm new password Enter the new password again to confirm the new password Note Press the key to clear the entry Press the key to cancel the password change The default password f...

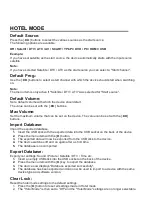
Page 73: ...he EXIT key to close the menu display 11 The following settings are available in the menu Hotel Mode Press the button to switch the On or Off setting If the menu item On is switched you have access to...

Page 74: ...ue can be set with the buttons Import Database Import the exported database 1 Insert the USB stick with the exported data into the USB socket on the back of the device 2 Press the menu item with the b...

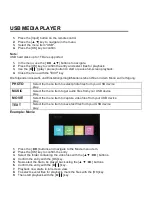
Page 75: ...menu item to select photo files from your USB device play MUSIC Select the menu item to get audio files from your USB device play MOVIE Select the menu item to capture video files from your USB devic...

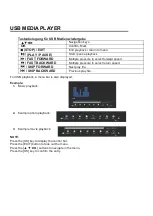
Page 76: ...ed FAST BACKWARD Multiple pressure to select return speed SKIP FORWARD Next play file SKIP BACKWARD Previous play file For USB playback a menu bar is also displayed Example 1 Music playback 2 Example...

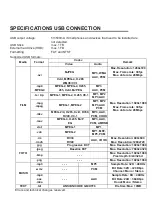
Page 77: ...1 MPEG 2 H 265 VC 1 MP1 MP2 MP3 AAC mpg mpeg MPEG 1 MPEG 2 MP1 MP2 MP3 AAC PCM mkv MPEG 2 4 H 265 Xvid RV30 RV40 VC 1 MP3 AAC PCM COOK mov MPEG 4 H 265 MJP EG MP3 AAC PCM AMRNB dat MPEG 1 MP1 vob MPE...

Page 78: ...is connected correctly Make sure that the channel is tuned correctly Change the picture settings Brightness Colour Sharpness Contrast Hue Make sure the TV is away from other electrical appliances tha...

Page 79: ...00 cd m Colours 262K colours Viewing angle Horizontal 178 Vertical 178 TV function TV Standard BG DK I L L Channels ATV DVB T C S 100 1000 T C 5000 S Teletext ATV DTV 1000 1000 Seiten Connections VGA...

Page 80: ...IFIED EU DECLARATION OF CONFORMITY Hereby UltraMedia GmbH Co Handels KG declares that the radio equipment type LEDW160 is in compliance with Directive 2014 53 EU The full text of the EU Declaration of...

Page 81: ......

Page 82: ...s optical wear and tear caused by the customer or external influences are excluded from the warranty In order to assert the warranty claims send the device with all accessories a copy of the invoice a...

Page 83: ...and electronic equipment and batteries must not be disposed of with the trash and must be disposed of separately As an end user it is necessary that you deliver your depleted batteries to the appropri...

Reviews: