background image

To definitively disactivate the control panel , press 
simultaneously the lower right button and the "-" button as 
indicated in Fig 10, release both buttons and press once more on 
the "-" button. 

SWITCHING THE COOKING AREA OFF 

To switch off a cooking area , select the area. The display will 
appear brighter . Press button ( - ) until level ZERO is reached. 
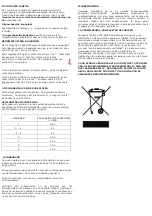
SAFETY SWITCH OFF 

The appliance is provided with a safety system , switching off 
automatically the cooking areas after a given working time at a 
given power level.  


POWER 

AUTO-OFF in HOURS 

1 8,5 

2 – 3 

6 h 

 4 – 5 

4 h 

6 2,8 

7 2,3 

8 1,8 

9 1,5 


9-MAINTENANCE 

The proper function of the appliance is related to regularity of the 
maintenance operations, in particular with regards to the grease 
filter and the active carbon filter.


Frequently clean all surfaces of the appliance using a cloth 
dampened with water and neutral non-abrasive liquid detergent. 

Avoid the use of water jets', thinners, solvents, alcohol or 
abrasives substances. 

Remove any remaining food or grease droplets from the hob’s 
surface using a special scraper (optional). Clean the heated area 
as thoroughly as possible using suitable products, and a 
cloth/paper, where after rinse with water and dry with a clean 
cloth. 

WARNING 


Using a special scraper (optional), immediately remove any 
fragments of aluminium and plastic material that have 
unintentionally melted on the heated cooking area, or residues of 
sugar or food with a high sugar content.  

In this way, any damage to the hob’s surface can be prevented. 
Under no circumstances should abrasive sponges, or corrosive 
chemical detergents, such as oven sprays or stain removers, be 
used


12-


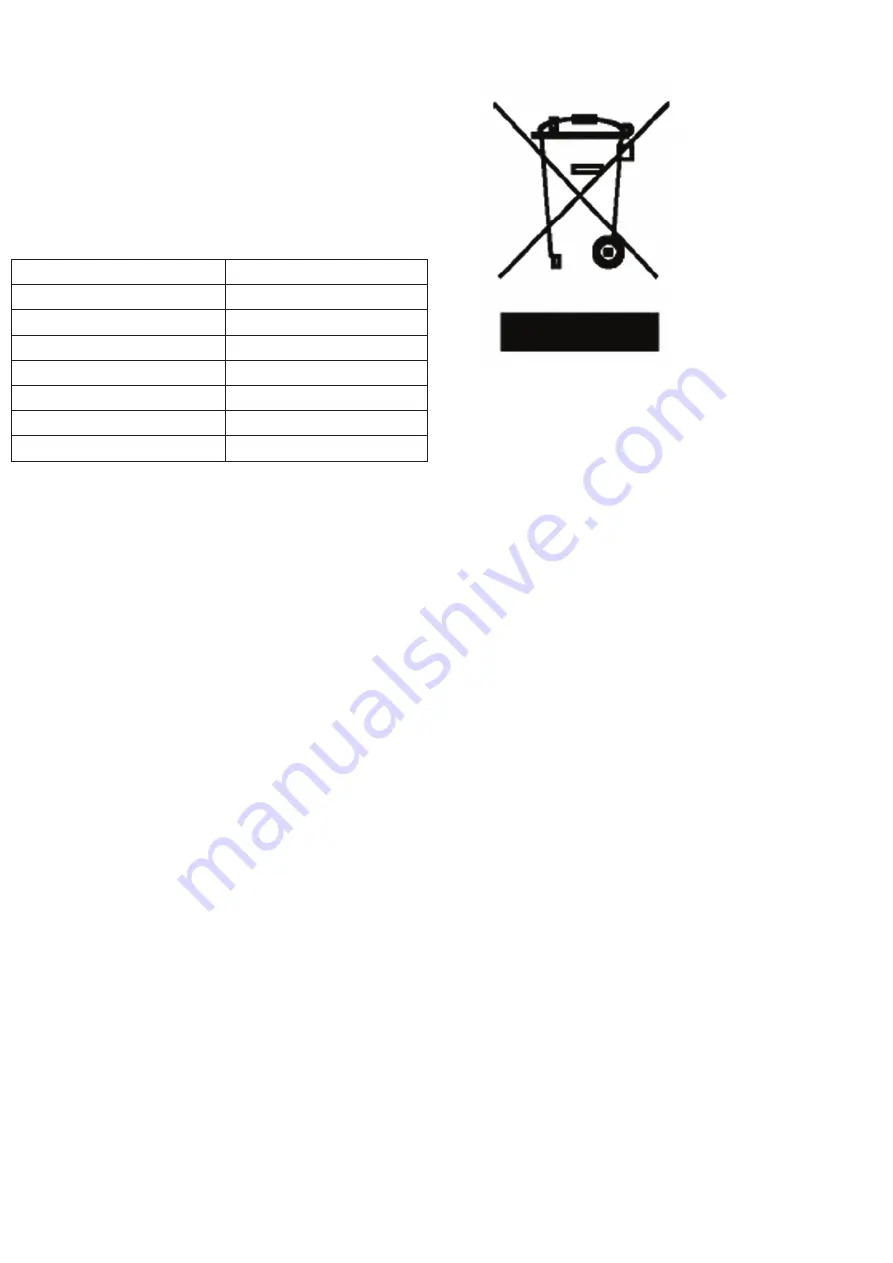
DISPOSAL OF OLD ELECTRICAL APPLIANCES 

The European Directive 2002/96/EC on Waste Electrical and 
Electronic Equipment (WEEE), requires that old household 
electrical appliances must not be disposed of in the normal 
unsorted municipal waste stream. Old appliances must be 
collected separately in order to optimise the recovery and 
recycling of the materials they contain and reduce the impact on 
human health and on the environment. 


The crossed-out dustbin symbol on the product reminds you of 
your obligation regarding separated waste collection. Consumers 
should contact their local public service or their local dealer for 
more information on the correct disposal of household 
appliances. 

THE MANUFACTURER DECLINES ALL RESPONSIBILITY FOR 
EVENTUAL DAMAGES CAUSED BY NOT FOLLOWING THE 
ABOVE WARNINGS. THE WARRANTY IS NOT VALID IN 
CASE OF DAMAGE CAUSED BY FAILURE TO COMPLY WITH 
THE ABOVE-MENTIONED WARNINGS. 


Summary of Contents for 7708

Page 1: ...uzione ASPIRANTE Istruzioni per l uso IT VITROCERAMIC COOKTOP Users manual EN GLASKERAMIKKOCHFELD Bedienungsanleitung DE PLAN DE CUISSON VETROCERAMIQUE Manuel d instructions FR KERAMISCHE KOOKPLAAT Gebruiksaanwijzing NL ...

Page 2: ...Fig 1 ...

Page 3: ...Fig 3 Fig 4 Fig 2 Fig 5 F ...

Page 4: ...Fig 6 Fig 8 Fig 9 Fig 7 ...

Page 5: ...Fig 10 Fig 11 Fig 12 ...

Page 6: ...Fig 15 Fig 13 Fig 14 Fig 16 ...

Page 7: ...Fig 17 Fig 18 Fig 19 ...

Page 8: ...o le distanze indicate Fig 4 5 VERSIONE ASPIRANTE FILTRANTE ASPIRANTE l aria aspirata viene purificata attraverso i filtri antigrasso metallici e convogliata all esterno attraverso una canalizzazione 5 1 USCITA ARIA SOTTO IL PIANO DI LAVORO Montare la scatola di derivazione F Fig 15 attraverso le 4 viti V Fig 15 Collegare mediante un tubo di raccordo al foro di scarico come indicato in Fig 13 14 N...

Page 9: ...g 10 il relativo display di segnalazione sarà segnalato con una luminosità più intensa indicando la zona selezionata Premere il tasto M FIG 10 oppure il tasto F FIG 10 Regolare la potenza desiderata agendo sui tasti e La potenza della singola zona di cottura può essere regolata in 9 differenti posizioni e sarà visualizzata nel relativo display luminoso con un numero da 1 a 9 FUNZONE BOOSTER La fun...

Page 10: ...ente tutte le superfici dell apparecchio usando un panno inumidito con acqua e detersivi liquidi neutri non abrasivi Evitare getti d acqua diluenti solventi alcol e sostanze abrasive Rimuovere eventuali residui di cibo e gocce di unto dalla superficie di cottura utilizzando lo speciale raschietto opzionale Pulire l area riscaldata nel miglior modo possibile utilizzando prodotti idonei ed un panno ...

Page 11: ...en conveyed outside through a ducting pipe 5 1 LOWER AIR OUTLET Fasten the junction box F Fig 15 through 4 screws V Fig 15 Connect through a connecting tube to the air outlet as shown in Fig 13 14 If the external pipe ducting has a different diameter apply a proper reduction fitting 5 2 REAR WALL AIR OUTLET Loosen the back panel S Fig 17 by unscrewing the 2 screws V Fig 17 Fix cover T Fig 19 by me...

Page 12: ...r up to level 9 with button release the button and press once more on button the display will show the simbol meaning the booster function is activated The booster function will be activated for 5 minuts To turn off the booster select the desired cooking area G Fig 10 press button F Fig 10 and set up the requested power level RESIDUAL HEAT If the temperature of a cooking area still is high after i...

Page 13: ...fter rinse with water and dry with a clean cloth WARNING Using a special scraper optional immediately remove any fragments of aluminium and plastic material that have unintentionally melted on the heated cooking area or residues of sugar or food with a high sugar content In this way any damage to the hob s surface can be prevented Under no circumstances should abrasive sponges or corrosive chemica...

Page 14: ...muss ein Trennboden eingebaut werden der diese Möglichkeit ausschließt Die einzuhaltenden Maßen sind in der Abbildung Abb 4 angegeben 5 ABLUFT UMLUFTBETRIEB ABLUFT die Luft wird durch einen Metallfettfilter gereinigt und dann durch ein Abzugsrohr nach außen abgeführt 5 1 UNTEN LUFTAUSTRITT Montieren Sie die Anschlussdose F Abb 15 mit die 4 Schrauben V Abb 15 Schließen Sie das Abluftrohr an einer L...

Page 15: ...e erhöhte Leistung für eine Dauer von 5 Minuten Um dem Booster einzuschalten soll die gewünschte Kochplatte mit Taste F Abb 10 gewählt werden Drücken Sie auf die Taste bis Stand 9 lassen Sie die Taste los Auf das Display wird das Symbol erscheinen Der Booster wird für 5 Minuten eingeschaltet bleiben Um die Funktion auszuschalten die gewünschte Kochplatte G Abb 10 wählen Taste F Abb 10 drücken und ...

Page 16: ...chaber für Glaskeramikfelder entfernt werden optional Reinigen Sie das Kochfeld am besten mit geeigneten Reinigungsmittel und Papiertuch danach säubern Sie es mit klarem Wasser und reiben es mit einem sauberen Tuch trocken WARNUNG Fragmente aus Aluminiumfolie und geschmolzenen Kunststoff eingebrannter Zucker oder zuckerhaltige Speisen können mit einem handelsüblichen Schaber für Glaskeramikfelder ...

Page 17: ... pour l air extérieur de diamètre différent appliquer une jonction de réduction approprié 5 2 SORTIE D AIR PAR LE MUR POSTERIEUR Démonter le dos S fig 17 avec les 2 vis V fig 17 Monter le couvercle T fig 19 à travers les 4 vis V fig 19 Démonter le group moteur G Fig 17 Effectuer les 4 trous F Fig 18 dans le mur postérieur en correspondance avec la sortie d air vers l extérieur Monter le group mote...

Page 18: ...le puissance CHALEUR RESIDEULLE Si la température d une plaque de cuisson après son arrêt est encore élevée le visuel indiquera le symbole chaleur résiduelle Le symbole disparaîtra quand la chaleur de la plaque de cuisson sera inférieur à eviro 50 LEVE CASSEROLES Les claque de cuisson sont sensible au diamètre des casselores Le diamètre minimum des casseroles pour les claques de cuisson grands est...

Page 19: ... propre AVVERTISSEMENT En utilisant le grattoir spécial en option enlevez immédiatement de la plaque de cuisson chauffée des particules de papier en aluminium et du matériel plastique fondu par inadvertance ou des résidus de sucre ou aliments à teneur élevée en sucre De cette manière vous évitez tout dommage possible à la surface du plan de cuisson En aucun cas Vous ne devez utiliser des éponges a...

Page 20: ...ant van het toestel na installatie toegankelijk blijft moet een tussenpaneel ingebouwd worden Fig 4 5 AFZUIGVERSIE RECIRCULATIE AFZUIGING de lucht wordt gezuiverd door de metalen vetfilters en vervolgens afgevoerd door een kanaal 5 1 LUCHTAFVOER ONDER DE KEUKEN WERKTOP Monteer de aansluitdoos F Fig 15 door de 4 schroeven V fig 15 Sluit via een verbindingsbuis aan op de afvoeropening zoals in fig 1...

Page 21: ...ende deze periode geen kookplaat geselecteert word wordt de functie automatisch uitgeschakeld en moet de procedure opnieuw herhaald worden SELECTIE VAN DE KOOKZONE Selecteer de gewenste kookzone met de toets G Fig 10 het signaal lampje S geeft de geselecteerde zone aan Druk op toets M Fig 10 of toets F Fig 10 Naargelang het gewenste vermogen op de toetsen e drukken Het vermogen van de enkele kookz...

Page 22: ...t apparaat is afhankelijk van een goed algemeen onderhoud vooral met betrekking tot de vetfilters en de geurfilters Reinig zorgvuldig alle oppervlakten met een vochtige doek en een neutral afwasmiddel Geen schuurmiddelen gebruiken Vermijd water jets verdunners oplosmiddelen alcohol of schuurmiddelen Verwijder alle voedselresten en vet druppels van het kookoppervlak met behulp van een speciale krab...

Page 23: ...L60LIPK75iRF 00 ...

Reviews: