background image

9

U20/E21 Gas Insert Zero Clearance Kit

INSTALLATION

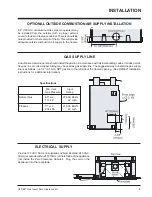
OPTIONAL OUTSIDE COMBUSTION AIR SUPPLY INSTALLATION

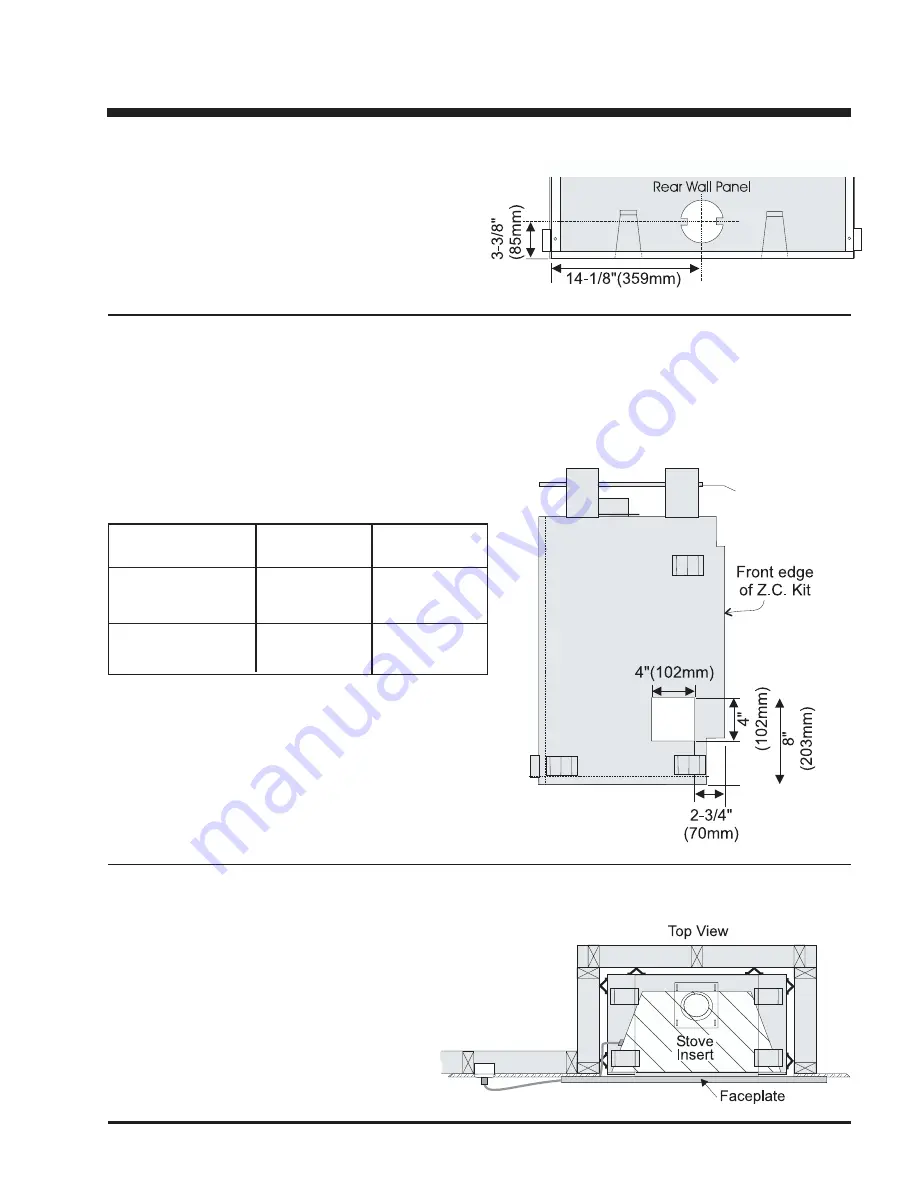
A 4" (100 mm) dia. aluminum flex pipe or equivalent may
be installed from the outside (with a proper exterior
cover) to the Zero Clearance cabinet. There is an outside
hole provided on the rear wall of the kit. This will provide
adequate outside combustion air supply to the heater.

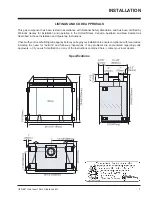
       Specifications

 Min. Inlet

       Input

                                      Gas Pressure       Rating

   Natural Gas

4.5" w.c.

21,000 Btu/hr

1.12 kP

22 mj/h

   Propane

11" w.c.

21,000 Btu/hr

2.74 kPa

22 mj/h

ELECTRICAL SUPPLY

Provide 120 VAC, 60 Hz (in Australia and New Zealand: 240 VAC,
50 Hz) receptacle within 24"(610mm) of the left side of the appliance
(not inside the Zero Clearance Cabinet).  Plug the cord on the
appliance into the receptacle.

GAS SUPPLY LINE

An authorized service person should install the gas line in accordance with all local building codes. If codes permit,
flex gas line or coiled copper tubing may be used as gas supply line. The suggested way to install the gas supply
line is as follows: run 1/2" (9.5 mm) NPT gas line to the left side of the framed opening.  (See U20/E21 installation
instructions for additional information).

Summary of Contents for Energy E21

Page 1: ...n adjustment alteration service or maintenance cancauseinjuryorpropertydamage Refertothismanual Forassistance or additional information consult an authorized installer service agency or the gas supplier FOR YOUR SAFETY Donotstoreorusegasolineorother flammable vapours and liquids in the vicinity of this or any other appliance Installation and service must be performedbyanauthorizedinstaller service...

Page 2: ... Specifications 3 General Information 4 Parts 4 Clearances to combustibles 4 Locating Your Fireplace 5 Framing 5 Kit Assembly 6 Venting 7 Insert Installation 8 Optional Outside Combustion Air Supply Installation 9 Gas supply line 9 Electrical Supply 9 Faceplate Trim Installation 10 Zero Clearance Top Louver 11 Finished Facing Notes 11 ...

Page 3: ...ion in the United States Canada Australia and New Zealand as described in these Installation and Operating Instructions Check with your local building code agency before you begin your installation to ensure compliance with local codes including the need for permits and follow up inspections If any problems are encountered regarding code approvals or if you wish clarification on any of the instruc...

Page 4: ...elow after it is installed in the Zero Clearance Kit Clearances to Combustibles for Insert The minimum clearance from the side of the appliance to a combustible side wall is 9 inches 229mm See the Mantel Clearances chart Diagram 2 for the minimum clearance from the bottom of the Top Faceplate to a combustible mantel The minimum height from the bottom of the Top Faceplate to the ceiling is 36 inche...

Page 5: ...his unit is not approved for installation into a mobile home FRAMING 1 The trim kit allows for 1 2 13 mm of finish facing material The kit may be installed directly on and or against standard combustible building materials 2 Frame in the Zero Clearance box for the Kit with framing material Theframedopeningfortheassembledkitis29 3 4 756mm high x 30 25 768mm wide x 16 5 419mm 17 432mm includingdrywa...

Page 6: ...crew each side NOTE the Side flanges are on the outside Back flanges are on the inside 3 Lift the Back Side Assembly onto the Base position as shown in the diagram The Back and Sides rest on the Base with the Base flanges on the outside Fasten the Back to the Base 3 screws and the Sides to the Base 2 screws for each side 4 Attach the top assembly with the top flanges on the outside of the Sides an...

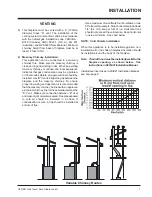
Page 7: ... masonry chimney To ensure proper flue sizing and operation it is recommended that the masonry chimney be lined with an approved aluminiumchimneylinerofthesamediameterasthe B Vent Make sure connection between B Vent andmasonryiscompletelysealed Fluepipeexposed to cold air should be insulated in a chase If condensation occurs a trap should be installed at bottom of flue Useamaximumoftwooffsets four...

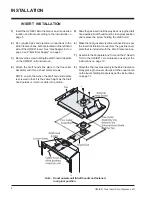
Page 8: ...od slide plate is screwed in that it is the same height as the draft hood guides or it will not slide into position Note Donotoperateunitifdrafthoodisnotfastened in original position 5 Slide the gas insert in all the way back using the draft hood guides Draft hood must be in original position and replace the screw holding the draft hood 6 Make the final gas and electrical connections as per the In...

Page 9: ...22 mj h Propane 11 w c 21 000 Btu hr 2 74 kPa 22 mj h ELECTRICAL SUPPLY Provide 120 VAC 60 Hz in Australia and New Zealand 240 VAC 50Hz receptaclewithin24 610mm oftheleftsideoftheappliance not inside the Zero Clearance Cabinet Plug the cord on the appliance into the receptacle GAS SUPPLY LINE An authorized service person should install the gas line in accordance with all local building codes If co...

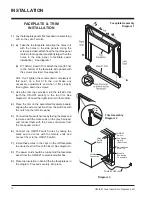
Page 10: ...t this point do a trial fit to the unit Make any necessary adjustments and when it fits properly then tighten down the screws 3 Using the trim clips provided join the left side trim with the ON OFF switch to the top trim See diagram 2 Connect the right side trim to the top trim 4 Place the trim on the assembled faceplate panels aligning the wire connections from the switches with the notch on the ...

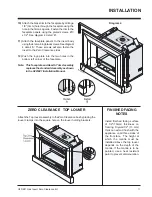
Page 11: ...oles in the bottom left corner of the faceplate Note This faceplate and Hearth Trim Assembly replacesthestandardAssemblyasshown in the U20 E21 Installation Manual FINISHEDFACING NOTES Install finished facing surface of 1 2 13mm thickness on framing Drywall 1 2 13 mm thick can extend flush with the appliance on all three sides of the front face The height at which the mantle must be installed above...

Page 12: ...Printed in Canada ...

Reviews: