46
Regency Horizon™ HZ42STE Gas Fireplace
INSTALLATION
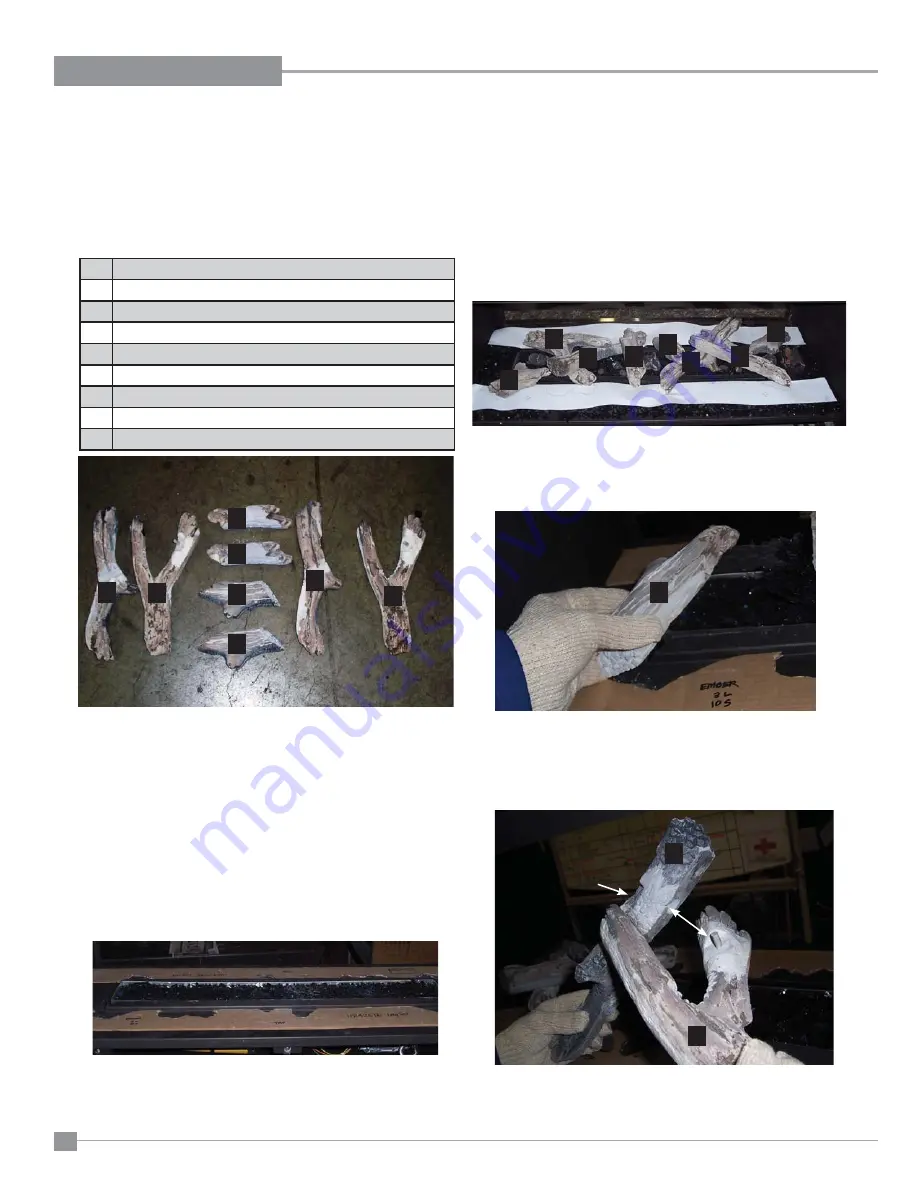
OPTIONAL LOG SET INSTALLATION
Read the instructions below carefully and refer to the images. If the logs are broken do not use the unit until they are replaced. Broken
logs can interfere with pilot operation.
Improper positioning of the logs and lava embers may create carbon build-up and can alter the unit's performance which is not covered
under warranty.
*Satin paint is included if touch ups are required.
1
Front Left Log (front side)
2
Front Left Log (back side)
3
Cross Log (front side)
4
Cross Log with 'Y' (front side)
5
Cross Log (back side)
6
Cross Log with 'Y' (back side)
7
Log piece (front side)
8
Log piece (back side)
Lava Embers / Rocks
1
. S hut off gas and electrical supply, allow unit to cool to room temperature.
2
. Remove both faceplates and fl ush glass doors (see unit manual).
3
. Carefully remove the logs from the packaging and unwrap them.
The logs are fragile, handle with care - never force into position.
4
. Ensure glass crystals are installed on the burner.
HZ42STE = 2lbs
5.
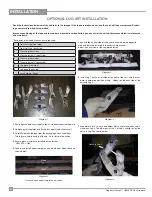
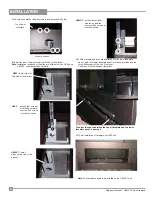
Locate and install paper templates on both sides of fi rebox base as
shown below.
Front and back paper templates in position
6.
Install Log 1 on the far left side of the front of the unit - use the tem-
plate to determine position of Log . Repeat on the back side of the
unit with Log 2.
1
2
3
4
6
5
7
8
1
3
4
1
3
5
7
8
6
4
2
7
. Assemble Logs 3 + 4 as shown below. Match up pin landing on Log 3
with pin on Log 4. The other part of the 'Y' of Log 4 should rest on the
notch in Log 3 as shown below.
Logs installed on one side of the unit are mirrored on the opposite
side and therefore installed in the exact same manner.
Below is an overview of the completed install.
Notch in Log 3
Front
Back
Diagram 1
Diagram 2
Diagram 3
Diagram 4
Diagram 5

