background image

2

ENGLISH

Congratulations

!  You have just purchased a Regent dusk to dawn 

neighbor friendly entry and patio lantern. This fixture will provide years 
of trouble-free light for your home.

Your fixture features a light sensor that automatically turns the light on
at dusk and off at dawn.

• Hammer
• Screwdriver
• Drill with 3/16” drill bit
• Adjustable wrench
• 1/2” diameter, flexible conduit (length depends on application)
• 1/2” watertight conduit connectors
• Wire connectors (if house wire is threaded type)
• Weatherproof junction box or lampholder mounting plate
• Silicone caulk

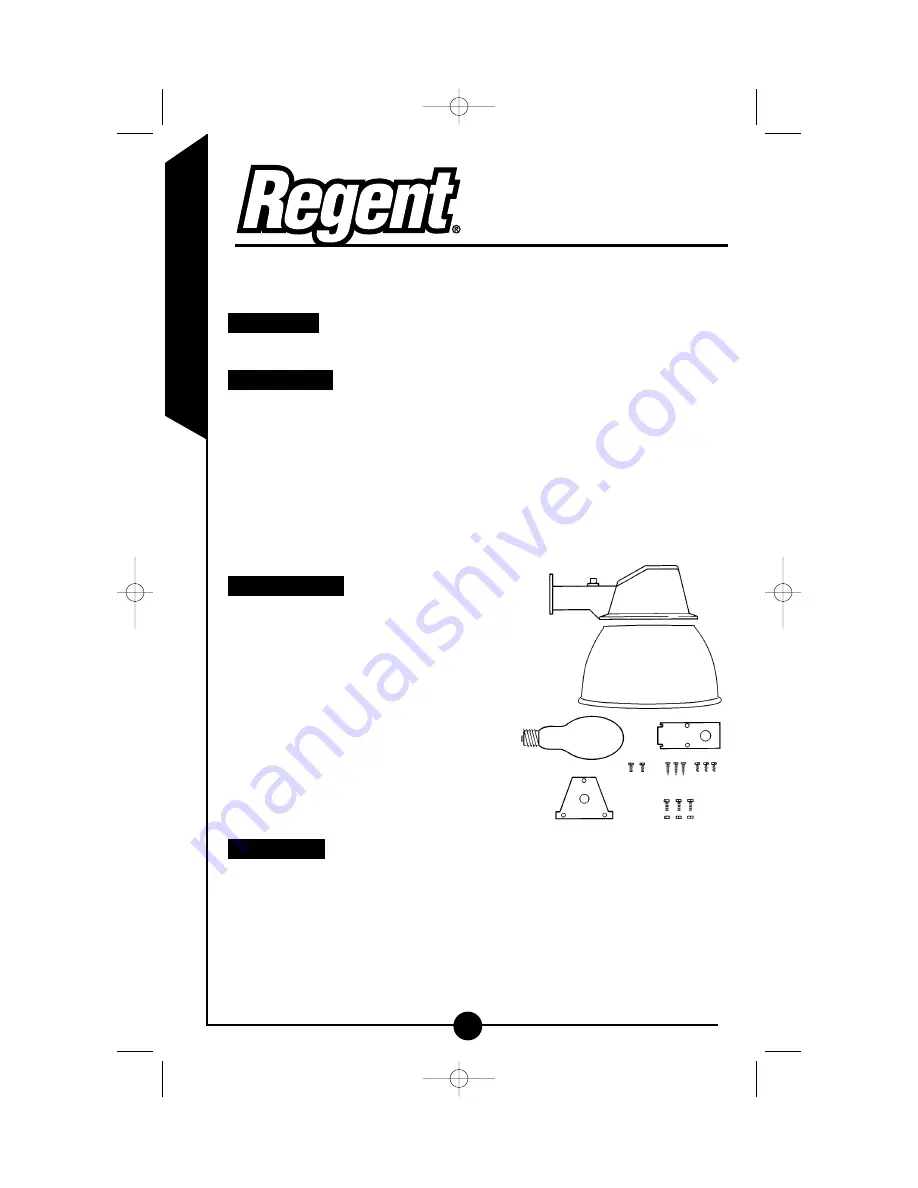
• Fixture housing with light sensor (A)
• Lens lock screw (inserted into housing)
• Reflector (B)
• Bulb (C)
• Access cover (D)
• (2) Access cover mounting screws (E)
• (3) Fixture mounting screws (F)
• Mounting plate adapter and locknut (G)
• (3) Mounting plate adapters, screws 

and nuts (H)

• Reflector mounting screws (I) 
• Green ground screws (not pictured)

• For indoor and outdoor use.
• UL and cUL LISTED for wet locations.
• Fixture must be connected to a 120 Volt, 60 Hz power source. Any

other connection voids warranty.

• Fixture should be installed by persons with experience in household

wiring or by a qualified electrician. The electrical system, and method
of electrically connecting the fixture to it, must be in accordance with

What to know

What’s included

What you need

How it works

DSL70HB

DSL70HW

A

B

C

D

E

F

H

G

I

DSL70HB/HW  10/13/03  3:52 PM  Page 2

Summary of Contents for DSL70HB

Page 1: ...FRAN AIS ESPA OL ENGLISH Instruction Manual Instrucciones Directives DSL70HB DSL70HW DSL70HB HW 10 13 03 3 52 PM Page 1...

Page 2: ...ht sensor A Lens lock screw inserted into housing Reflector B Bulb C Access cover D 2 Access cover mounting screws E 3 Fixture mounting screws F Mounting plate adapter and locknut G 3 Mounting plate a...

Page 3: ...tom of the fixture plate and then screwing the top screw back into the prethreaded hole Tighten all screws 5 Remove the access cover from the hardware bag With a hammer and screwdriver remove the roun...

Page 4: ...pply wire from your house into the quick connector with the black wire coming from the fixture N 2 Attach your ground supply wire to the green ground wire coming from your the fixture Secure with wire...

Page 5: ...for 1 3 minutes Your fixture should come on Uncover the sensor and your fixture should turn off in 1 4 minutes What to do if Operating your fixture Installing the bulb Attaching access cover and lens...

Page 6: ...F MER CHANTABILITY AND FITNESS FOR A PARTICULAR PURPOSE ARE LIMITED IN DURATION TO THE DURATION OF THIS EXPRESS WARRANTY Some states do not allow the exclusion or limitation of incidental or consequen...

Page 7: ...12 7mm Conectores de cable si el cable de la casa es del tipo roscado Caja de conexiones impermeable o placa de montaje del portal mparas Calafatear con silicona Alojamiento del portal mparas con sen...

Page 8: ...do suficiente espacio entre los tornillos de montaje y la superficie de montaje para deslizar el portal mparas en posici n 3 Enrosque el tornillo de montaje de la parte superior en el agujero pre viam...

Page 9: ...la casa no son lo suficientemente largos puede que sea necesario agregarle una extensi n de cable de 6 pulgadas 15 24cm 4 Atornille el adaptador de la placa de montaje en la placa de montaje del porta...

Page 10: ...able blanco del portal mparas al cable blanco de sumin istro neutral Aseg relo con la tuerca para cables no suministrado 5 Aseg rese de que conecta los cables correctamente Aseg rese de que no salen h...

Page 11: ...ores el foco al colocarla Est funcionando el sensor correctamente Se est reflejando luz en el sensor lo que hace que el portal mparas se apague Est n los cables de la unidad sueltos APAGUE LA ENERG A...

Page 12: ...ROPOSITO EN PARTICULAR ESTAN LIMITADAS EN DURACION A LA DURACION DE LA GARANTIA EXPRESA En algunos estados no se permite la exclusi n o limitaci n de da os incidentales o consecuenciales o limitacione...

Page 13: ...te de jonction tanche Mastic base de silicone Mat riel inclus Bo tier de luminaire avec capteur de lumi re A Vis de verrouillage de la lentille ins r e dans le bo tier R flecteur B Ampoule C Panneau...

Page 14: ...e vissage seront ainsi bien marqu s et le luminaire sera plus facile installer 4 Installez le luminaire sans le panneau d acc s sur la surface de montage en glissant les fentes de la plaque de montage...

Page 15: ...s fournis M Les fils lectriques de la maison devraient alors se trouver ans la partie inf rieure du bras du luminaire 7 Faites les connexions lectriques dans le bras du luminaire conform ment aux inst...

Page 16: ...ucune partie de fil d nud ne d passe des serre fils ou de tout autre connecteur de fil approuv non inclus Installation du panneau d acc s et de la lentille 1 Si le luminaire sera install sur un socle...

Page 17: ...st elle r fl chie sur le capteur poussant la lampe s teindre Est ce que le c blage du luminaire est bien serr AVANT DE CONTINUER COUPEZ L ALIMENTATION LECTRIQUE V rifiez les connexions Est ce que le l...

Page 18: ...ES GARANTIES TACITES S IL Y EN A Y COMPRIS LES GARANTIES IMPLICITES DE QUALITE MARCHANDE ET DE CONVENANCE A UNE FIN PARTICULIERE SONT LIMITEES EN DUREE A LA DUREE DE CETTE GARANTIE EXPLICITE Certains...

Reviews: