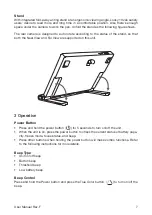
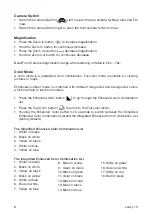
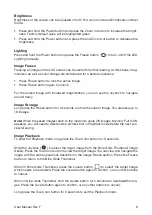
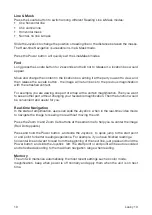
background image

9

User Manual Rev. F

Brightness

Brightness of the screen can be adjusted in both Full-color mode and Enhanced-contrast 
mode.  

• 

Press and hold the Power button and press the Zoom In button to increase the bright-
ness. Factory default value will be highlighted green. 

• 

Press and hold the Power button and press the and Zoom Out button to decrease the 
brightness.

Lighting

Press and hold the Power button and press the Freeze button (

) to turn on/off the LED 

Lighting manually.

Image Freeze

Freezing an image on the LCD screen can be useful for further reading. At this status, mag-
nification as well as color change are still allowed for a better experience.

• 

Press Freeze button to lock the active image.

• 

Press Freeze button again to unlock.

For the locked image with increased magnification, you can use the Joystick to navigate 
around freely.

Image Storage 


Long press the Freeze button for 3 seconds to store the current image. You can save up to 
18 images.  

Note: 

When the saved images reach to the maximum value (18 images, Memory Full ICON 

appears), you will need to delete some pictures first in Playback mode before the next suc-
cessful saving.


Image Playback

To enter the Playback mode, long press the True Color button for 3 seconds.

Slide the Joystick (

) to select the target image from the Nine Grids Thumbnail Image 

Gallery. Press the True Color button to view the target image. You can view and navigate the 
image with the same operations described in the Image Freeze section. Press the Freeze 
button to return to the Nine Grids Thumbnail.

When in Nine Grids Thumbnail, press the Locate button (

) to select the target Image 

which needs to be deleted. Press the Locate button again to confirm, or any other buttons 
to cancel.

When in Nine Grids Thumbnail, hold the Locate button for 5 seconds to delete 

all

 the ima-

ges. Press the Locate button again to confirm, or any other buttons to cancel.

Long press the True Color button for 3 seconds to exit the Playback mode.

Summary of Contents for Looky 10

Page 1: ...USER MANUAL Looky 10...

Page 2: ......

Page 3: ...amera Switch 8 Magnification 8 Color Mode 8 Brightness 9 Lighting 9 Image Freeze 9 Image Storage 9 Image Playback 9 Line Mask 10 Find 10 Real time Navigation 10 Memory 10 HDMI Output 11 Auto Power Sav...

Page 4: ...r Use the supplied power adapter and battery 2 Quick Start Overview Thank you for purchasing Looky 10 Looky 10 is a portable 10 inch video magnifier with excellent Full HD image quality and it assures...

Page 5: ...screen 2 Front camera 3 Enhanced Color 4 Zoom out 5 Joystick 6 Zoom in 7 True Color 8 Rear camera 9 LED lights 10 Stand 11 Power button 12 Power port 13 HDMI port 14 Locate button 15 Freeze button 16...

Page 6: ...ge will take about 5 hours and will support the unit working for about 3 hours Charging when the unit is on the power LED will be green When the unit is on without charging the power LED will be green...

Page 7: ...th the Near View and Far View are supported on this unit 3 Operation Power Button Press and hold the power button for 5 seconds to turn on off the unit When the unit is on press the power button to ch...

Page 8: ...olors which can help to read more clearly Press the Enhanced Color button to go through the Enhanced color combination list Press the True Color button to return to the Full color mode Holding the Enh...

Page 9: ...n for 3 seconds to store the current image You can save up to 18 images Note When the saved images reach to the maximum value 18 images Memory Full ICON appears you will need to delete some pictures f...

Page 10: ...art without changing your favorable magnification Then the function would be convenient and useful for you Real time Navigation In the state of amplification users can slide the Joystick when in the r...

Page 11: ...wer button and click the Enhanced Color button to turn on off the Auto Power Saving function manually factory default is on Restore Long press the Freeze button and the Locate button at the same time...

Page 12: ...ff to ensure change happens Adjust the magnification Adjust the color mode Restart the unit Hardware Reset The image does not change If the unit enter the freeze mode or playback mode the image will n...

Page 13: ...t White on black Black on green Black on white Violet on black Yellow on black Black on violet Black on yellow Blue on black White on blue Black on blue Blue on white White on green Yellow on blue Gre...

Page 14: ...REHAN ELECTRONICS Aughrim Road Carnew County Wicklow Ireland www rehanelectronics ie...

Reviews: