background image

8

Looky4

English

7. Battery maintenance

•  Remove  the  battery  from  the  Looky4  if  you  do  not  intend 

to use it for an extended period of time. This will improve the 

longevity of the battery handle. 

•   Batteries are sensitive to overcharging. It is recommended to 

only charge the battery when it is completely drained.

•   Chargeable Lithium-Ion batteries have an auto discharge that 

strongly  depends  on  the  temperature  of  the  environment 

(e.g. never leave the battery in a car that is parked in direct 

sunlight).

•  New  Lithium-Ion  batteries  must  be  charged  several  times 

before reaching their nominal capacity.

•   Charge Lithium-Ion batteries at least once every 6 months. 

•   The  average  lifespan  of  the  battery  is  usually  300  charging 

cycles,  but  this  depends  on  the  use.  Total  capacity  will 

slowly decrease after multiple charging cycles.

8. Folding handle

When  the  handle  is  extended,  you  can  use  the  Looky4  as  a 

magnifier.  The  closer  you  get  to  the  object,  the  bigger  the 

magnification will be. 

It is also possible to use the Looky4 with the handle folded in. You 

can  easily set the device on the table and it will automatically 

stand at an angle. The magnification will then be about 8x. This is 

easier when you want some stability during the reading of texts.

Summary of Contents for Looky4

Page 1: ...4 User Manual ...

Page 2: ...4 The Looky4 and Looky4 logos are a trademark of Rehan Electronics Ltd User manual V1 2 HD 4 ...

Page 3: ...English Nederlands Deutsch Français Italiano Español English 4 Nederlands 22 Deutsch 40 Français 58 Itialiano 76 Español 94 ...

Page 4: ...ightness icon 12 15 1 3 Reading lines 12 15 2 Display modes and battery 12 15 2 1 Battery icon 13 15 2 2 Display mode icon 13 16 Looky4 functions 14 16 1 Saving an image Looky4 only 14 16 2 Viewing saved images Looky4 only 14 16 3 Deleting saved images Looky4 only 15 16 4 TV Connection Looky4 only 15 17 Writing with the Looky4 16 18 Troubleshooting 16 19 Hidden menu access 17 19 1 Enabling Disabli...

Page 5: ...chase of your Looky4 In this manual you will find a detailed description of all the functions of the Looky4 Read this manual carefully before you start using the Looky4 If you still have any questions after reading this manual please contact your supplier Unless otherwise stated all mentions of Looky4 in this manual also apply to the Looky4 2 General description Looky4 ...

Page 6: ...afety and maintenance Before use be sure to comply to with the following safety and maintenance instructions Protect the device and its batteries from moisture rain sand or extreme temperatures like radiators or direct sunlight Do not use cleaning products that contain alcohol methylated spirits ammonia or abrasives These can damage the device or its touch screen Only use accessories that the manu...

Page 7: ...t Connect the narrow end of the USB cable to the Looky4 to start the charging process Note the dot on the small connector marks the topside LED burning constantly batteries are being charged LED off batteries are fully charged LED blinking error batteries are defect Charge the batteries in a well ventilated environment Remove the Looky4 from its carrying case when charging Don t place it in direct...

Page 8: ...tteries must be charged several times before reaching their nominal capacity Charge Lithium Ion batteries at least once every 6 months The average lifespan of the battery is usually 300 charging cycles but this depends on the use Total capacity will slowly decrease after multiple charging cycles 8 Folding handle When the handle is extended you can use the Looky4 as a magnifier The closer you get t...

Page 9: ...o pitched signal will be heard 10 Focusing the Looky4 The Looky4 uses a push to focus method to focus the image on the screen Simply touch the screen ones in the centre of the screen and the camera will focus 11 Switching off the LED s By touching the centre of the screen for 4 seconds you can switch off the LED s at the back of the Looky4 You will hear a beeping sound indicating that the LED s is...

Page 10: ...le colour modes 13 Zooming To alter the magnification you slide your finger up down on the left or right hand side of the touch screen To zoom in slide your finger upwards on the zooming icon to zoom out slide downwards on the zooming icon The magnification range of the Looky4 ranges from 2x to a 20x magnification or Zooming icon ...

Page 11: ...apacity When the image is frozen you can use 1 finger to pan through the frozen image All functions of the Looky4 can still be used while the image is frozen 15 Looky4 menu 15 1 Sound brightness and reading lines Use 1 finger to touch the bottom section of the screen for 2 seconds to generate the sound menu brightness menu and the reading line option in the bottom half of the screen These settings...

Page 12: ...ttings 15 1 3 Reading lines By tapping this icon you can generate a horizontal or vertical reading line on the screen 15 2 Display modes and battery Use 1 finger to touch the top section of the screen for 2 seconds to generate the battery play mode Looky4 only when images are stored and display mode menu in the top half of the screen Looky4 Looky4 sound on sound off least brightness most brightnes...

Page 13: ...erent icons to indicate this When the battery is charging the menu will display the charging icon 15 2 2 Display mode icon By touching the display mode icon an overview of all available display modes will appear You can easily select which display mode you want to use battery empty battery full ...

Page 14: ...en this icon appears during saving the memory of the Looky4 is full Please delete a saved image before attempting to save an image See chapter 16 3 for instructions on deleting saved images 16 2 Viewing saved images Looky4 only Touch the top section of the screen with one finger for 2 seconds to generate the battery play mode icon and display mode menu in the top half of the screen Tap the play mo...

Page 15: ...arrow keys you can cycle through your saved images 16 4 TV Connection Looky4 only The Looky4 contains a TV connector with which you can connect the Looky4 to an external display Simply connect the supplied video cable to the Looky4 and the analogue video input of an external monitor or TV Please ensure that the external monitor or TV is earthed for the best results TV connector Delete icon Cancel ...

Page 16: ...n shortly press the ON OFFbutton once Switch the viewing mode to colour 2 Looky4 cannot be switched on Press the ON OFF button to switch the Looky4 on Charge the battery Reinsert or replace the battery 3 Looky4 switches itself off within minutes sounding a dual pitched tone The Looky4 switches itself off if it does not detect movement on the screen for 3 minutes 4 Looky4 switches itself off within...

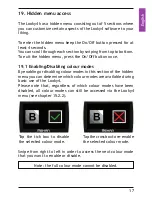
Page 17: ...ng Disabling colour modes By enabling or disabling colour modes in this section of the hidden menu you can determine which colour modes are available during basic use of the Looky4 Please note that regardless of which colour modes have been disabled all colour modes can still be accessed via the Looky4 menu see chapter 15 2 2 Swipe from right to left in order to access the next colour mode that yo...

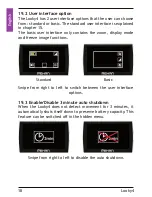
Page 18: ...only contains the zoom display mode and freeze image functions Swipe from right to left to switch between the user interface options 19 3 Enable Disable 3 minute auto shutdown When the Looky4 does not detect movement for 3 minutes it automatically shuts itself down to preserve battery capacity This feature can be switched off in the hidden menu Standard Basic Swipe from right to left to disable th...

Page 19: ...the horizontal and vertical reading lines 19 5 Software information This section shows the software version of the Looky4 Tap the tick box to disable the horizontal reading line Tap the crossbox to re enable the horizontal reading line Tap the tick box to disable the vertical reading line Tap the crossbox to re enable the vertical reading line Rehan Electronics Looky 4 Touch VersionX X ...

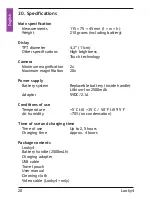
Page 20: ...aximum magnifitation 20x Power supply Battery system Replaceble battery inside handle Lithium Ion 2500mAh Adaptor 5VDC 2 1A Conditions of use Temperature 5 C till 35 C 50 F till 95 F Air humidity 70 no condensation Time of use and charging time Time of use Up to 2 5 hours Charging time Approx 4 hours Package contents Looky4 Battery handle 2500mAh Charging adapter USB cable Travel pouch User manual...

Page 21: ...tions This device is subject to the warranty regulations of your supplier For futher information regarding these regulations please contact your supplier 23 Regulations Products with CE marking comply with EMC Directive 2004 108 EC and the Low Voltage Directive 2006 95 EC issued by the Commission of the European Community Compliance with these directives implies conformity to the following standar...

Page 22: ...15 1 3 Leeslijnen 30 15 2 Beeldweergave en batterij 30 15 2 1 Batterij icoon 31 15 2 2 Beeldweergave icoon 31 16 Looky4 functies 32 16 1 Afbeelding opslaan alleen Looky4 32 16 2 Opgeslagen afbeeldingen bekijken alleen Looky4 32 16 3 Opgeslagen afbeeldingen verwijderen alleen Looky4 33 16 4 Aansluiting TV alleen Looky4 33 17 Schrijven met de Looky4 34 18 Probleemoplossing 34 20 Specificaties 38 19 ...

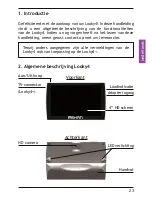
Page 23: ...liciteerd met de aankoop van uw Looky4 In deze handleiding vindt u een uitgebreide beschrijving van de functionaliteiten van de Looky4 Indien u nog vragen heeft na het lezen van deze handleiding neem gerust contact op met uw leverancier Tenzij anders aangegeven zijn alle vermeldingen van de Looky4 ook van toepassing op de Looky4 2 Algemene beschrijving Looky4 ...

Page 24: ...gebruik de volgende veiligheids en onderhouds instructies in acht Stel het apparaat en de batterijen niet bloot aan vocht regen zand of extreme temperaturen zoals verwarmingen of direct zonlicht Gebruik geen schoonmaakproducten die alcohol aceton ammoniak of schuurmiddelen bevatten Deze kunnen het apparaat of het touch scherm beschadigen Gebruik alleen accessoires die de fabrikant aanlevert of goe...

Page 25: ...bruik neemt Lees de laadinstructies goed door 6 Laadinstructies Sluit de brede connector van de USB kabel aan op de adapter en stop de adapter in het stopcontact Sluit de smalle connetor van de USB kabel aan op de Looky4 om deze op te laden Let op het bolletje op de smalle connector geeft de bovenzijde aan LED brandt constant batterij wordt opgeladen LED uit batterij is vol LED knippert fout batte...

Page 26: ... de omgevingstemperatuur bijv laat de batterij niet liggen in een auto die geparkeerd staat in de zon Nieuwe Lithium Ion batterijen moeten meerdere keren opgeladen worden voordat ze hun nominale capaciteit bereiken Laad Lithium Ion batterijen minstens 1 keer per 6 maanden op De gemiddelde levensduur van een batterij is gemiddeld 300 laadcyclussen maar dit hangt af van het gebruik De totale capacit...

Page 27: ...f uitschakelen na 3 minuten U hoort dan een tweetonig geluid 10 De Looky4 focussen De Looky4 gebruikt een push to focus methode om het beeld scherp te stellen Raak het scherm kort aan en de camera zal scherpstellen 11 LED uitschakelen Door het midden van het scherm 4 seconden aan te raken kunt u de LED op de achterkant van de Looky4 uitschakelen u hoort een piepje dat aangeeft wanneer de LED uitst...

Page 28: ...n gebruiken 13 Vergroten en verkleinen Om de vergroting te veranderen veeg met uw vinger naar boven of beneden op de linker of rechter uiteinden van het scherm Voor het vergroten van het beeld veeg met uw vinger naar boven op het zoom icoon en om te verkleinen veegt u naar beneden op het icoontje De Looky4 kan van 2x tot 20x vergroten of Zoom icoon ...

Page 29: ...neer het beeld bevroren en vergroot is kunt u 1 vinger gebruiken om het bevroren beeld te bewegen Alle andere functies van de Looky4 kunnen ook gebruikt worden bij het bevroren beeld 15 Looky4 menu 15 1 Geluid helderheid en leeslijnen Door met 1 vinger het onderste gedeelte van het scherm 2 seconden aan te raken krijgt u het menu voor geluid helderheid en leeslijnen te zien onder in het scherm De ...

Page 30: ...en Met dit icoon kunt u een horizontale of verticale leeslijn genereren op het scherm of deze uitzetten 15 2 Beeldweergave en batterij Door met 1 vinger het bovenste gedeelte van het scherm 2 seconden aan te raken krijgt u het menu voor batterij opgeslagen afbeeldingen bij Looky4 alleen wanneer afbeeldingen zijn opgeslagen en beeldweergave te zien boven in het scherm Looky4 Looky4 geluid aan gelui...

Page 31: ...nden hiervoor Wanneer de batterij aan het laden is zal het laad icoon van de batterij zichtbaar zijn 15 2 2 Beeldweergave icoon Door het beeldweergave icoon aan te raken zult u een overzicht zien van alle beschikbare beeldweergaves U kunt eenvoudig selecteren welke weergave u wilt gebruiken batterij leeg batterij vol ...

Page 32: ...opslaan van een afbeelding houdt dit in dat het geheugen van de Looky4 vol is Verwijder een opgeslagen afbeelding voordat u een nieuwe afbeelding op wilt slaan 16 2 Opgeslagen afbeeldingen bekijken alleen Looky4 Raak het bovenste gedeelte van het scherm 2 seconden aan met 1 vinger om het het menu voor de batterij opgeslagen afbeeldingen bekijken en beeldweergave op te roepen Druk op het icoon voor...

Page 33: ...deren icoontje te drukken Door op de pijl iconen te drukken kunt u door uw opgeslagen afbeeldingen bladeren 16 4 Aansluiting TV alleen Looky4 De Looky4 kan het beeld weergeven op een externe monitor Sluit hiervoor de bijgeleverde kabel aan op de analoge video connector Zorg ervoor dat de Looky4 op een geaarde monitor is aangesloten voor het beste resultaat Verwijderen icoon Verwijderen bevestigen ...

Page 34: ...dig op de AAN UIT knop Gebruik een kleurenstand 2 De Looky4 kan niet aangezet worden Druk op de AAN UIT knop om de Looky4 aan te zetten Laad de batterij op Vervang de batterij of sluit deze opnieuw aan 3 De Looky4 schakelt zichzelf uit binnen enkele minuten Er klinkt een tweetonig geluid De Looky4 schakelt zichzelf uit indien deze geen beweging op het scherm detecteert gedurende 3 minuten 4 De Loo...

Page 35: ...l op de Aan Uit knop 19 1 Aan uitzetten van kleurmodussen Door het aan of uitzetten van kleurmodussen in deze sectie van het verborgen menu kunt u bepalen welke kleurmodussen beschikbaar zijn tijdens normaal gebruik van de Looky4 Let wel dat alle kleurmodussen nog steeds te selecteren zijn via het Looky4 menu zie hoofdstuk 15 2 2 in de gebruiksaanwijzing Veeg van rechts naar links om de volgende k...

Page 36: ... opties om te vergroten verkleinen beeldweergave en beeldbevriezing Veeg van rechts naar links om te wisselen tussen de gebruikers interfaces 19 3 Automatisch uitschakelen aan of uitzetten Wanneer de Looky4 gedurende 3 minuten geen beweging detecteert via de camera zal hij zichzelf uitzetten om batterij capaciteit te besparen Deze functie kan uitgezet worden in het verborgen menu Standaard Basis V...

Page 37: ...ntale en verticale leeslijnen 19 5 Software informatie Deze sectie geeft de software informatie weer van de Looky4 Druk op het vinkje om de horizontale leeslijn uit te schakelen Druk op het kruisje om de horizontale leeslijn in te schakelen Druk op het vinkje om de verticale leeslijn uit te schakelen Druk op het kruisje om de verticale leeslijn in te schakelen Rehan Electronics Looky 4 Touch Versi...

Page 38: ...aximum vergroting 20x Stroomtoevoer Batterijsysteem Verwisselbaar in het batterijhandvat Lithium Ion 2500 mAh Adapter 5VDC 1 8A Gebruiksomstandigheden Temperatuur 5 C tot 35 C 50 F tot 95 F Luchtvochtigheid 70 geen condensatie Gebruikstijd en laadtijd Gebruikstijd Tot 2 5 uur Laadtijd Gemiddeld 4 uur Inhoud verpakking Looky4 Batterij 2500mAh Laadadapter USBkabel Reistasje Gebruiksaanwijzing Schoon...

Page 39: ...ingen Dit product valt onder de garantiebepalingen van uw leverancier Voor meer informatie over deze bepalingen neem contact op met uw leverancier 23 Richtlijnen Producten met CE markering voldoen aan de EMC Directive 2004 108 EC en de Low Voltage Directive 2006 95 EC afgegeven door de Commissie van de Europese Community Nakoming van deze richtlijnen impliceert overeenstemming met de volgende rich...

Page 40: ... 48 15 1 3 Lesezeilen 48 15 2 Anzeigearten und Akku 48 15 2 1 Akkusymbol 49 15 2 2 Anzeigeartensymbol 49 16 Funktionen des Looky4 50 16 1 Ein Bild speichern nur Looky4 50 16 2 Gespeicherte Bilder anzeigen nur Looky4 50 16 3 Gespeicherte Bilder löschen nur Looky4 51 16 4 Anschluss an Fernseher nur Looky4 51 17 Schreiben mit dem Looky4 52 18 Fehlersuche und Abhilfe 52 19 Zugang zu verborgenem Menü 5...

Page 41: ...tzen Falls Sie nach dem Lesen dieser Anleitung noch Fragen haben wenden Sie sich bitte an Ihren Händler Wenn keine gegenteiligen Angaben gemacht werden gelten die in diesem Handbuch für den Looky4 enthaltenen Informationen auch für den Looky4 2 Allgemeine Beschreibung des Looky4 EIN AUS Schalter Kontrollleuchte LED Beleuchtung HD Kamera Griff Ladeanschluss Vorderseite Rückseite Looky4 Fernsehansch...

Page 42: ...tie anspruch 4 Sicherheit und Wartung Prüfen Sie vor der Inbetriebnahme ob die folgenden Sicherheits und Wartungsanweisungen eingehalten werden Schützen Sie das Gerät und die Akkus vor Feuchtigkeit Regen Sand und extremen Temperaturen beispielsweise durch Heizungen oder direkte Sonneneinstrahlung Verwenden Sie keine Reinigungsprodukte die Alkohol Brennspiritus Ammoniak oder Scheuermittel enthalten...

Page 43: ...Aufladeanleitung sorgfältig durch 6 Aufladeanleitung Stecken Sie das breite Ende des USB Kabels in den Adapter und stecken Sie den Adapter in die Steckdose Stecken Sie das schmale Ende des USB Kabels in das Looky4 um das Gerät aufzuladen Achtung Der Punkt auf dem schmalen Stecker muss oben liegen Leuchtdiode blinkt ständig Akku wird aufgeladen Leuchtdiode aus Akku voll aufgeladen Leuchtdiode blink...

Page 44: ... den Akku beispielsweise nie in einem geparkten Auto liegen das direkter Sonneneinstrahlung ausgesetzt ist Neue Lithium Ionen Akkus müssen mehrfach aufgeladen werden bevor sie ihre Nennleistung erreichen Laden Sie Lithium Ionen Akkus mindestens alle 6 Monate auf Die durchschnittliche Lebensdauer des Akkus beträgt normalerweise 300 Ladezyklen ist jedoch abhängig von der Benutzung Die Gesamtleistung...

Page 45: ...ppeltonsignal 10 Scharfstellen des Looky4 Das Looky4 verwendet zum Scharfstellen des Bildes auf dem Display eine Push to Focus Methode Damit sich die Kamera scharfstellt genügt es die Mitte des Displays einmal zu berühren 11 Ausschalten der Leuchtdioden Wenn Sie die Mitte des Displays 4 Sekunden lang berühren schalten Sie die Leuchtdioden an der Rückseite des Looky4 aus Sie hören dann ein Piepen d...

Page 46: ...ern Verkleinern Wenn Sie die Vergrößerung ändern wollen verschieben Sie Ihren Finger an der linken oder rechten Seite des Touchscreens nach oben bzw unten Zum Vergrößern schieben Sie Ihren Finger auf dem Zoom Symbol nach oben zum Verkleinern schieben Sie ihn auf dem Zoom Symbol nach unten Der Vergrößerungsbereich des Looky4 reicht von der 2 bis zur 20 fachen Vergrößerung oder Zoom Symbol ...

Page 47: ...d wird die Beleuchtung gedimmt dies spart Akkuleistung Ein Standbild können Sie mit einem Finger verschieben Auch bei einem Standbild können weiterhin alle Funktionen des Looky4 benutzt werden 15 Looky4 Menü 15 1 Ton Helligkeit und Lesezeilen BerührenSiemiteinemFingerdieunterenDisplayhälfte2Sekunden lang Sie gelangen dann in das Tonmenü das Helligkeitsmenü und die Lesezeilen Option Diese Einstellu...

Page 48: ... 3 Lesezeilen Wenn Sie auf dieses Symbol tippen können Sie eine waagerechte oder senkrechte Lesezeile auf dem Display anzeigen lassen 15 2 Anzeigearten und Akku Berühren Sie mit einem Finger die obere Displayhälfte 2 Sekunden lang Sie gelangen dann in das Akku Abspielart Looky4 nur wenn zuvor Bilder gespeichert worden sind und das Anzeige artenmenü in der oberen Displayhälfte Ton ein Ton aus gerin...

Page 49: ...hiedene Symbole angezeigt Während der Akku aufgeladen wird wird das Aufladesymbol angezeigt 15 2 2 Anzeigeartensymbol Durch Berühren des Anzeigeartensymbols erscheint eine Übersicht aller verfügbaren Anzeigearten Sie können einfach auswählen welche Anzeigeart Sie benutzen möchten Akku leer Akku voll ...

Page 50: ...nde Symbol angezeigt wird ist der Speicher des Looky4 voll Bitte löschen Sie dann ein gespeichertes Bild bevor Sie versuchen ein Bild zu speichern In Kapitel 16 3 finden Sie Anweisungen zum Löschen von gespeicherten Bildern 16 2 Gespeicherte Bilder anzeigen nur Looky4 Berühren Sie den oberen Teil des Bildschirms 2 Sekunden lang mit einem Finger um das Batteriesymbol das Symbol für den Abspielmodus...

Page 51: ...en Bilder blättern 16 4 Anschluss an Fernseher nur Looky4 Das Looky4 verfügt über einen Fernseheranschluss über den Sie das Looky4 an ein externes Display anschließen können Verbinden Sie das im Lieferumfang enthaltene Videokabel ganz einfach mit dem Looky4 und dem analogen Videoeingang eines externen Monitors oder Fernsehers Bitte vergewissern Sie sich dass der externe Monitor oder Fernseher geer...

Page 52: ...rz auf die EIN AUS Taste Schalten Sie Anzeigeart auf Farbe um 2 Das Looky4 kann nicht eingeschaltet werden Drücken Sie auf die EIN AUS Taste um das Looky4 einzuschalten Laden Sie den Akku auf Setzen Sie den Akku wieder ein oder wechseln Sie ihn aus 3 3 Das Looky4 schaltet sich nach wenigen Minuten aus und es ertönt ein Doppelton Wenn das Looky4 3 Minuten lang keine Bewegung auf dem Display erfasst...

Page 53: ...n Deaktivieren der Option Farbmodi in dieser Sektion des verborgenen Menüs können Sie festlegen welche Farb modi bei der Basisverwendung des Looky4 verfügbar sein sollen Bitte beachten Sie dass unabhängig davon welche Farbmodi deaktiviert wurden über das Looky4 Menü noch immer auf alle Farbmodi zugegriffen werden kann siehe Kapitel 15 2 2 Streichen Sie von rechts nach links um Zugang zum nächsten ...

Page 54: ...n Zoom Vergrößern Anzeigemodus und Standbild Streichen Sie von rechts nach links um zwischen der Optionen der Benutzerschinttstelle umzuschalten 19 3 Automatische Abschaltung nach 3 Minuten aktivieren deaktivieren Wenn das Looky4 3 Minuten lang keine Bewegung erfasst schaltet es automatisch ab um Batterieleistung zu sparen Diese Funktion kann im verborgenen Menü ausgeschaltet werden Standard Basis...

Page 55: ...chalten 19 5 Software Info In dieser Sektion wird die Softwareversion des Looky4 angezeigt Tippen Sie auf das Kontroll kästchen um die horizontale Leselinie zu deaktivieren Tippen Sie auf das Kontrollkästchen um die horizontale Leselinie wieder zu aktivieren Tippen Sie auf das Kontroll kästchen um die vertikale Leselinie zu deaktivieren Tippen Sie auf das Kont rollkästchen um die vertikale Leselin...

Page 56: ...ößerung höchstens 20 x Stromversorgung Akkusystem austauschbarer Akku im Griff Lithium Ionen 2500 mAh Adapter 5 Vdc 2 1 A Benutzungsbedingungen Temperatur 5 C bis 35 C Luftfeuchtigkeit 70 keine Kondensation Betriebs und Aufladezeit Betriebszeit bis zu 2 5 Stunden Aufladezeit etwa 4 Stunden Verpackungsinhalt Looky4 Akkugriff 4000 mAh Ladeadapter Transporttasche Bedienungsanleitung SDTV Kabel Reinig...

Page 57: ... dieses Gerät gelten die Garantiebestimmungen Ihres Händlers Erkundigen Sie sich bitte bei Ihrem Händler nach weiteren Informationen über diese Bestimmungen 23 Richtlinien Produkte mit dem CE Zeichen erfüllen die Anforderungen der von der Kommission der Europäischen Gemeinschaft herausgegebenen EMV Richtlinie 2004 108 EG und Niederspannungsrichtlinie 2006 95 EG Die Übereinstimmung mit diesen Richt...

Page 58: ...66 15 2 Modes d affichage et batterie 66 15 2 1 Pictogramme de batterie 67 15 2 2 Pictogramme de mode d affichage 67 16 Fonctions de Looky4 68 16 1 Enregistrer une image Looky4 uniquement 68 16 2 Visualiser les images enregistrées Looky4 uniquement 68 16 3 Effacer des images enregistrées Looky4 uniquement 69 16 4 Connexion TV Looky4 uniquement 69 17 Ecrire avec le Looky4 70 18 Petit dépannage 70 1...

Page 59: ...à utiliser le Looky4 Si des questions subsistent après la lecture de ce mode d emploi veuillez prendre contact avec votre fournisseur À moins qu il n en soit convenu autrement les mentions relatives à le Looky4 dans ce mode d emploi s appliquent aussi à le Looky4 2 Description générale du Looky4 Bouton de marche arrêt Voyant LED Voyants lumineux Caméra HD Poignée Port de recharge Ecran HD 11 cm Av...

Page 60: ...e en tout temps les précautions suivantes Protéger l appareil et sa batterie contre l humidité la pluie le sable ou les températures extrêmes par exemple d apareils de chauffage ou de la lumière solaire directe Ne pas utiliser de produits de nettoyage contenant de l alcool de l acétone de l ammoniac ou des abrasifs Ils pourraient endommager l appareil ou son écran tactile Utiliser uniquement les a...

Page 61: ...de recharge 6 Instructions de recharge Connecter l extrémité large du câble USB à l adapteur et brancher l adapteur sur la prise murale Brancher l extrémité étroite du câble USB au Looky4 pour commencer le processus de charge Attention le point sur le petit connecteur indique le dessus Les voyants lumineux allumés en continu indiquent que la batterie est en cours de chargement Voyants éteints indi...

Page 62: ...nd fortement de la température ambiante par exemple ne jamais laisser la batterie dans une voiture garée au soleil Les batteries au lithium ion neuves doivent être rechargées plusieurs fois avant d atteindre leur capacité nominale Recharger les batteries au lithium ion au moins une fois tous les 6 mois La durée de vie moyenne de la batterie est habituellement de 300 cycles de recharge mais elle dé...

Page 63: ... minutes Un double signal sonore retentit alors 10 Réglage de la netteté de l image du Looky4 Un dispositif de poussoir sert à régler la netteté de l image sur l écran Il suffit d effleurer une fois le centre de l écran et l appareil photo se focalise 11 Mise à l arrêt des voyants lumineux Toucher le centre de l écran pendant 4 secondes pour éteindre les voyants lumineux au dos du Looky4 Un signal...

Page 64: ...pparaître différentes couleurs d affichage 13 Zoom Pour modifier le facteur d agrandissement effleurer le côté gache ou droit de l écran vers le haut ou vers le bas Pour agrandir glisser le doigt vers le haut du pictogramme et pour la rapetisser le glisser vers le bas Le Looky4 agrandit de 2 à 20 fois ou Pictogramme Zoom ...

Page 65: ...e s affaiblit pour économiser la batterie Quand l image est fixe il est possible de la faire glisser du doigt Toutes les fonctions du Looky4 peuvent encore être utilisées alors que l image est fixe 15 Menu Looky4 15 1 Son luminosité et lignes de lecture Toucher du doigt le bas de l écran pendant 2 secondes pour y faire apparaître le menu Son Luminosité et l option Lignes de lecture Ces réglages se...

Page 66: ... de lecture En tapotant ce pictogramme il est possible de créer une ligne horizontale ou verticale de lecture sur l écran 15 2 Modes d affichage et batterie Effleurer du doigt le haut de l écran pendant 2 secondes pour faire apparaître le menu Batterie Images en Mémoire Looky4 seulement s il y a des images enregistrées et Mode d affichage dans la moitié supérieure de l écran En marche marche coupé...

Page 67: ...quent cela Pendant le rechargement de la batterie le pictogramme de charge figure sur l écran 15 2 2 Pictogramme de mode d affichage Pour faire apparaître un aperçu des différents modes d affichage toucher le pictogramme du mode d affichage Pour choisir le mode d affichage souhaité l effleurer du doigt batterie pleine batterie vide ...

Page 68: ... Si cette icone s affiche pendant l enregistrement cela signifie que la mémoire de Looky4 est pleine Veuillez effacer une image enregistrée auparavant avant d essayer d enregistrer la nouvelle image 16 2 Visualiser les images enregistrées Looky4 uniquement Touchez la partie supérieure de l écran d un doigt pendant 2 secondes pour générer le menu batterie mode lecture et affichage dans la moitié su...

Page 69: ...ges enregistrées en tapant sur les touches flèches 16 4 Connexion TV Looky4 uniquement Le Looky4 contient un connecteur TV qui vous permet de connecter le Looky4 à un affichage externe Il suffit de connecter le câble vidéo fourni au Looky4 et l entrée vidéo analogique sur un moniteur externe ou un téléviseur Pour des résultats irréprochables assurez vous que le moniteur externe ou le téléviseur es...

Page 70: ...bouton Marche Arrêt ON OFF Mettre le mode d affichage sur couleur 2 Le Looky4 ne s allume pas Pour mettre le Looky4 en marche appuyer une fois sur le bouton Marche Arrêt ON OFF Charger la batterie Réinsérer ou remplacer la batterie 3 3 Le Looky4 s arrête après quelques minutes après un double signal sonore Le Looky4 se met à l arrêt s il ne détecte pas de mouvement sur l écran pendant 3 minutes 4 ...

Page 71: ...ctivation des modes couleur En activant ou désactivant les modes de couleur dans cette section du menu caché vous pouvez déterminer les modes de couleurs disponibles pendant l utilisation de base du Looky4 Notez que quels que soient les modes couleur désactivés tous les modes de couleur restent toujours accessibles via le menu Looky4 voir chapitre 15 2 2 Balayez de droite à gauche pour accéder au ...

Page 72: ...se ne contient que les fonctions zoom mode d affichage et arrêt sur image Balayez de droite à gauche pour changer des options interface utilisateur 19 3 Activation désactivation l arrêt automatique 3 minutes Si le Looky4 ne détecte pas de mouvement pendant 3 minutes il se ferme automatiquement pour préserver la capacité de la batterie Cette fonction peut être désactivée dans le menu caché Standard...

Page 73: ...les aux verticales 19 5 Informations sur le logiciel Cette section affiche la version logicielle du Looky4 Tapotez sur la case à cocher pour désactiver la ligne de lecture horizontale Tapotez sur la croix pour réactiver la ligne de lecture horizontale Tapotez sur la case à cocher pour désactiver la ligne de lecture verticale Tapotez sur la case à cocher pour désactiver la ligne de lecture vertical...

Page 74: ...entation en courant électrique Système de batterie Batterie remplaçable dans la poignée Lithium Ion 2500mAh Adaptateur 5VDC 2 1A Conditions d utilisation Température 5 à 35 C Humidité ambiante 70 aucune condensation Autonomie et durée de recharge Autonomie Jusqu à 2 5 heures Temps de recharge 4 heures environ Contenu de l emballage Looky4 Poignée batterie 2500mAh Adaptateur chargeur Câble USB Sac ...

Page 75: ... garantie Ce dispositif est soumis aux modalités de garantie de votre fournisseur Pour en savoir plus sur ces modalités veuillez contacter votre fournisseur 23 Modalités Les produits avec marquage CE sont conformes à la directive CEM 2004 108 EC et à la directive basse tension 2006 95 EC publiés par la Commission européenne La conformité à ces directives implique la conformité aux normes suivantes...

Page 76: ...ura 84 15 2 Modalità visualizzazione e batteria 84 15 2 1 Icona della batteria 85 15 2 2 Icona modalità visualizzazione 85 16 Funzioni Looky4 86 16 1 Come salvare un immagine solo Looky4 86 16 2 Come visualizzare delle immagini salvate solo Looky4 86 16 3 Come eliminare delle immagini salvate solo Looky4 87 16 4 Collegamento alla TV solo Looky4 87 17 Scrivere con il Looky4 88 18 Individuazione gua...

Page 77: ...i utilizzare il Looky4 Se avete necessità di chiarimenti dopo aver letto il manuale siete pregati di contattare il vostro fornitore Se non diversamente indicato le menzioni Looky4 nel presente manuale valgono anche per Looky4 2 Descrizione generale Looky4 Pulsante On Off Indicatore LED Illuminazione LED Telecamera HD Impugnatura Presa di carica Schermo HD 4 Lato anteriore Retro Output per collegam...

Page 78: ...ttare le seguenti istruzioni di sicurezza e manutenzione Tenere l apparecchio e le batterie al riparo da umidità pioggia temperature estreme o sabbia e da fonti di calore quali ad esempio termosifoni o raggi solari diretti Non utilizzare prodotti detergenti che contengono alcool derivati dall alcol denaturato ammoniaca o sostanze abrasive Questi prodotti possono danneggiare il dispositivo o il tou...

Page 79: ...i ricarica 6 Istruzioni per la ricarica Collegare il connettore largo del cavo USB all adattatore e collegare l adattatore alla presa a muro Collegare il connettore stretto del cavo USB al Looky4 in modo da avviare il processo di carica Attenzione il punto sul connettore piccolo indica il lato alto LED accesso a luce costante ricarica delle batterie in corso LED spento lebatteriesonostatecaricatec...

Page 80: ...e per esempio mai lasciare la batteria in un auto che è parcheggiato al sole Nuove batterie agli ioni di litio devono essere caricate più volte prima di raggiungere la loro capacità nominale Ricaricare le batterie agli ioni di litio almeno una volta ogni 6 mesi La vita media della batteria è di solito di 300 cicli di ricarica ma dipende dall uso La capacità complessiva diminuirà lentamente dopo pi...

Page 81: ...egnale acustico a due toni 10 Messa a fuoco del Looky4 Il Looky4 utilizza un metodo push to focus per mettere a fuoco l immagine sullo schermo Basta toccare rapidamente nel centro dello schermo e la telecamera mette a fuoco l immagine 11 Spegnimento dei LED Toccando il centro dello schermo per 4 secondi è possibile spegnere i LED nella parte posteriore del Looky4 È udibile un segnale acustico che ...

Page 82: ...zione di zoom Per modificare l ingrandimento si fa scorrere il dito su o giù sul lato sinistro o destro del touch screen Per ingrandire far scorrere il dito verso l alto sull icona dello zoom per rimpicciolire l immagine far scorrere verso il basso il dito sull icona dello zoom La gamma di ingrandimento del Looky4 va da 2 a 20 volte Icona dello zoom oppure ...

Page 83: ...miare energia capacità della batteria Quando l immagine è congelata è possibile utilizzare 1 dito per muovere l immagine congelata Tutte le funzioni del Looky4 sono utilizzabili anche quando l immagine è congelata 15 Il menu di Looky4 15 1 Audio luminosità e linee di lettura Per accedere al menu suono luminosità e l opzione linea di lettura toccare con un dito per 2 secondi la parte bassa dello sc...

Page 84: ...Toccando questa icona è possibile generare sullo schermo una linea orizzontale o verticale di lettura 15 2 Modalità visualizzazione e batteria Con 1 dito toccare la parte superiore dello schermo per 2 secondi per visualizzare il menu della batteria e i menu della modalità riproduzione solo Looky4 e solo quando le immagini sono salvate e visualizzazione nella metà superiore dello schermo Audio on a...

Page 85: ... la batteria è sottocarica il menu visualizza l icona di ricarica 15 2 2 Icona modalità visualizzazione Toccando l icona della modalità di visuaizzazione comparirà una panoramica di tutte le modalità di visualizzazione disponibili Si può facilmente selezionare la modalità di visualizzazione che si desidera utilizzare Batteria scarica batteria carica ...

Page 86: ... che la memoria del Looky4 è piena Eliminare un immagine salvata prima di provare a salvare un immagine Per le istruzioni su come eliminare delle immagini salvate consultare il capitolo 16 3 16 2 Come visualizzare delle immagini salvate solo Looky4 Toccare la sezione superiore dello schermo con un dito per 2 secondi per generare la batteria l icona modalità play e il menu modalità display nella me...

Page 87: ...ti freccia si possono scorrere le immagini salvate 16 4 Collegamento alla TV solo Looky4 Il Looky4 contiene un connettore TV con il quale è possibile collegare il Looky4 a uno schermo esterno Basta collegare il cavo video fornito al Looky4 e l ingresso video analogico di un monitor o TV esterno Per un risultato ottimale accertarsi che il monitor o TV esterno disponga di una messa a terra Icona eli...

Page 88: ...elato premere brevemente il pulsante ON OFF una volta Attivare la modalità di visualizzazione a colori 2 Il Looky4 non si accende Premere il pulsante ON OFF per accendere il Looky4 Caricare la batteria Reinserire o sostituire la batteria 3 Il Looky4 si spegne in pochi minuti emettendo un segnale acustico a doppio tono Il Looky4 si spegne se non rileva nessun movimento sullo schermo per 3 minuti 4 ...

Page 89: ...itando o disabilitando le modalità colore in questa sezione del menu nascosto si può definire quali modalità colore rendere accessibili durante l uso di base del Looky4 Si noti che a prescindere dalle modalità colore disabilitate è comunque possibile accedere a tutte le modalità colore dal menu Looky4 vedere capitolo 15 2 2 Passare il dito da destra a sinistra per accedere alla modalità colore suc...

Page 90: ...alità display e ferma immagine Passare il dito da destra a sinistra per passare tra opzione interfaccia utente 19 3 Come abilitare disabilitare lo spegnimento automatico dopo 3 minuti Se il Looky4 non rileva nessun movimento per 3 minuti si spegne automaticamente da solo per risparmiare la batteria Questa funzione può essere disattivata nel menu nascosto Standard Base Passare con il dito da destra...

Page 91: ...elle verticali 19 5 Informazioni sul software Questa sezione mostra la versione del software del Looky4 Toccare la casella di spunta per disabilitare la riga di lettura orizzontale Toccare la casella con la crocetta per riabilitare la riga di lettura orizzontale Toccare la casella di spunta per disabilitare la riga di lettura verticale Toccare la casella con la crocetta per riabilitare la riga di ...

Page 92: ... di batteria Batteria sostituibile all interno dell impugnatura da 2500mAh agli ioni di litio Adattatore 5VDC 2 1A Condizioni ambientali di utilizzo Temperatura da 5 C a 35 C da 50 F a 95 F Umidità relativa 70 in assenza di condensa Autonomia e tempo di ricarica Tempo di utilizzo fino a 2 5 ore Tempo di ricarica circa 4 ore Contenuto della confezione Looky4 Impugnatura portabatteria 2500mAh Adatta...

Page 93: ...dizioni di garanzia Questo prodotto è coperto dalla garanzia del fornitore Per ulteriori informazioni sulle condizioni di garanzia contattate il vostro fornitore 23 Aspetti normativi I prodotti muniti della marcatura CE sono conformi alla direttiva EMC 2004 108 CE e alla direttiva sulle basse tensioni 2006 95 CE emanate dalla Commissione della Comunità europea La conformità con dette direttive imp...

Page 94: ...2 15 2 Modos de visualización y batería 102 15 2 1 Icono de la batería 103 15 2 2 Icono del modo de visualización 103 16 Funciones de Looky4 104 16 1 Cómo guardar imágenes sólo Looky4 104 16 2 Ver imágenes guardadas sólo Looky4 104 16 3 Eliminar imágenes guardadas sólo Looky4 105 16 4 Conexión de TV sólo Looky4 105 17 Escribir con Looky4 106 18 Resolución de fallos 106 19 Acceso al menú oculto 107...

Page 95: ...zar su Looky4 Si todavía tuviera cualquier pregunta tras leer este manual contacte con su proveedor A menos que se indique lo contrario las menciones al Looky4 de este manual se aplican también al Looky4 2 Descripción general de Looky4 Botón de conexión desconexión Indicador LED Iluminación LED Cámara HD Asa Puerto de carga Pantalla de 4 de alta definición HD screen Frontal Parte trasera Conexión ...

Page 96: ...segúrese de cumplir las instrucciones de seguridad y mantenimiento siguientes Proteja el dispositivo y sus baterías frente a la humedad lluvia arena o temperaturas extremas como pueden tener los radiadores o la exposición directa a la luz del sol No utilice productos de limpieza que contengan alcohol alcoholes desnaturalizados amoniaco o abrasivos Estos pueden dañar el dispositivo o su pantalla tá...

Page 97: ...s de carga 6 Instrucciones de carga Conecte el extremo ancho del cable USB al adaptador y enchufe el adaptador a la toma de pared Conecte el extremo estrecho del cable USB al Looky4 para comenzar el proceso de dcarga Precaución El punto del conector pequeño indica el lado que debe ir hacia arriba LED encendido constante se están cargando las baterías LED apagado las baterías estan completa mente c...

Page 98: ...tomática que depende fuertemente de la temperatura del entorno por ejemplo nunca deje la baterías en un coche aparcado y expuesto a la luz directa del sol Las baterías de ion litio nuevas se deben cargar varias veces antes de alcanzar su capacidad nominal Cargue las baterías de ion litio al menos una vez cada seis meses La vida media de la batería suele ser de 300 ciclos de carga pero esto depende...

Page 99: ...señal de dos agudos 10 Enfocar el Looky4 El Looky4 utiliza un método de pulsar para enfocar de cara a enfocar la imagen en pantalla Simplemente toque la pantalla una vez en el centro y la cámara se enfocará 11 Desconectar los LED Tocando el centro de la pantalla durante 4 segundos podrá apagar los LED de la parte posterior de Looky4 Escuchará un pitido que indicará que los LED han quedado desconec...

Page 100: ...sos modos de color 13 Aumentar Para alterar la amplificación deslice su dedo hacia arriba o abajo en la parte izquierda o derecha de la pantalla táctil Para ampliar deslice su dedo hacia arriba en el icono de ampliación Deslice hacia abajo en el mismo icono para reducir El rango de amplificación de Looky4 va desde x2 a x20 o Icono de amplificación ...

Page 101: ...la imagen esté congelada podrá utilizar 1 dedo para moverse por la imagen Todas las funciones de Looky4 pueden seguir utilizándose mientras la imagen esté congelada 15 Menú de Looky4 15 1 Sonido brillo y lectura de líneas Utilice 1 dedo para tocar la sección inferior de la pantalla durante 2 segundos para generar el menú de sonido menú de brillo y la opción de lectura de líneas en la mitad inferio...

Page 102: ... Tocando este icono podrá generar en la pantalla una línea de lectura horizontal o vertical 15 2 Modos de visualización y batería Utilice 1 dedo para tocar la sección superior de la pantalla durante 2 segundos para generar el menú de la batería de reproducción solo Looky4 y solo quando le immagini sono salvate y de visualización en mitad superior de la pantalla sonido conectado sonido desconectado...

Page 103: ... Cuando la batería se esté cargando el menú mostrará el icono de carga 15 2 2 Icono del modo de visualización Al tocar el icono de modo de visualización aparecerá una visión general de todos los modos de visualización disponibles Podrá seleccionar fácilmente el menú de visualización que desee usar batería vacía batería llena ...

Page 104: ...que la memoria del Looky4 está llena Para guardar la imagen deberá eliminar alguna de las almacenadas en el dispositivo Consulte el apartado 16 3 si quiere más información sobre cómo eliminar imágenes guardadas 16 2 Ver imágenes guardadas sólo Looky4 Toque durante dos segundos la parte superior de la pantalla con el dedo para hacer que aparezca el icono de la batería modo de reproducción y el menú...

Page 105: ...do sobre las flechas 16 4 Conexión de TV sólo Looky4 El Looky4 incluye un conector de TV que le permite conectar el Looky4 con un dispositivo externo Lo único que tiene que hacer es conectar el cable de vídeo incluido al Looky4 y la entrada de vídeo analógica de un monitor externo o televisión Para obtener un mejor resultado asegúrese de que el monitor externo o televisión esté conectado a tierra ...

Page 106: ... congelada pulse brevemente el botón ON OFF una vez Conecte el modo de visuali zación en color 2 No se puede conectar Looky4 Pulse el botón ON OFF para conectar Looky4 Cargue la batería Reinserte o sustituya la batería 3 Looky4 se apaga solo pasados unos minutos y se escucha un tono doble Looky4 se desconecta solo si no detecta movimiento durante 3 minutos 4 Looky4 se apaga solo pasados unos minut...

Page 107: ...colores Si habilita o deshabilita los modos de colores en esta sección del menú oculto puede definir qué modos estarán disponibles para el uso básico del Looky4 Tenga en cuenta que podrá acceder a todos los modos de colores a través del menú del Looky4 independientemente de los que haya deshabilitado consulte el apartado 15 2 2 Desplace de derecha a izquierda para pasar al siguiente modo de color ...

Page 108: ...oom modo de reproducción y congelar imagen Desplace de derecha a izquierda para cambiar de opciones de interfaces de usario 19 3 Habilitar deshabilitar apagado automático después de tres minutos Si el Looky4 no detecta movimiento en tres minutos se apaga automáticamente para ahorrar batería Es posible deshabilitar esta función en el menú oculto Estándar Básica Desplace de derecha a izquierda para ...

Page 109: ... Información sobre el software En este apartado se muestra la versión de software del Looky4 Pulse en la casilla para deshabilitar la línea de lectura horizontal Pulse de nuevo en la casilla para volver a habilitar la línea de lectura horizontal Pulse en la casilla para deshabilitar la línea de lectura vertical Pulse de nuevo en la casilla para volver a habilitar la línea de lectura vertical Rehan...

Page 110: ...ma x20 Alimentación Sistema de batería Batería reemplazable asa interior Ion litio 2500mAh Adaptador 5VCC 2 1A Condiciones de uso Temperatura 5 C hasta 35 C 50 F hasta 95 F Humedad del aire 70 sin condensación Tiempo de uso y tiempo de carga Tiempo de uso Hasta 2 5 horas Tiempo de carga 4 horas aprox Contenidos del paquete Looky4 Asa de la batería 2500mAh Adaptador de carga Cable USB Funda de tran...

Page 111: ... sujeto a las regulaciones de garantía de su proveedor Para obtener más información sobre estas regulaciones contacte con su proveedor 23 Regulaciones Los productos con la marca CE cumplen con la directiva 2004 108 CE sobre compatibilidad electromagnética EMC y con la directiva sobre baja tensión 2006 95 CE elaborada por la Comisión de la Comunidad Europea El cumplimiento de estas directivas impli...

Page 112: ...Supplier contact details ...

Page 113: ...REHAN ELECTRONICS LTD Aughrim Road Carnew County Wicklow Ireland www rehanelectronics ie ...

Reviews: