background image

45 


Warranty Information 

1.  Reinecker Vision GmbH grants a warranty of 24 months (warranty 

period only valid within the European Union) against defects in man-
ufacture counted from date of invoice ex Reinecker Vision GmbH. 

2.  All parts that have been replaced when repairing the unit will auto-

matically become property of Reinecker Vision GmbH. 

3.  Damage caused by improper use or by non-compliance with the  

operating instructions will result in the invalidation of the warranty. 

4.  Interventions from persons other than Reinecker Vision GmbH  

authorised specialists may lead to invalidity of warranty. 

5.  Partial warranty is valid for light sources serving to illuminate the 

reading object, batteries and other parts subject to wear and tear. 

6.  If a warranty claim is necessary, the system has to be returned to 

the manufacturer in Alsbach-Hähnlein or to your authorised dealer in 
the original packaging including all components. The manufacturer 
does not carry the cost for transport, packaging and insurance. 


Phone number: +49 6257 9311-0 

 
View our General Terms and Conditions. 
 
Your authorized distributor: 

Summary of Contents for MANO XL

Page 1: ...MANO XL Gebrauchanweisung User Manual ...

Page 2: ......

Page 3: ......

Page 4: ...g des Produktes 8 Wiedereinsatz Installation und Wartung 8 Gerätereinigung 9 Besondere Hinweise zu Transport und Lagerung 9 Umweltfreundliche Entsorgung nach EU Richtlinie 2002 96 EG 9 Netzzuleitung 9 Sicherheitsunterweisung zur Vermeidung von Schäden 10 II Anleitung zur Leselupe MANO XL 11 Inbetriebnahme 11 Beschreibung der Bedienelemente 11 Akku laden 13 Betriebsanzeige 13 Lese Schreibstativ 14 ...

Page 5: ...al kein Lineal und keine Abdeckung 19 Suchen 19 Navigation im Live Bild 20 Erinnerungsfunktion 20 Frequenz umschalten 60Hz auf 50Hz 20 HDMI Ausgang 21 Energiesparmodus 21 Werkseinstellung wiederherstellen 21 Hardware Reset 21 Fehlerdiagnose 22 Das Gerät lässt sich nicht einschalten 22 Schwarzer Bildschirm Weißer Bildschirm 22 Das Bild ändert sich nicht 22 Es sind Schmierer oder Flecken auf dem Dis...

Page 6: ...tören unwahrscheinlich Trotzdem sollte berücksich tigt werden dass gemeinsamer Betrieb des Gerätes zusammen mit an deren Geräten zu Störungen des Gerätes oder anderer Geräte führen kann Daher sollte darauf geachtet werden dass das Gerät nicht un mittelbar neben oder auf einem anderen Gerät angeordnet werden darf Wenn sich eine Anordnung der opto elektronischen Sehhilfe in unmit telbarer Nähe zu me...

Page 7: ...unterwegs Medizinprodukt MANO XL ist ein Medizinprodukt der Klasse I und entspricht der Richt linie 93 42 EWG Bei Einsatz des Gerätes außerhalb der EU Mitglieds staaten sind die jeweiligen landesspezifischen Richtlinien zu beachten Zweckbestimmung Die opto elektronische Sehhilfe ist ein Medizinprodukt zum Vergrößern von Text und Bildvorlagen Stark sehbehinderte Menschen kompen sieren damit ihre Se...

Page 8: ...n bei Änderung der Leistung des Produktes Sollten sich die technischen Merkmale am MANO XL ändern ist das Gerät auszuschalten und der Netzstecker zu ziehen Das Gerät ist in diesem Zustand nicht wieder in Betrieb zu nehmen Informieren Sie umgehend das Reinecker Vision GmbH Service Center oder eines unserer Partnerunternehmen Wiedereinsatz Installation und Wartung Die Geräte dürfen nur von Reinecker...

Page 9: ...folgen Folgende Lager und Transportbedingungen sind einzuhalten Luftdruck 700 bis 1000 hPa Temperaturbereich 5 C bis 40 C Relative Luftfeuchtigkeit 30 bis 80 Umweltfreundliche Entsorgung nach EU Richtlinie 2002 96 EG Das Gerät beinhaltet elektronische Bauelemente Um Umweltrisiken o der Gefährdungen durch nicht fachgerechte Entsorgung zu verhindern muss die Entsorgung des Produkts einschließlich de...

Page 10: ...en Sie das Gerät nur im Temperaturbereich von 10 C bis 35 C 50 und 95 F 7 Es dürfen keine Flüssigkeiten in das Gerät gelangen Verwenden Sie das Gerät nur in trockener Umgebung 8 Das Gerät darf nicht in der Umgebung von medizinischen Appara ten verwendet werden Patientenumgebung 9 Drücken Sie nicht auf den Bildschirm und legen Sie keine schweren Gegenstände auf dem Gerät ab dadurch kann das Gerät b...

Page 11: ...DMI Kabel 1 5 m Schutztasche Reinigungstuch Bedienungsanleitung Inbetriebnahme Bevor Sie MANO XL zum ersten Mal benutzen müssen Sie den Akku aufladen Weitere Informationen finden Sie im Kapitel Akku laden Beschreibung der Bedienelemente 1 LCD Display 4 Joystick 2 Farbauswahl Taste 5 Zoom Vergrößern 3 Zoom Verkleinern 6 Echtfarben Taste ...

Page 12: ...12 7 Kamera 8 LED Lichteinheit 9 Lese Schreibstativ 10 Ein Aus Taste 13 Standbild Taste 11 Lineal Maske 14 HDMI Anschluss Suchfunktion 15 Ladebuchse 12 USB Anschluss 16 Autofokus Taste ...

Page 13: ...t ca 4 Stunden und ermöglicht eine Betriebszeit von bis zu ca 3 Stunden je nach Betriebsart Wenn das Gerät eingeschaltet ist leuchtet die Betriebsanzeige des Geräts während des Ladevorgangs grün Wenn das Gerät eingeschaltet aber nicht mit dem Stromnetz ver bunden ist und der Akkustand hoch ist leuchtet die Betriebsanzeige grün Ist der Akkustand niedrig leuchtet die Anzeige rot Wenn die Anzeige anf...

Page 14: ... mit dem Stativ ausgerichtet wird so dass die Nahsicht wie auch die Fernsicht von dem Gerät unterstützt wird Bitte klappen Sie das Stativ ein wenn Sie die Fernsicht nutzen Bedienung des Gerätes Ein Aus Taste Halten Sie die Ein Aus Taste für ca 3 Sekunden gedrückt um das Gerät ein bzw auszuschalten Wenn das Gerät an ist drücken Sie die Ein Aus Taste um den aktuellen Status des Akkus den Standbild M...

Page 15: ...aste Verkleinern um die Vergrößerung zu reduzieren Halten Sie die Verkleinerungstaste gedrückt um die Vergrößerung kontinuierlich zu reduzieren Vergrößerungsbereich bei Naheinstellung auf dem Tisch 2 4x 28x Farbmodus Ein Farbmodus ist eine vordefinierte Farbkombination Der Vollfarbmodus eignet sich zum Anzeigen von Bildern oder Karten Mit der Farbwahl Taste können verschiedene Vorder und Hintergru...

Page 16: ...nd her zu schalten Wenn Sie die Farbwahl Taste 3 Sekunden lang gedrückt halten erscheint das Vollbild Symbol mit einem Signalton der anzeigt dass Sie zur integrierten erweiterten Farbwahl Liste ge wechselt haben Werksseitig eingestellte erweiterte Farbwahl Favoritenliste 4 Varianten Weiß auf Schwarz Schwarz auf Weiß Gelb auf Schwarz Schwarz auf Gelb Integrierte erweiterte Farbwahl Liste 18 Variant...

Page 17: ...s Drücken Sie auf die Fokus Taste um den Autofokus zu deaktivieren Autofokus AUS ein roter Rahmen erscheint am Bild schirmrand Dies ist speziell beim Schreiben unter der Kamera auf dem Tisch hilfreich Drücken Sie erneut auf die Fokus Taste um den Autofokus wieder zu aktivieren Autofokus EIN der rote Rahmen erlischt am Bildschirmrand Standbild Modus Das Einfrieren eines Bildes auf dem LCD Bildschir...

Page 18: ...Bild Standbild Taste um zur Miniaturbildergalerie zurückzukehren Drücken Sie in der Miniaturbildergalerie die Suchen Taste um das Zielbild auszuwählen welches gelöscht werden soll Drücken Sie die Suchen Taste noch einmal um den Vorgang zu bestäti gen oder drücken Sie irgendeine andere Taste um den Vorgang ab zubrechen Um alle Bilder zu löschen halten Sie in der Miniaturbildergalerie die Suchen Tas...

Page 19: ...gen zu erhöhen reduzieren Hinweis Bitte beachten Sie dass das Live Bewegen per Joystick in diesem Modus nicht verfügbar ist Normal kein Lineal und keine Abdeckung Drücken Sie die Ein Aus Taste um den Linien oder Masken modus schnell zu verlassen Suchen Halten Sie die Suchen Taste für 1 Sekunde gedrückt bis eine Lokalisierungsbox erscheint Bewegen Sie den Inhalt in der Lokalisierungsbox bis Sie zu ...

Page 20: ...ll zweimal nach links Der Start oder Endpunkt wird beim Lesen entsprechend dem maximalen Navigations bereich automatisch gespeichert und aktualisiert Die Navigationsgeschwindigkeit kann in drei Stufen eingestellt wer den langsam mittel Werkseinstellung und schnell Bewegen Sie den Joystick zur einen Seite und drücken Sie die Vergröße rungs Taste zum Erhöhen Reduzieren der Lesegeschwindigkeit Erinne...

Page 21: ...arfunktion manuell ein oder auszuschalten Werkseinstellung EIN Achten Sie auf das Mond Symbol Werkseinstellung wiederherstellen Halten Sie die Standbild Taste gleichzeitig mit der Suchen Taste für 5 Sekunden gedrückt um das Gerät auf die Werkseinstellungen zu rückzusetzen Das Gerät schaltet sich nach dem Zurücksetzen auto matisch ab Hardware Reset Wenn das Gerät nicht mehr reagiert oder sich nicht...

Page 22: ...sich was passiert Passen Sie die Vergrößerung an Passen Sie den Farbmodus an Starten Sie das Gerät neu Machen Sie einen Hardware Reset Das Bild ändert sich nicht Wenn das Gerät im Standbild oder Wiedergabemodus ist ändert sich das Bild nicht Drücken Sie die EIN AUS Taste um den aktuellen Status zu prüfen Starten Sie das Gerät neu Machen Sie einen Hardware Reset Es sind Schmierer oder Flecken auf d...

Page 23: ...röße 188x138x21 mm Gewicht 420 g Farbmodus Echtfarbe bevorzugter benutzerdefinierter Modus 18 integrierte erweiterte Farbmodi Vergrößerung 2 4x 28x Akku Integrierte aufladbare Lithium Batterie Akku Ladezeit ca 4 Stunden Betriebsdauer bis zu 3 Stunden je nach eingestelltem Modus Netzteil Eingang 110 240V Ausgang 5V 3A ...

Page 24: ...g oder durch Nichtbeach tung der Gebrauchsanweisung entstehen 4 Eingriffe durch nicht von Reinecker Vision GmbH bevollmächtigte Personen lassen den Garantieanspruch und den Gewährleistungs anspruch erlöschen sofern der Schaden in ursächlichem Zusam menhang mit dem Eingriff steht 5 Die Sachmangelhaftung umfasst auch Leuchtmittel die der Be leuchtung der Lesegutauflage dienen und sonstige Verschleiß...

Page 25: ...f the performance of the device 29 Reinstatement installation and maintenance 29 Cleaning of the system 29 Special advice for transport and storage 30 Disposal of the unit according to EU directive 2002 96 EEC 30 Power Supply 30 Safety instructions 31 II Instructions on the adequate use of the electronic magnifier MANO XL 32 Scope of delivery 32 Commissioning 32 Compositions 32 Battery Charging 34...

Page 26: ...39 Normal no line mask 40 Find 40 Live Panning 41 Memory 41 Change frequency 60Hz to 50Hz 41 HDMI Output 42 Auto Power Saving 42 Restore 42 Hardware 42 Troubleshooting 43 The unit does not turn on 43 Black screen or White screen 43 The image does not change 43 Smudges or blemishes on the screen 43 Specifications 44 Warranty Information 45 ...

Page 27: ...appliances operated close by is improbable When operating the reading system simultane ously with other systems however the possibility of disturbances of the system or other systems should not be neglected For this reason it should be ensured that the system is not placed directly beside or on top of another system If the set up of this system in the proximity of medical measuring devices cannot ...

Page 28: ...device class I according to 93 42 EEC Annexe IX standard 12 For the distribution to countries outside the EU the respective country specific guidelines have to be regarded Purpose This electronic magnifier is a medical device to assist with the magnifi cation of printed text and pictures Visually impaired people can com pensate for their loss of visual acuity by using this device For private appli...

Page 29: ...features or performances change the device must be turned OFF and the battery must be taken out Please do not switch on the device again Refer directly to your authorized dealer or to Reinecker Vision GmbH Service Center Reinstatement installation and maintenance This device may be technically maintained and reconditioned by Reinecker Vision GmbH only or by an authorized technician Reinstatement m...

Page 30: ...0 to 1000 hPa Temperature range 5 C to 40 C Relative air humidity 30 to 80 Disposal of the unit according to EU directive 2002 96 EEC MANO XL contains of electronic components To avoid damage to the environment the country specific rules have to be respected Power Supply Only use the original power supply and cables which are included in the delivery by Reinecker Vision GmbH Caution The use of any...

Page 31: ...ture quality 6 Do not use this device below 10 C or above 35 C 50 or above 95 F 7 No liquids must reach the interior of the system Only use the device in a dry environment 8 The device may not be used next to medical devices patients environment 9 Do not press down on the screen or lay heavy objects on the device This may cause damage to the device particularly the LCD 10 Do not try to repair or t...

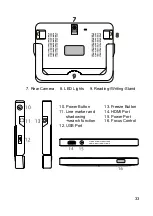
Page 32: ...gnifier MANO XL Power supply incl connection cable HDMI cable 1 5 m Protection bag Micro fibre cloth User manual Commissioning Before using MANO XL for the first time you have to charge the bat tery Further information can be found in the chapter charging the battery Compositions 1 LCD Screen 4 Joystick 2 Enhanced Color 5 Zoom In 3 Zoom Out 6 True Color ...

Page 33: ...33 7 Rear Camera 8 LED Lights 9 Reading Writing Stand 10 Power Button 13 Freeze Button 11 Line marker and 14 HDMI Port shadowing 15 Power Port 11 search function 16 Focus Control 12 USB Port ...

Page 34: ...hours and will support the unit working for about 3 hours depending on operation mode Charging when the unit is on the power LED will be green When the unit is on without charging the power LED will be green when the battery level is high and will be red when the bat tery is dying It is a signal to charge the battery as long as the red light starts to flash You can also check the battery status by...

Page 35: ...designed to auto rotate with the stand so that both the Near View and Far View are supported on this unit Please fold the stand when view in a distance Operation Power Button Press and hold the Power Button for 3 seconds to turn on off the unit When the unit is on press the Power Button to check the current status of battery capacity freeze mode focus status and beep Press other buttons when holdi...

Page 36: ...e Zoom Out Button to decrease magnification and hold the Zoom Out Button for continuous decrease Magnification range when standing on table 2 4x 28x Color Mode A color mode is a predefined color combination Full color mode is suitable for viewing pictures or maps Enhanced Color mode is combined with different foreground and background colors which can help to read more clearly Press the Enhanced C...

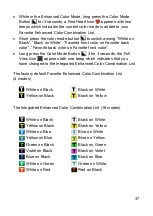
Page 37: ... Mode Button 3 for 3 seconds the Full View Icon appears with one beep which indicates that you have changed to the Integrated Enhanced Color Combination List The factory default Favorite Enhanced Color Combination List 4 modes White on Black Black on White Yellow on Black Black on Yellow The Integrated Enhanced Color Combination List 18 modes White on Black Black on White Yellow on Black Black on ...

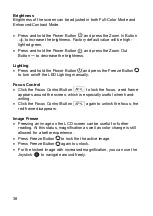
Page 38: ... the LED Lighting manually Focus Control Click the Focus Control Button to lock the focus a red frame appears around the screen which is especially useful when hand writing Click the Focus Control Button again to unlock the focus the red frame disappears Image Freeze Freezing an image on the LCD screen can be useful for further reading At this status magnification as well as color change is still ...

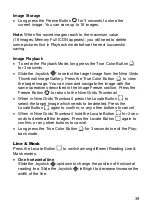
Page 39: ...e operations described in the Image Freeze section Press the Freeze Button to return to the Nine Grids Thumbnail When in Nine Grids Thumbnail press the Locate Button to select the target Image which needs to be deleted Press the Locate Button again to confirm or any other buttons to cancel When in Nine Grids Thumbnail hold the Locate Button for 2 sec onds to delete all the images Press the Locate ...

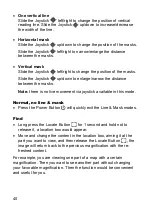
Page 40: ...e masks Note there is no live movement via joystick available in this mode Normal no line mask Press the Power Button will quickly exit the Line Mask modes Find Long press the Locate Button for 1 second and hold not to release it a location box would appear Move and change the content in the location box aiming it at the part you want to view and then release the Locate Button the image will retur...

Page 41: ...e Joystick left or just quickly push the Joystick left twice The start point or end point will be auto recorded and refreshed according to the maximum navigation range when reading The navigation speed can be adjustable in three levels slow me dium the factory default and fast Push the Joystick to one side and press the Zoom in out to increase decrease the reading speed Memory The unit will memori...

Page 42: ...nd click the Enhanced Color Button to turn on off the Auto Power Saving function manually factory default is on Pay attention to the Moon symbol Restore Long press the Freeze Button and the Locate Button at the same time for 5 seconds to reset to the default factory settings Auto power off when reset is done Hardware When the unit is hung or can t be turned off normally press the Power Button True...

Page 43: ... to ensure change happens Adjust the magnification Adjust the Color Mode Restart the unit Hardware Reset The image does not change If the unit enter the freeze mode or playback mode the image will not change Press power button to check the current status Restart the unit Hardware Reset Smudges or blemishes on the screen Adjust brightness Clean the LCD screen and camera Please contact your local di...

Page 44: ...t 420 grams Color Mode Nature color favorite user defined mode 18 Integrated enhanced color modes Magnification 2 4x 28x Battery Integrated rechargeable Li battery 3 hour continuous use after 4 hour charge Operating time up to approx 4 hours Charging time approx 3 hours depending on the set mode Power Adapter Input 110 240V Output 5V 3A ...

Page 45: ...invalidation of the warranty 4 Interventions from persons other than Reinecker Vision GmbH authorised specialists may lead to invalidity of warranty 5 Partial warranty is valid for light sources serving to illuminate the reading object batteries and other parts subject to wear and tear 6 If a warranty claim is necessary the system has to be returned to the manufacturer in Alsbach Hähnlein or to yo...

Page 46: ...46 Notes ...

Page 47: ...47 ...

Page 48: ...nlein customer service Erlenweg 3 DE 64665 Alsbach Hähnlein Tel 49 6257 9311 0 Fax 49 6257 9311 8230 E Mail international reineckervision de www reineckervision com Version 1 2 Stand 09 18 Art Nr 000 10 375 Änderungen und Druckfehler vorbehalten Bitte wenden Sie sich bei Fragen oder einem Servicefall direkt an unser Hauptwerk in Alsbach Hähnlein oder an eine unserer Niederlassungen Bei im Ausland ...

Reviews: