9
8
ENGLISH ENGLISH
SETTING UP & CONNECTIONS
1. Attach the Turntable -1- to the motor. To do so, place the turntable above the Hub -2-.
2. Place the supplied slipmat above the Hub -2- onto the Turntable -1-.
3. Place the Balancing Weight -16- onto the Pick-Up Arm -11-.
NOTE! The Balancing Weight Scale -15- must face toward the DJ.
4. Screw the Headshell with the Pick-Up System -8- into the Pick-Up Arm -11-. The Pick-Up System is easy to exchange if required:
a) First loosen the fastening screw on the headshell and disconnect the cable of the supplied pick-up system.
b) Remove the old pick-up system from the headshell.
c) Now connect the leads of the pick-up system and observe the assignment of wires:
d) Tighten the fastening screws to the headshell.
5. Insert the Dust Guard into the Hinges -17-.
6. Via the Phono/Line Switch -19- select the desired output signal and connect the RP-2000 USB MK2 to the corresponding inputs of your mixer.
7. Connect the Mains Connection -21- to a power outlet.
OPERATION
1. BALANCING WEIGHT
Bring the Pick-Up Arm Lift -13- into the „DOWN“ position. Guide the Pick-Up Arm -11- just in front of the Turntable -1-. Adjust the Balancing Weight
-16- by turning it clockwise as such that the pick-up arm does not lean up nor down, i.e. it should be balanced in parallel position to the record.
Then return the Pick-Up Arm to its rest -12-. Set the Balancing Scale -15- of the balancing weight as such that the „0“ position is above the marked
line. Continue turning the balancing weight clockwise until the scale indicates the value which corresponds to the recommended stylus force of
the pick-up system.
2. ANTI-SKATING WHEEL
Adjust the Anti-Skating Wheel -14- as such that the value of the stylus force corresponds to the stylus force of the pick-up system.
3. POWER ON
After carrying out all connections turn on the device with the ON/OFF Switch -4-; the turntable‘s illumination is activated.
4. PLAY
Place a record onto the slipmat on the Turntable -1-. Use the 33/45 Selectors -7- to set the correct speed. The LED of the respective selector lights
up. Activate the START/STOP Button -5-. Remove the headshell with the Pick-Up System -8-. Now bring the Pick-Up Lift -13- into the “UP” position
and move the Pick-Up Arm -11- just above the desired position of the record. Then bring the Pick-Up Lift -13- “Down” so that the Pick-Up Arm -11-.
is lowered into the vinyl groove.
NOTE! It is possible to leave the pick-up lift permanently in a “Down” position and to lower the pick-up arm manually onto the desired position.
When doing so be sure not to damage the stylus of the pick-up system.
5. STYLUS ILLUMINATION
Use switch -6- to activate the stylus illumination if required to be able to see the grooves of the vinyl more clearly. Deactivate the stylus illumina
-
tion by pressing the lamp down until it locks into place.
6. RPM FINE-TUNING
Use the Pitch Fader -9- to infinitely adjust the speed of the record. If you wish to play the vinyl in original speed bring the pitch fader into position
„+/- 0%“. The Quartz Lock LED -10- indicates in red for original RPM, and the LED goes out when disgressing.
Colour:
Channel and Polarity:
White (L+)
left, plus terminal
Blue (L-)
left, minus terminal
Red (R+)
right, plus terminal
Green (R-)
right, minus terminal
7. AUDIO OUTPUT VIA USB
The RP-2000 USB MK2 disposes of an integrated audio interface which makes it possible to digitize your vinyl in high quality.
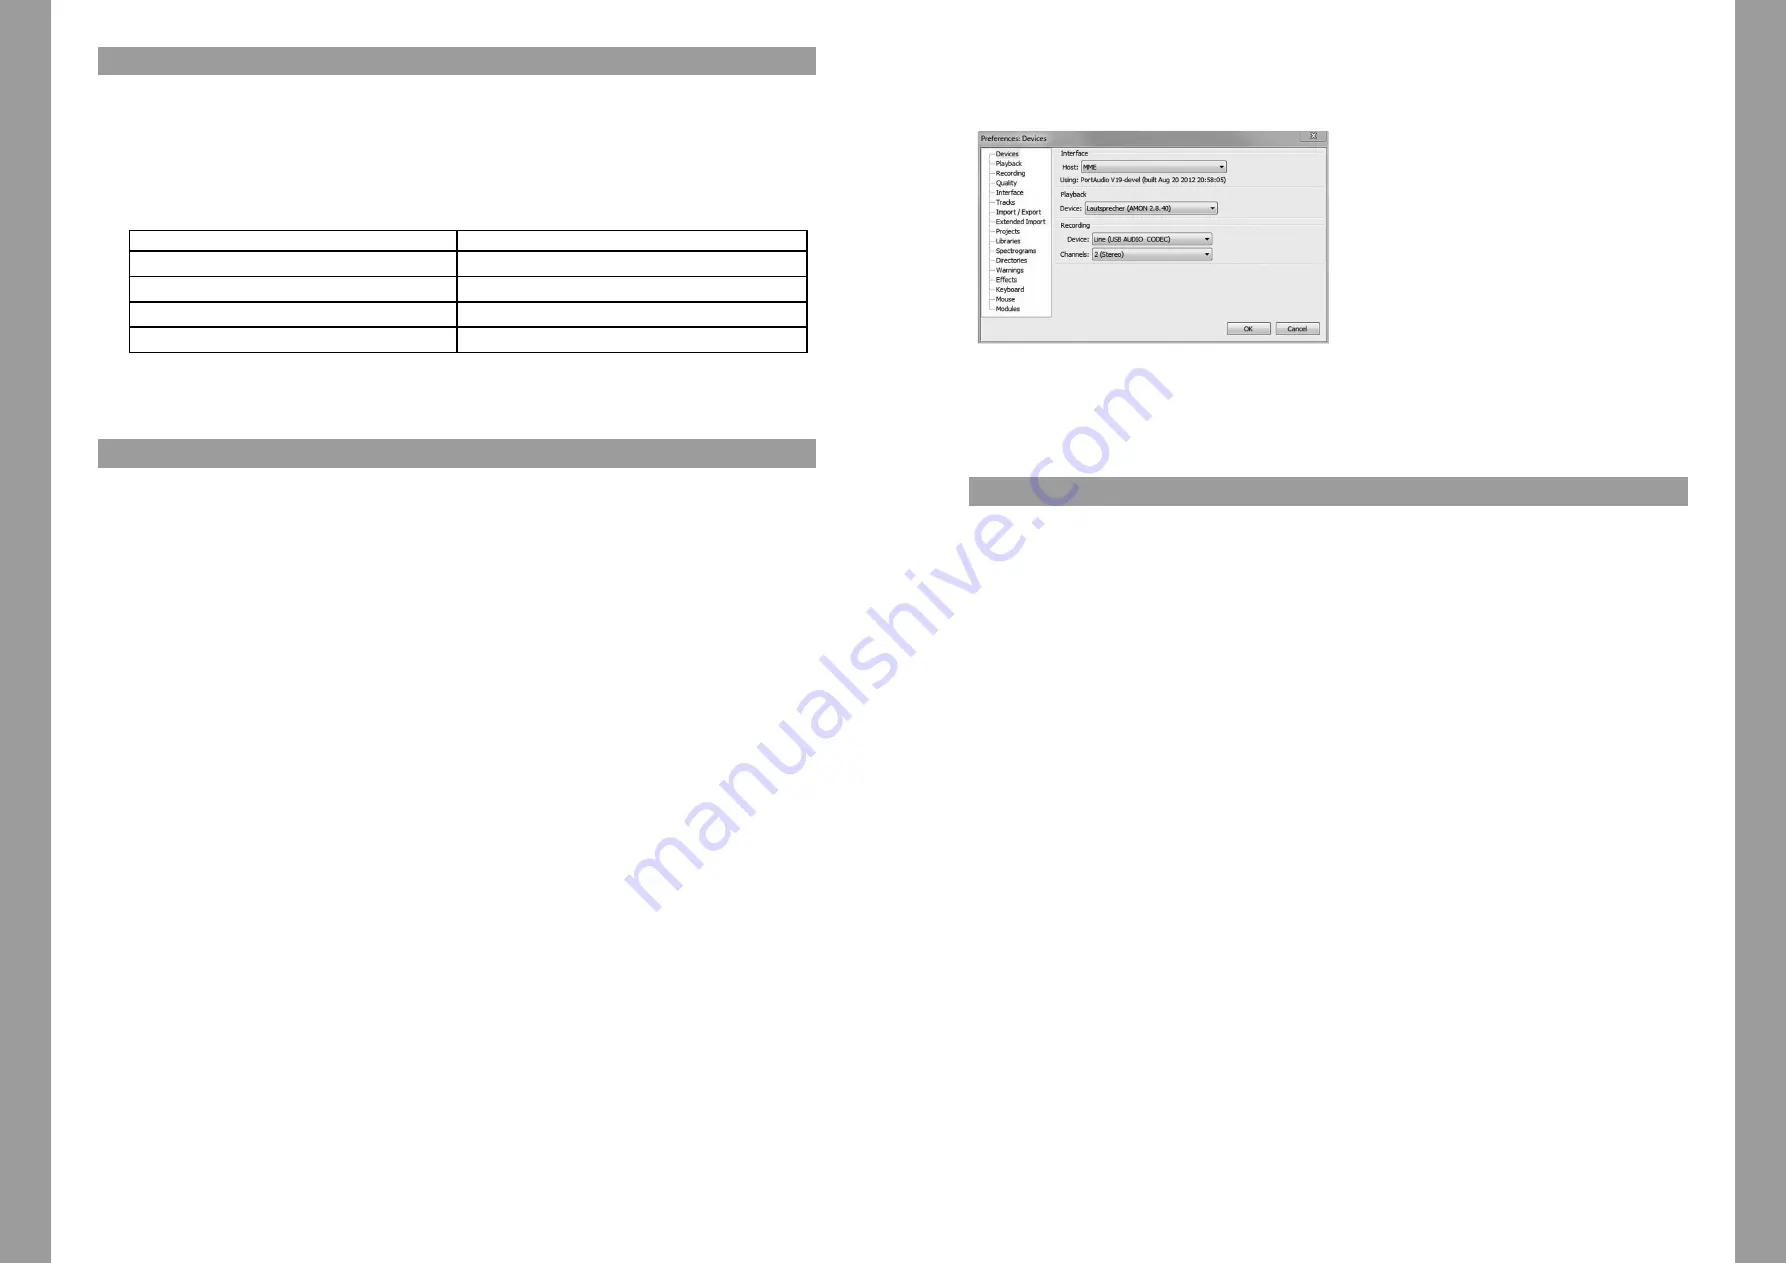
Connect the USB Port -20- of the RP-2000 USB MK2 to a computer. Start a recording software, for example Audacity (freeware).
Open the settings and select the RP-2000 USB MK2 as device under the option recording (audio input).
The RP-2000 USB MK2 is shown as ‘LINE (USB Audio Codec)‘.
Activate recording and then play your desired vinyl.
The RP-2000 USB MK2‘s output will now be recorded.
TECHNICAL SPECIFICATIONS
Type: .................................................. 2 speeds, fully manual
Drive: ................................................. direct drive
RPM: .................................................. 33 1/3 and 45 RPM
Start/Stop time: .............................. 1 sec.
Starting torque: ............................... > 1000 g/cm
Flutter: .............................................. < 0.15% WMRS
S/N Ratio: ......................................... > 50 dB (DIN-B)
Dimensions: ...................................... 450 x 352 x 144 mm
Weight: ..............................................
6.76 kg
RIAA: ................................................ 20 Hz – 20 kHz +1/-3 dB
Phono Output Level: .....................
1.7 ~ 3.6 mV at 1 kHz 5 cm/sec
Line Output Level: .........................
102 ~ 216 mV at 1 kHz 5 cm/sec
Power Supply: .................................
115/230 V, 60/50 Hz
Power Consumption: ..................... 13 Watts
USB Function: ................................. USB rec. function
A/D, D/A: ..........................................
16 bit, 44.1 kHz or 48 kHz USB selectable
Computer Interface: ...................... USB 1.1 compliant for Windows and Mac OSX
Reloop
Global Distribution GmbH, Schuckertstr. 28, 48153 Muenster / Germany
Fax: +49-251.6099368
Subject to alterations.
Illustrations similar to original product.
Misprints excepted.
ENGLISH
ENGLISH
Summary of Contents for RP2000MK2
Page 10: ...19 18 NOTES NOTES ...


