background image

Change of batteries for the lock body

Lock Body

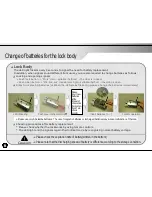
The LED light flickers every 4 seconds to signal the need for battery replacement.
In addition, when signals sound different from usual, you are also required to change batteries as follows:

Locking and opening signals

* Push lock button→ "Pi~ik" (two-syllable rhythms) →the door is locked.
* Push open button →"Pik, pik, pik" (repeated single-syllable rhythm) →the door is open.

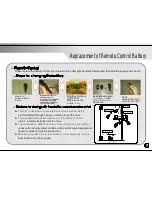
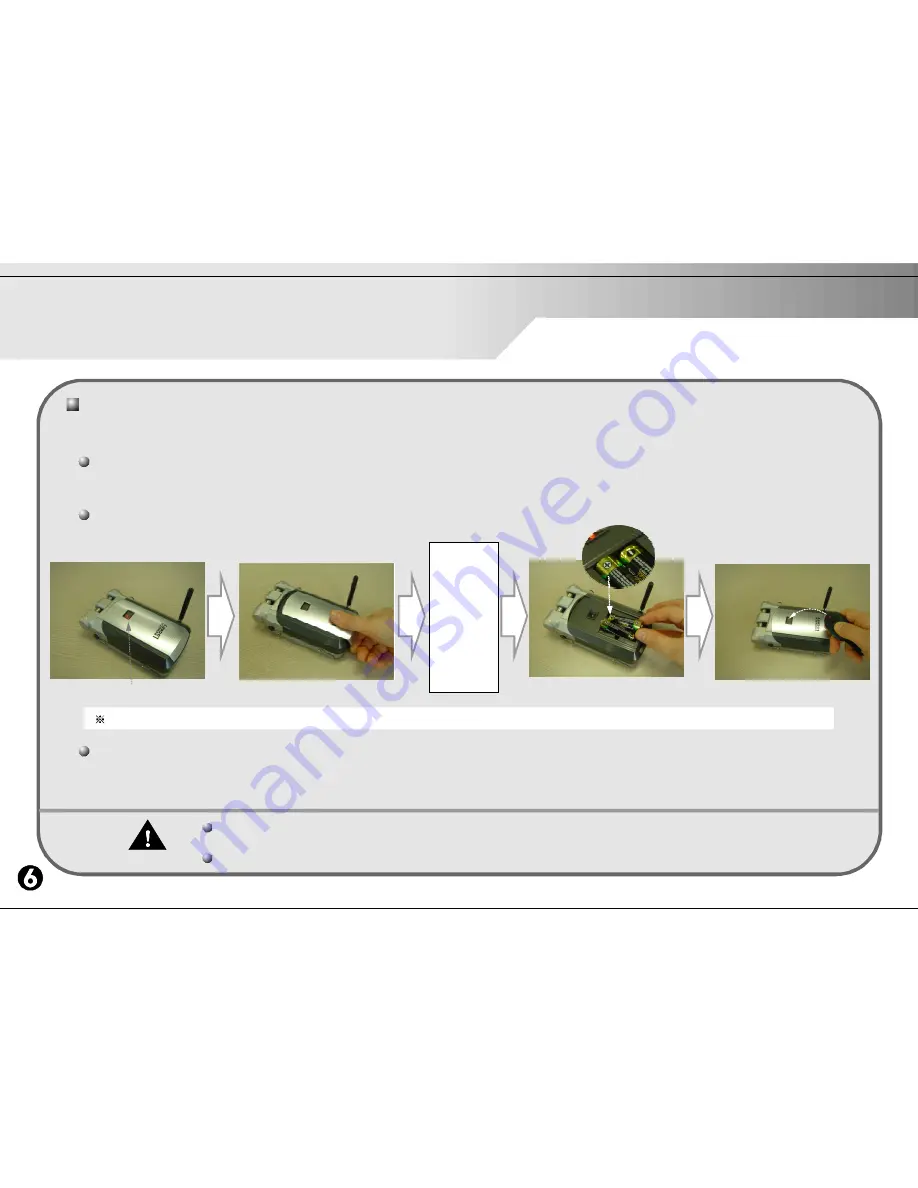
Steps for replacing batteries [※ When the LED starts flickering please change the batteries immediately]

Please
insert new
batteries
at the
interval of
10seconds
(for protec-
tion of ele-
ctronic
circuit.)

LED flickering

Push cover in the direction▼

Insert batteries [+,-]

confirm operation

Please use only AA alkaline batteries. The use of magnetic batteries or recharged batteries may induce malfunction of the lock.

Checking procedures after battery replacement
* Please check whether the lock works by using remote controls.
* The LED light and the signals regain their normal mode by recognizing normal battery voltage.

Please check the expiration date of battery(written in the bottom)

Please note that the discharging speed of battery is different according to the storage condition.

Causion

Summary of Contents for Next Generation Wireless Door Lock with Remote Control

Page 1: ...eless Door Lock with Remote Control User Instruction Manual Please read carefully the following instruction for your safety before using the product It is important to understand how this lock works t...

Page 2: ...you correctly place two batteries according to the signs of and And you are recommended not to replace batteries in presence of children Please take out batteries from the lock body when the lock is...

Page 3: ...eless Door Lock with Remote Control User Instruction Manual Please read carefully the following instruction for your safety before using the product It is important to understand how this lock works t...

Page 4: ...pik pik repeated single syllable rhythm the door is open If the remote control does not work please press the button again Although it is possible to acknowledge the locking and opening of the door by...

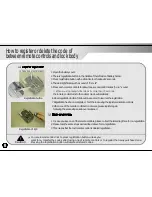
Page 5: ...y Remote Control Components NAME OF EACH PART hand lever latch with assistant busing assembled remote controller front plate rubber packing LED window signaling the time of batter change Battery Inser...

Page 6: ...ries immediately Please insert new batteries at the interval of 10seconds for protec tion of ele ctronic circuit LED flickering Push cover in the direction Insert batteries confirm operation Please us...

Page 7: ...rom the door The transmission distance of the remote control from the outdoor varies with environmental conditions and electric wave background Same conditions from the inside also Wireless transmissi...

Page 8: ...with a sound of Pi ri lik 5 Press each remote controls for about one second until it makes pi ik sound When you stop taking further steps for more than 15 seconds the remote control turns to the norma...

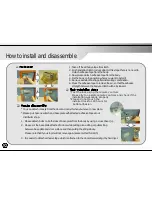
Page 9: ...allation place with alcohol Impurities will undermine adhesion Inserting busing in the hole of latch Install the lock after inserting assistant busing in the hole of latch and combining the body with...

Page 10: ...mote controls and check if the installation was made properly Please do not touch the installed lock for 24 hours for better adhesion You can detach it easily from the door and carry it when you move...

Page 11: ...dew condition 5 80 in no dew condition Number of registered remote controller 16 different codes can be registered respectively ASK SINGLE CONVERSION 315MHz 500KHz lithium battery CR2032 12 months ba...

Page 12: ...When failure or damage was caused by improper use attachment dismantlement or modification d When failure or damage was caused by careless handling or accidental dropping after purchase e Change of c...

Reviews: