24
N1-HV/AC Series
User Manual
25
N1-HV/AC Series
User Manual
5.8 Inverter manipulation
Start inverter:
Start inverter after checking all below steps:
·
Check that the device is fixed well on the wall.
·
Make sure all the PV wiring and the AC wiring are completed.
·
Make sure the meter are connected well.
·
Make sure the battery is connected correctly.
·
Turn on the external AC, DC switch.
·
Turn on the DC switch to the ‘ON’ position.
·
Set sysswitch on the screen of the inverter to ‘Turn on’
·
Inverter will start automatically when the PV panel generate enough energy or the battery is charged.
·
Check the status of LED and LCD screen, first LED should be green and the LCD screen should display the main interface.
·
If first LED is not green please check the below:
-All the connections are right.
-All the external disconnect switches are closed.
-The DC switch of the inverter is in the ‘ ON ‘ positon.
·
Enter the setting interface.
·
Set the safety standard as page 28; Set the system time as page 27; PV connection mode as page 28; Set the work mode
as page 27; Set the communication address as page 28; Set the EPS as page 26; Set WIFI according to the wifi manual;
NOTE!
Please set the inverter if it is the first time to start up.
Above steps is for the regular start-up of the inverter. If it is the first time to start up the
inverter , you need to start up the inverter.
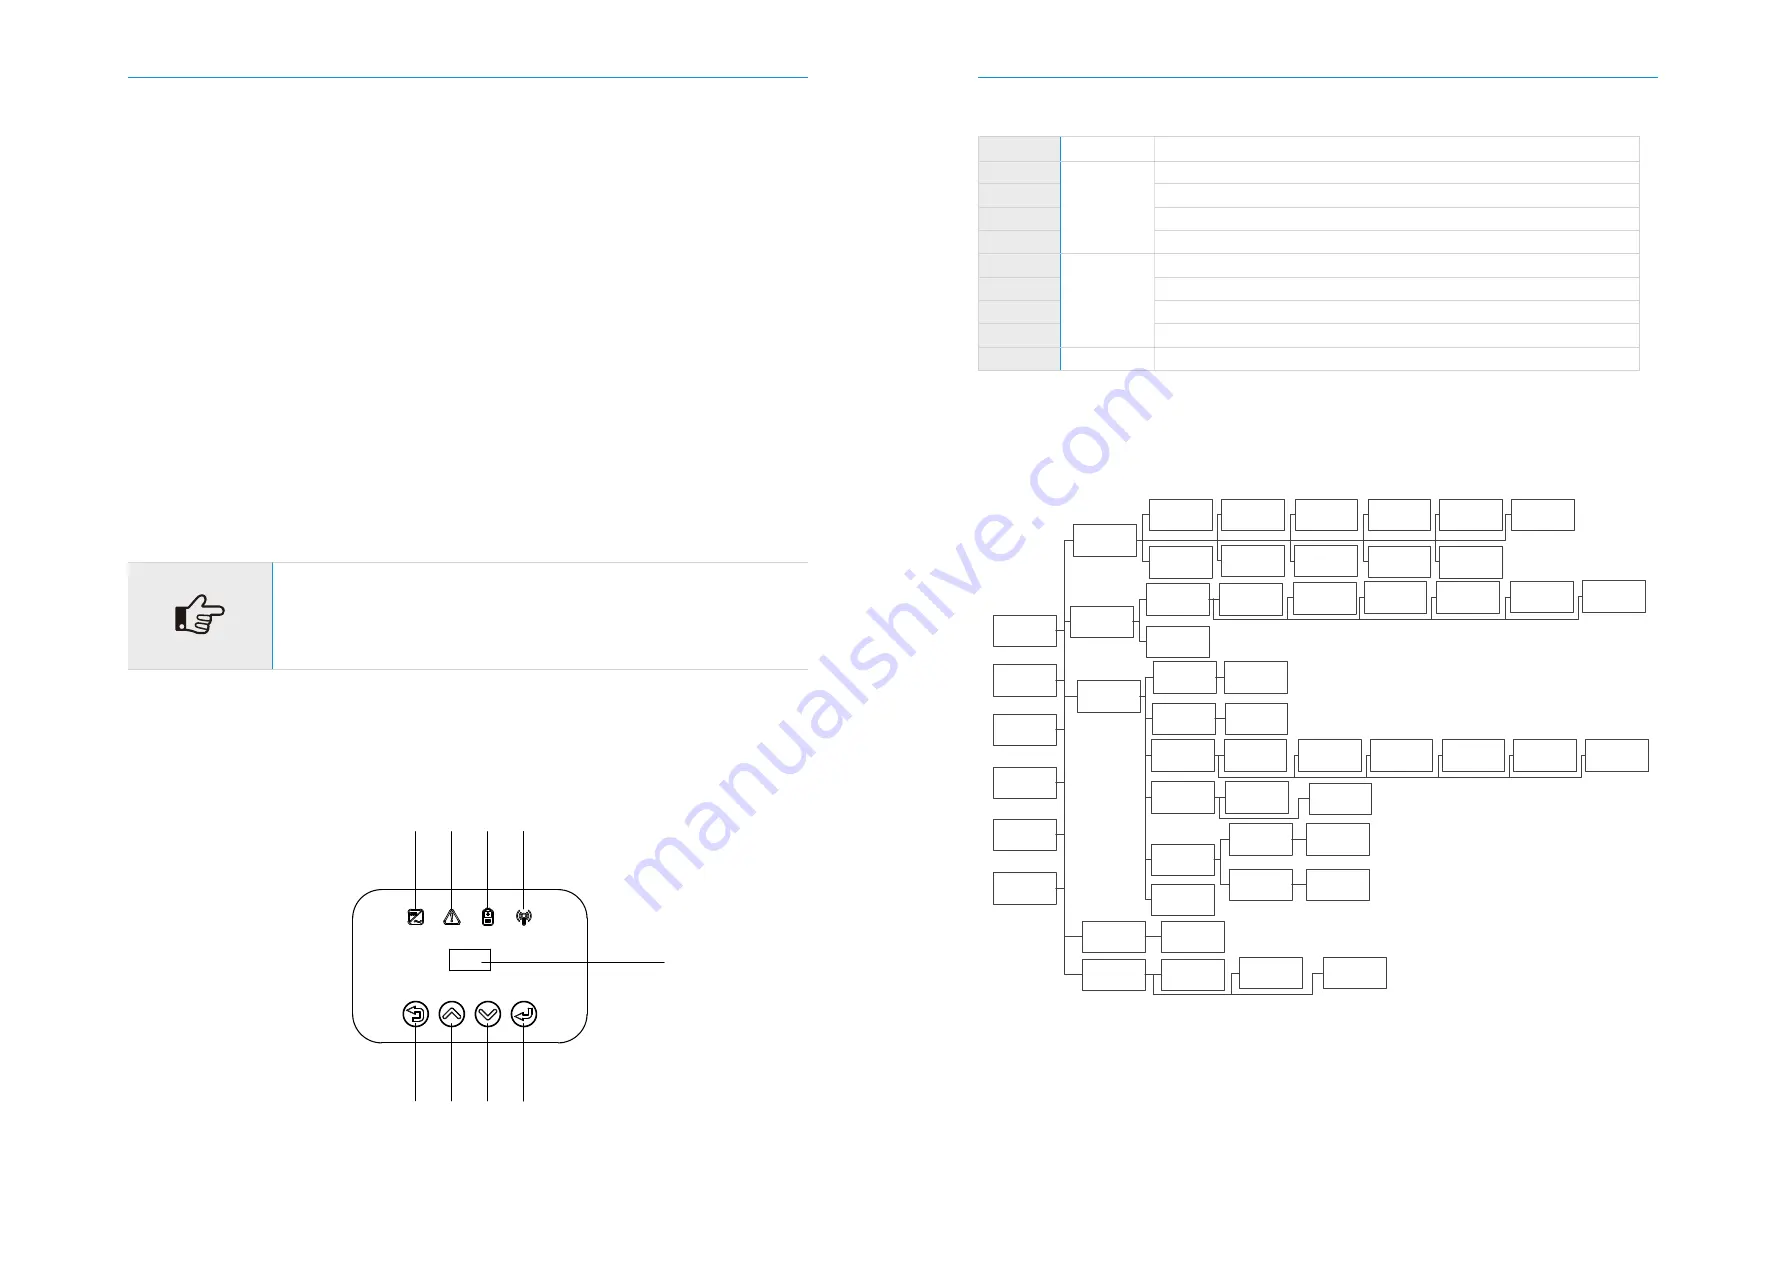
6 Operation method
6.1 Control panel
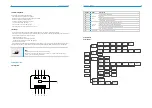
A B C D
J
E F G H
6.2 LCD function
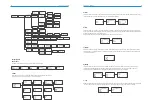
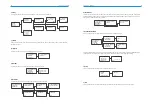
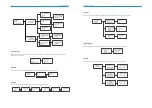
Menu structure :
===Comm Addr===
Local Addr
>Meter Addr
===Comm Addr===
>Local Addr
Meter Addr
===Local Addr===
>001
OK
===Meter Addr===
>001
OK
=====Settings=====
Work Mode
PV Config
>Comm Addr
=PV Connection=
>Comm
OK
=PV Connection=
>Multi
OK
=====Settings=====
Data&Time
Work Mode
>PV Config
Normal
Power
W
Battery: %
XX-XX XX:XX:XX
Normal
Ppv: W
Pbat
W
Normal
Pac: W
Pfeed
W
Pload: W
Normal
ENV_S:
℃
Charger_S
℃
Inv_S:
℃
Normal
WorkMode:
Self Use
Normal
Boost_S:
℃
======Menu======
Status
History
>Setting
=====Settings=====
Language
Data&Time
>Work Mode
===Work Mode===
>Self Use
OK
===Work Mode===
>Remote Use
OK
===Work Mode===
>Force Time Use
OK
===Work Mode===
>Backup Use
OK
===Work Mode===
>Feedin Use
OK
===Work Mode===
>FFR Use
OK
=====About=====
Mode:
6.0kW-Hybrid
=====About=====
InverSN:
XXXXXXXXX
=====About=====
M Ver: Vx.xx
S Ver: Vx.xx
H Ver: Vx.xx
=====Menu=====
Setting
SysSwitch
>About
====SysSwitch====
>Turn On
OK
=====Menu=====
History
Setting
>SysSwitch
To
‘
Advanced
’
=====Solar=====
Vpv1: V
Vpv2: V
=====Solar=====
Ipv1: A
Ipv2
A
=====Solar=====
Ppv1
W
Ppv2: W
Imod: Multi
=====Grid=====
Vac: V
Iac
A
Pac: W
=====Grid=====
Fac: Hz
Pfeed
W
=====Battery=====
Bsoc: %
Btmp
Bstat
℃
=====BMS=====
Vbat: V
Ibat
A
Vchr
V
=====BMS=====
Vdis: V
Ichr
A
Idis
A
=====EPS=====
Veps: V
Ieps
A
Peps: W
=====EPS=====
Feps:
Hz
======Menu======
>Status
History
Setting
=====Charger=====
Vbat: V
Ibat
A
Pbat: W
=====History=====
>Inver Total
kWh
===Error Logs===
01: xx-xx-xx
xx:xx:xx
Xxx Fault
=====Menu=====
Status
>History
Setting
====History====
>Yield Logs
Error Logs
=====History=====
>Eps Total
kWh
=====History=====
>Solar Total
kWh
=====History=====
>Batdischr Total
kWh
=====History=====
>Batchr Total
kWh
=====History=====
>Charge Total
kWh
====Language====
>English
OK
=====Settings=====
>Language
Data&Time
Work Mode
===Data&Time===
Data:xx-xx-xx
Time:xx:xx:xx
OK
=====Settings=====
Language
>Data&Time
Work Mode
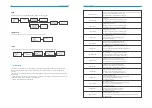
Object
Name
Indicator
LED
Function
Button
LCD Screen
Green: Normal working Status.
Red: Fault.
Blue: Battery communication status.
Yellow: RS485 communication status.
ESC button: Leave from current interface or function.
Up button: Move cursor to upside or increase value.
Down button: Move cursor to downside or decrease value.
OK button: Confirm the selection.
Display the information of the inverter.
Description
A
B
C
D
E
F
G
H
J

