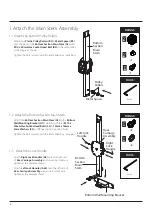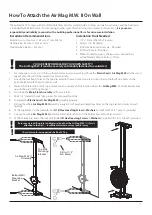
1-6. Locate the ideal fixing holes on wall for the Air Mag M.W. II attachment
•
Follow the installations of “
How To Attach The Air Mag M.W. II On Wall
“
for the next assembly on page 11.
FIXINGS:
FIXINGS:
x
8
FIXINGS:
TOOLS:
Air Mag. M.W. II
Assembly
8
Bottom
Section
Main
Stem
Top
Section
Main
Stem
Bottom Wall
Mounting
Bracket
Top Wall
Mounting
Bracket
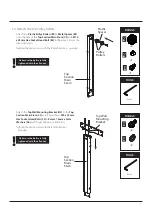
1-5 Attach the Top Section Main Stem
•
Loosen four
M10 x 35mm Socket Set Screws (C8)
attached on the
Bottom Section Main Stem
3 ~ 4
threads with provided 5 mm Allen Key carefully.
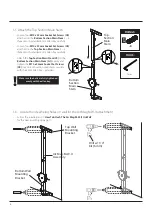
•
Loosen four
M10 x 35mm Socket Set Screws (C8)
attached on the
Top Section Main Stem
3 ~ 4
threads with provided 5 mm Allen Key carefully.
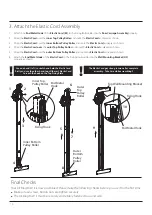
•
Attach the
Top Section Main Stem (C2)
to the
Bottom Section Main Stem (G1)
evenly and
tighten the
M10 x 35mm Socket Set Screws
(C8)
lose on both section main stems securely
with the 5 mm Allen Key – provided.
5mm
Drill w/ 1/ 4”
bit ( 6mm)
Make sure the bolts are fully tightened
evenly with the allen key.
!
Part
No.
C8


