9
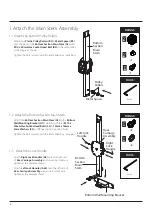
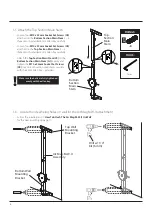
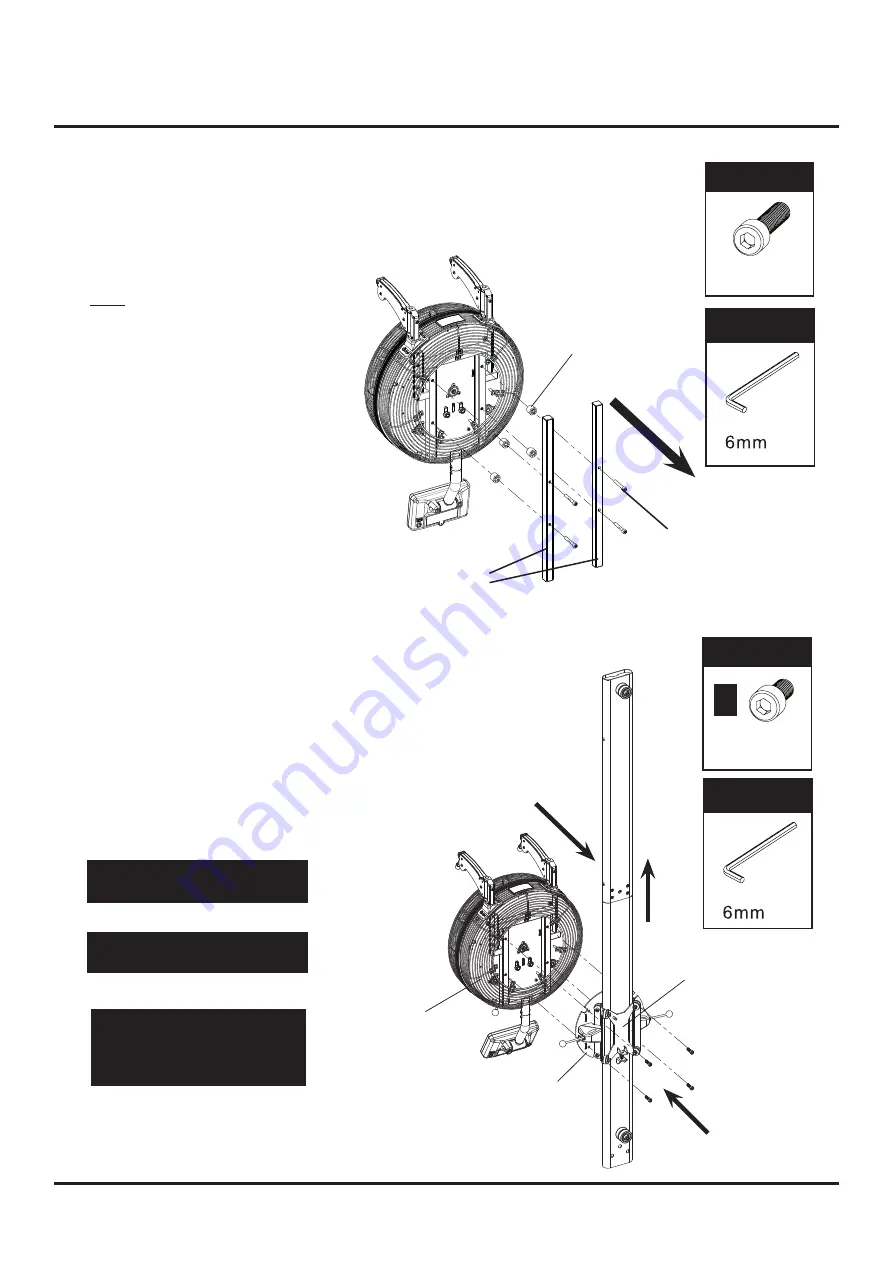
2. Attach the Air Mag M.W.
Be sure to fit the parts in the same
order as the diagrams shown.
!
Make sure the bolts are fully
tightened evenly with the allen key.
!
Part
No.
B8
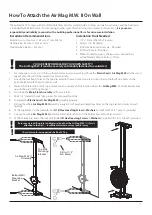
2-2. Attach the Air Mag. M.W.
•
Check and ensure the
Rear Carriage Assembly
is located in bot-
tom position of main stem.
•
Have someone to assist you to hold the
Air Mag M.W.
evenly and
attach it to the
Fixing Bracket
of the
Air Mag. M.W. II
attachment
with four
M8 X 25mm Hex Head Socket Bolts (S7)
as shown.
•
Tighten the bolts securely with the 6mm Allen Key - provided.
•
Pull the right side
Lock Handle (A3)
and raise the
Air Mag. M.W.
up to the top position of main stem and engaged.
Fixing
Bracket
FIXINGS:
FIXINGS:
x
4
FIXINGS:
TOOLS:
FIXINGS:
FIXINGS:
x
4
FIXINGS:
TOOLS:
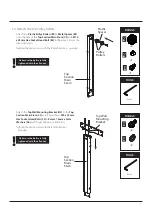
2-1. Remove the metal posts from the back of the Air Mag. M.W.
•
Loosen the four
M8 x 60mm Hex Socket Head Bolts
from the two metal posts as shown.
Note:
The four Hex Socket Head Bolts,
four Plastic Spacers and the two
Metal Posts are used for packaging
protection purpose, which won’t be
used again during the assembly.
Plastic
Spacers
Metal
Posts
M8 x 60mm Hex
Socket Head Bolt
Air Mag.
M.W.
The Air Mag. M.W. is heavy !!
Please Take Care while raising it
upward and moving it downward
on main stem.
!
Rear
Carriage
Assembly
1
2
3
Part
No.
S7


