background image

RX72M Group 

Single-Chip Motor Control via EtherCAT Communications 

R01AN5434EJ0110  Rev.1.10 


Page  33  of 85 

Aug.31.2020 


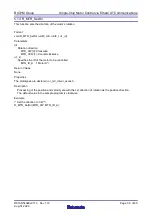
5.7  R_MTR_SetPositionStatus 

This function sets the input method of the position command value. 

 
Format 
void R_MTR_SetPositionStatus(uint8_t u1_pos_status) 

 
Parameters 
u1_pos_status 

Input method 

MTR_POS_CONST(0): 0 command 

MTR_POS_STEP(1): Direct input (step input) 

MTR_POS_TRAPEZOID(2): Command value creation 

Return Values 
None 
Properties 
The prototypes are declared in r_mtr_driver_acces.h. 
Description 
The default value for the input method of the sample program is MTR_POS_TRAPEZOID. 
Example 
/* set position state "STEP"*/ / 

R_MTR_SetPositionStatus(MTR_POS_STEP); 

Summary of Contents for RX72M Series

Page 1: ...which is used in the RX family products that incorporate an EtherCAT slave controller ESC for industrial Ethernet communications The FIT module itself does not include the SSC Therefore generate the executable code after obtaining the sample SSC from the EtherCAT Technology Group ETG Association This FIT module is hereinafter referred to as the EtherCAT FIT module Target Devices RX72M group device...

Page 2: ...2 State Transitions 20 3 3 State Transition Functions 21 3 4 Object Dictionary 23 4 Motion Control Parameters 25 4 1 Velocity Parameters 25 4 2 Acceleration Parameters 25 4 3 Conversion of Units by the RMW 25 5 API Functions 27 5 1 Overview 27 5 2 R_MTR_InitControl 28 5 3 R_MTR_SetUserifMode 29 5 4 R_MTR_ExecEvent 30 5 5 R_MTR_ChargeCapacitor 31 5 6 R_MTR_GetLoopModeStatus 32 5 7 R_MTR_SetPosition...

Page 3: ...ts 55 5 30 R_MTR_SetDecelerationUnits 56 6 Checking Operation of the Application on the Solution Kit 57 6 1 Operating Environment 57 6 2 Operating Environment Settings and Connection 58 6 3 Building the Sample Program 62 6 4 Importing the Sample Project into the e2 studio 64 6 5 Programming and Debugging 65 6 6 Connection with TwinCAT Writing the ESI File 67 6 7 Checking the Connection with CODESY...

Page 4: ... V system inverter board Integrated development environment IDE Renesas e2 studio V 7 5 0 or later IAR Embedded Workbench for Renesas RX 4 13 1 or later C compiler Renesas C C compiler package for RX Family V3 01 00 or later GCC for Renesas RX 4 8 4 201803 or later IAR C C compiler for Renesas RX version 4 13 1 or later Motor Permanent magnet synchronous motor with an incremental encoder from Lead...

Page 5: ... the motor by the EtherCAT communications program The units of position and velocity were converted to conform with the CiA402 object specifications EtherCAT communications rx72m_com_cia402 r01an4672ej0100 rx72m ecat Objects were added to fit the CiA402 drive profile Calls of API functions to control the motor The project included for the sample program is shown below In the following sections the...

Page 6: ...AT Communications R01AN5434EJ0110 Rev 1 10 Page 6 of 85 Aug 31 2020 2 System Overview 2 1 Hardware Configuration The following figure shows the hardware configuration of the environment where the sample program runs Figure 2 1 Hardware Configuration ...

Page 7: ...og values P30 START STOP toggle switch P02 ERROR RESET toggle switch P71 LD1 on off control PN4 LD2 on off control PH0 LD3 on off control P40 AN000 U phase current measurement P42 AN002 W phase current measurement PE1 MTIOC3B PWM output Up PE2 MTIOC4A PWM output Vp PE3 MTIOC4B PWM output Wp PE0 MTIOC3D PWM output Un PE5 MTIOC4C PWM output Vn PE4 MTIOC4D PWM output Wn P31 IRQ1 Hall U phase input PD...

Page 8: ...ve data input bit 2 P74 CAT0_ERXD1 4 bit receive data input bit 1 P75 CAT0_ERXD0 4 bit receive data input bit 0 PL7 CAT0_MDIO Management data I O PN3 CAT1_RX_ER Receive error input P84 CAT1_LINKSTA Link status input from the PHY LSI PQ2 CAT1_RX_DV Received data valid input PL6 CAT0_TX_EN Transmit enable output PN2 CAT1_TX_CLK Transmit clock input PH4 CATLEDSTER Output for RUN LED part of STATE LED...

Page 9: ...6 CAT1_ETXD1 4 bit transmit data output bit 1 P11 CATSYNC1 SYNC1 signal output PM6 CAT0_TX_CLK Transmit clock input PK0 CAT0_MDC Management data clock output P34 CAT0_LINKSTA Link status input from the PHY LSI P82 CATI2CDATA EEPROM I2C data input output Table 2 4 Other Pin Interface Pin Name Description P12 RXD2 SCI2 receive data input pin P13 TXD2 SCI2 transmit data output pin PH2 Device ID DIP S...

Page 10: ...r_driver_ecat_access c Definitions of functions for access by the EtherCAT communications program common r_mtr_common h Common definition r_mtr_units h Definitions of units r_mtr_filter h r_mtr_filter c General purpose filter function definition r_mtr_fluxwkn h r_mtr_fluxwkn obj Definition of a function related to magnetic flux weakening control r_mtr_pi_control h r_mtr_pi_control c PI control fun...

Page 11: ...on r_mtr_speed_observer h r_mtr_speed_observer obj Velocity observer function definition driver inverter r_mtr_ctrl_mrssk h r_mtr_ctrl_mrssk c Inverter board dependent function definition mcu r_mtr_interrupt c Interrupt function definition r_mtr_ctrl_rx72m h r_mtr_ctrl_rx72m c MCU specific function definition r_mtr_ctrl_mcu h MCU common definition sensor r_mtr_ctrl_encoder h r_mtr_ctrl_encoder c E...

Page 12: ...dule src hal renesashw h renesashw c ESC access function definition phy phy h phy c PHY control function definition targets rx72m r_ecat_setting_rx72m c MCU specific function definition utilities rx72m batch_files apply_patch bat Batch file for modifying the SSC source file RX72M_Motor_YYMMDD patch Modification patch for the single chip motor control program esi RX72M EtherCAT MotorSolution xml ES...

Page 13: ... the Module Layer Layer Module Related File Description of File Application layer EtherCAT application cia402sample c Application layer for the EtherCAT communications program This has the functions of passing commands from the EtherCAT master to the motor control program and passing indicators of state from the motor control program to the EtherCAT master Middle layer EtherCAT interface module r_...

Page 14: ...RX72M Group Single Chip Motor Control via EtherCAT Communications R01AN5434EJ0110 Rev 1 10 Page 14 of 85 Aug 31 2020 Figure 2 2 Module Configuration of the Motor Control Program ...

Page 15: ...bxIn SyncMan2 SyncMan3 FMMU n FMMU n FMMU n FMMU n EtherCAT Slave Controller ESC ESC Address Space Registrers Mailbox Process Data EtherCAT Processing Unit And Auto Forwarder with Loop Back PHY Management MII Port0 MII Port1 Object Dictionary PDO SDO PDO Mapping Process Data Interface CiA402 Drive Profile Application Application Layer AL DataLink Layer DL Physical Layer PL CoE EoE FoE VoE CoE SSC ...

Page 16: ...000 ppr after multiplication by 4 4000 cpr Positional dead zone 1 Encoder incrementing or decrementing by one t 0 09 Frequencies specific to the control systems Current control system 300 Hz Velocity control system 30 Hz Position control system 10 Hz Protection stop processing The motor control signal outputs 6 lines are set to the inactive level in response to any of the following four conditions...

Page 17: ...ID Specified by the device ID DIP switch block 6 bits Explicit device ID Supported Device profile CiA402 device profile Sync manager 4 FMMU 3 Communications objects SDO service data object PDO process data object Synchronous mode SM2 event synchronous mode DC mode Form of providing the protocol stack The SSC tool project files for the sample program are provided A patch for the CiA402 application ...

Page 18: ... Moreover the finite state automaton FSA to define the internal and external behavior in every state is included To change the status set the control word object then status word which shows the current status reflects the result after transition The control word and various command values such as for velocity are assigned to RxPDO and the status word and various actual values such as for position...

Page 19: ... Modes Operating Mode Support Profile position mode Available Velocity mode frequency converter Not available Profile velocity mode Not available Profile torque mode Not available Homing mode Available Interpolated position mode Not available Cyclic synchronous position mode Available Cyclic synchronous velocity mode Available Cyclic synchronous torque mode Not available Cyclic synchronous torque ...

Page 20: ...s from Switched on to Operation enabled transition 4 The motor is deactivated at the times of transitions from Operation enabled to several other states transitions 5 8 9 However at the times of transitions from Operation enabled to Quick stop active transition 11 or the timing of transition to Fault reaction active transition 13 the application of torque is maintained Figure 3 2 CiA402 State Tran...

Page 21: ...lled when the state transition occurs Table 3 2 List of CiA402 State Transition Functions Transition No Function Name 1 CiA402_StateTransition1 2 CiA402_StateTransition2 3 CiA402_StateTransition3 4 CiA402_StateTransition4 5 CiA402_StateTransition5 6 CiA402_StateTransition6 7 CiA402_StateTransition7 8 CiA402_StateTransition8 9 CiA402_StateTransition9 10 CiA402_StateTransition10 11 CiA402_StateTrans...

Page 22: ...ts to appropriate values and end function calling in accord with the CiA402 standard When 1 is set as the return value the state transition has not proceeded Example TCiA402Axis pCiA402Axis UINT16 retval Transition1 retval CiA402_StateTransition1 pCiA402Axis CiA402_LocalError This function is called in response to the detection of an error specified in the CiA402 drive profile After this function ...

Page 23: ...Optional rw UINT32 No 0x6066 Following error time out Optional rw UIN16 No 0x606C Velocity actual value Mandatory csv ro INT32 TxPDO 0x6077 Torque actual value Optional ro INT32 No 0x607A Target position Mandatory pp csp rw INT32 RxPDO 0x607B Position rage limit Optional rw INT32 No 0x607C Home offset Optional rw INT32 RxPDO 0x607D Software position limit Optional c rw INT32 No 0x607F Max profile ...

Page 24: ...ations R01AN5434EJ0110 Rev 1 10 Page 24 of 85 Aug 31 2020 Index Object Name Category Access Data Type PDO Mapping 0x60FF Target velocity Mandatory csv rw INT32 RxPDO 0x6402 Motor type Optional rw UINT16 No 0x6502 Supported drive modes Mandatory all ro UINT32 No ...

Page 25: ...ng of velocity the acceleration and deceleration values are handled as fixed point numbers in 16 16 bit format after being multiplied by 216 i e 65536 For the conversion of unit from the number counted by the encoder count per second to the control parameter the number has to be multiplied by the square of the position cycle time slice and then by 65536 Since the control cycle is 500 us the accele...

Page 26: ...arget velocity as its definition of the acceleration Figure 4 1 shows how the acceleration changes from that for acc1 to that for acc2 by changing the acceleration time to reach the target velocity from t1 to t2 The acceleration at those times can be expressed by dividing the velocity by the acceleration times acc1 speed t1 acc2 speed t2 Figure 4 1 Acceleration Times and Acceleration Examples of c...

Page 27: ...set direction of motor rotation R_MTR_GetStatus Gets the state of system operation of the motor control program R_MTR_InputBuffParamReset Sets the buffer of variables for ICS input to the default value R_MTR_CtrlInput Copies an ICS input variable to the buffer of variables for ICS input R_MTR_SetVariables Sets the contents of the buffer of variables for ICS input as the motor control parameters R_...

Page 28: ...mat void R_MTR_InitControl uint8_t u1_id Parameters u1_id Specifies the ID of the motor to be controlled Note The sample program can only control a single motor MTR_ID_A Motor A Return Values None Properties The prototypes are declared in r_mtr_driver_acces h Description This function initializes the state of system operation and sets the default values of the motor control parameters Example Init...

Page 29: ... u1_user_mode Parameters u1_user_mode Enables or disables automatic updating MTR_DISABLE_AUTO_SET 0 MTR_ENABLE_AUTO_SET 1 Return Values None Properties The prototypes are declared in r_mtr_driver_acces h Description This function enables or disables periodic automatic updating in response to a signal from a timer Automatic updating is for the board user interface The default value in the sample pr...

Page 30: ...eing turned on MTR_EVENT_ACTIVE 0x01 This indicator corresponds to torque through the motor being turned off MTR_EVENT_ERROR 0x02 This indicator corresponds to the system detecting an error MTR_EVENT_RESET 0x03 This indicator corresponds to the operation being initialized or recovery from an error u1_id Specifies the ID of the motor to be controlled MTR_ID_A Motor A Return Values None Properties T...

Page 31: ...ted before starting motor control Format void R_MTR_ChargeCapacitor uint8_t u1_id Parameters u1_id Specifies the ID of the motor to be controlled MTR_ID_A Motor A Return Values None Properties The prototypes are declared in r_mtr_driver_acces h Description This function checks whether the inverter s main line voltage VDC has risen above 80 of 24 V DC and waits until it has without timing out Examp...

Page 32: ...pModeStatus uint8_t u1_id Parameters u1_id Specifies the ID of the motor to be controlled MTR_ID_A Motor A Return Values Control loop mode MTR_LOOP_SPEED 0 Velocity control MTR_LOOP_POSITION 1 Position control Properties The prototypes are declared in r_mtr_driver_acces h Description The default value of the control loop mode in the sample program is MTR_LOOP_POSITION Example uint8_t u1_status u1_...

Page 33: ...SetPositionStatus uint8_t u1_pos_status Parameters u1_pos_status Input method MTR_POS_CONST 0 0 command MTR_POS_STEP 1 Direct input step input MTR_POS_TRAPEZOID 2 Command value creation Return Values None Properties The prototypes are declared in r_mtr_driver_acces h Description The default value for the input method of the sample program is MTR_POS_TRAPEZOID Example set position state STEP R_MTR_...

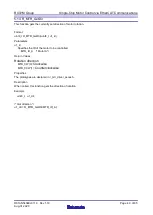
Page 34: ...void R_MTR_SetPosition int16_t s2_ref_position Parameters s2_ref_position Position command value deg Return Values None Properties The prototypes are declared in r_mtr_driver_acces h Description The position command value is a signed value in units of degrees The position after initialization of the position of the motor s magnet is 0 degrees Example Set reference position 180 deg R_MTR_SetPositio...

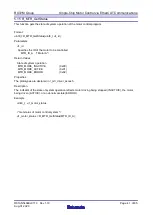
Page 35: ...on uint8_t u1_id Parameters u1_id Specifies the ID of the motor to be controlled MTR_ID_A Motor A Return Values Current position deg Properties The prototypes are declared in r_mtr_driver_acces h Description The current position value is a signed value in units of degrees The position after initialization of the position of the motor s magnet is 0 degrees Example int16_t s2_pos Get current positio...

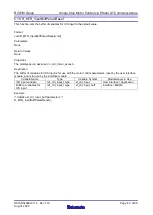
Page 36: ... ID of the motor to be controlled MTR_ID_A Motor A Return Values MTR_FLG_CLR 0 Positioning not completed MTR_FLG_SET 1 Positioning completed Properties The prototypes are declared in r_mtr_driver_acces h Description Checking of the completion of positioning is based on judging whether the difference between the target position and the current position is within a certain range Example If the posit...

Page 37: ...t16_t ref_speed Parameters ref_speed Velocity command value rpm Return Values None Properties The prototypes are declared in r_mtr_driver_acces h Description The unit of velocity command values is rpm A negative value will cause rotation in the opposite direction to forward rotation The available range of settings in the sample program is 2000 rpm to 2000 rpm Example Set reference position 2000 rp...

Page 38: ...s u1_id Specifies the ID of the motor to be controlled MTR_ID_A Motor A Return Values Current velocity rpm Properties The prototypes are declared in r_mtr_driver_acces h Description This function gets the velocity value at the time the function is executed The unit is rpm A negative value indicates rotation being in the opposite direction to that of forward rotation Example int16_t s2_speed Get cu...

Page 39: ...s dir Rotation direction MTR_CW 0 Clockwise MTR_CCW 1 Counterclockwise u1_id Specifies the ID of the motor to be controlled MTR_ID_A Motor A Return Values None Properties The prototypes are declared in r_mtr_driver_acces h Description Processing of the position and velocity are with the set direction of rotation as the positive direction The default value in the sample program is clockwise Example...

Page 40: ... Format uint8_t R_MTR_GetDir uint8_t u1_id Parameters u1_id Specifies the ID of the motor to be controlled MTR_ID_A Motor A Return Values Rotation direction MTR_CW 0 Clockwise MTR_CCW 1 Counterclockwise Properties The prototypes are declared in r_mtr_driver_acces h Description When called this function gets the direction of rotation Example uint8_t u1_dir Get direction u1_dir R_MTR_GetDir MTR_ID_A...

Page 41: ...the ID of the motor to be controlled MTR_ID_A Motor A Return Values State of system operation MTR_MODE_INACTIVE 0x00 MTR_MODE_ACTIVE 0x01 MTR_MODE_ERROR 0x02 Properties The prototypes are declared in r_mtr_driver_acces h Description The indicator of the state of system operation reflects motor driving being stopped INACTIVE the motor being driven ACTIVE or an abnormal state ERROR Example uint8_t u...

Page 42: ...prototypes are declared in r_mtr_driver_acces h Description The buffer of variables for ICS input is for use with the motor control parameters input by the user interface module and is for use by the interface module Variable Name Type Variable Symbol Module Layer in Use ICS input variable mtr_ctrl_input_t type st_ctrl_input User interface Application Buffer of variables for ICS input mtr_ctrl_inp...

Page 43: ...eters Pointer to an mtr_ctrl_input_t type structure Return Values None Properties The prototypes are declared in r_mtr_driver_acces h Description This function copies the mtr_ctrl_input_t type variable to which the pointer points to the buffer of variables for ICS input st_ctrl_input_buff It also sets the write enable flag u1_trig_enable_write among the motor control parameters Example Structure f...

Page 44: ...motor control parameters Format void R_MTR_SetVariables void Parameters None Return Values None Properties The prototypes are declared in r_mtr_driver_acces h Description This function sets the values of the various parameters set in the buffer of variables for ICS input st_ctrl_input_buff as the corresponding motor control parameters Example Set control input buffer to motor control structure mem...

Page 45: ...put as the given motor control parameters Format void R_MTR_AutoSetVariables void Parameters None Return Values None Properties The prototypes are declared in r_mtr_driver_acces h Description This function is executed in response to the 500 us cycle interrupt This setting is only valid when the setting of the automatic update mode parameter is enabled Example Set control input buffer to motor cont...

Page 46: ...function calculates the gain for the motor control parameters Format void R_MTR_CtrlGainCalc void Parameters None Return Values None Properties The prototypes are declared in r_mtr_driver_acces h Description This function calculates the gain for PI control IPD control and velocity observer control Example Motor gain calculation R_MTR_CtrlGainCalc ...

Page 47: ...olls the write enable flag u1_trig_enable_write among the motor control parameters If the flag is set the values in the buffer of variables for ICS input are set as the motor control parameters by the R_MTR_SetVariables function and calculation of the motor control parameter gain by the R_MTR_CtrlGainCalc function proceeds After the execution of these functions is completed the R_MTR_UpdatePolling...

Page 48: ...owing list Macro Name Value Type of Error MTR_ERROR_NONE 0x0000 No error MTR_ERROR_OVER_CURRENT_HW 0x0001 Overcurrent error H W detection MTR_ERROR_OVER_VOLTAGE 0x0002 Inverter main line overvoltage error MTR_ERROR_OVER_SPEED 0x0004 Rotation velocity error MTR_ERROR_HALL_TIMEOUT 0x0008 Not in use MTR_ERROR_BEMF_TIMEOUT 0x0010 Not in use MTR_ERROR_HALL_PATTERN 0x0020 Hole detection angle error MTR_...

Page 49: ...he motor to be controlled MTR_ID_A Motor A Return Values Profile status MTR_POS_STEADY_STATE 0 Stable state the current position is not changing MTR_POS_TRANSITION_STATE 1 Transitional state the current position is changing Properties The prototypes are declared in r_mtr_driver_ecat_acces h Description This function can be used to check whether the motor is or is not running under positional contr...

Page 50: ... void R_MTR_SetPositionUnits int32_t s4_position_units Parameters Position command value count Return Values None Properties The prototypes are declared in r_mtr_driver_ecat_acces h Description The position command value is a signed value number counted The position after initialization of the position of the motor s magnet is 0 degrees Example 2000 count is equivalent to 180 degrees R_MTR_SetPosi...

Page 51: ..._t s4_position_units Parameters Position command value count Return Values None Properties The prototypes are declared in r_mtr_driver_ecat_acces h Description The position command value is a signed value number counted This function is only for setting the value for the current position but does not control the motor It can be used for setting an offset in the initial position in homing mode Exam...

Page 52: ...tion Format int32_t R_MTR_GetPositionUnits uint8_t u1_id Parameters u1_id Specifies the ID of the motor to be controlled MTR_ID_A Motor A Return Values Current position count Properties The prototypes are declared in r_mtr_driver_ecat_acces h Description The current position value is a signed value number counted Example int32_t s4_current_pos_units Get position units s4_current_pos_units R_MTR_Ge...

Page 53: ...its uint8_t u1_id Parameters u1_id Specifies the ID of the motor to be controlled MTR_ID_A Motor A Return Values Get the Current velocity count s Properties The prototypes are declared in r_mtr_driver_ecat_acces h Description The current velocity value is a signed value number counted per second The value is converted to the 16 16 bit fixed point format Example int32_t s4_speed_units Get speed uni...

Page 54: ...oid R_MTR_SetSpeedUnits int32_t s4_speed_units Parameters Velocity command value count s Return Values None Properties The prototypes are declared in r_mtr_driver_ecat_acces h Description The velocity command value is a signed value number counted per second The value is converted to the 16 16 bit fixed point format Example 4 369 066 count s is equivalent to 2000 rpm R_MTR_SetSpeedUinits 4369066 ...

Page 55: ...s2 Format void R_MTR_SetAccelerationUnits uint32_t u4_acceleration_units Parameters Acceleration command value count s2 Return Values None Properties The prototypes are declared in r_mtr_driver_ecat_acces h Description The acceleration command value is a signed value in count s2 The value is converted to the 16 16 bit fixed point format Example Set acceleration 10 cout s2 R_MTR_SetAccelerationUnit...

Page 56: ...uint32_t u4_deceleration_units Parameters Deceleration command value count s2 Return Values None Properties The prototypes are declared in r_mtr_driver_ecat_acces h Description The deceleration command value is a signed value in count s2 The value is converted to the 16 16 bit fixed point format Note The sample program does not use the deceleration command value in motor control Example Set decele...

Page 57: ...Item Description Boards to be used RX72M CPU board TS TCS02796 from Tessera Technology RX23T inverter board RTK0EM0006S01212BJ Motor encoder I F board CPU RX CPU RXv3 Operating voltage 24 V Communication protocol EtherCAT Integrated development environment CCRX compiler V3 01 00 or later e2studio V7 5 0 or later Emulator Renesas E2 Lite SSC tool Provided by the EtherCAT Technology Group ETG Slave ...

Page 58: ...phase power lines of the motor to the U V and W phase outputs of the inverter board as shown below 1 A Connect the brown line of the motor to the U phase inverter 1 B Connect the blue line of the motor to the V phase inverter 1 C Connect the black line of the motor to the W phase inverter Figure 6 1 Connection of the Three Phase Power Lines 2 Connect the motor encoder to the encoder interface I F ...

Page 59: ... points of the encoder I F board and CPU board as shown below Figure 6 3 Connection of the 5 V Power Supply 4 Connect the inverter board and CPU board as follows Attach the CPU board to the inverter board Connect the ICS cable between the CPU board and the inverter board Figure 6 4 Connection of the CPU Board and Inverter Board 5 V cable ICS cable ...

Page 60: ... Aug 31 2020 5 Connect the power supply to the inverter board as follows Figure 6 5 Connection of the Power Supply for the Inverter 6 The overall configuration of the connected parts is shown below Figure 6 6 Overall Configuration 24 V AC adapter Motor Inverter output Encoder I F 24 V AC adapter CPU board ...

Page 61: ...he inverter board are shown below The power is supplied through the main switch Connect the ICS I F when using the RMW Renesas Motor Workbench SW1 and SW2 are not used in control as covered by this manual Figure 6 7 Details of the Inverter Board 24 V AC adapter Debugger I F ICS I F Main switch Inverter output pin SW1 SW2 RJ45 connector ...

Page 62: ... you must obtain the EtherCAT Slave Stack Code SSC tool The EtherCAT Technology Group ETG provides the SSC package 1 Double click on the SSC project file of the sample program to activate the SSC tool ecat_cia402_motor_rsskrx72m src smc_gen r_ecat_rx utilities rx72m ssc_config RX72M EtherCAT CiA402 esp 2 Click on Project Create New Slave Files and then click on Current new Slave Files Start 3 When...

Page 63: ...ch exe in a folder that has a path executable from the command prompt http gnuwin32 sourceforge net packages patch htm 5 Right click on the apply_patch bat file and select Run as administrator Yes The patch file contains the RX specific modifications to the SSC source files ecat_cia402_motor_rsskrx72m src smc_gen r_ecat_rx utilities rx72m batch_files apply_patch bat 6 After the patch has been appl...

Page 64: ...elect an import wizard dialog box select General Existing Project to Workspace and click on Next 3 Select the Select root directory checkbox in the Import Project dialog box and click on Browse 4 Select ecat_cia402_motor_rsskrx72m which is the sample project for the communications board and click on Open Check ecat_cia402_motor_rsskrx72m indicated under Project and click on Next to import the proj...

Page 65: ...tton hammer icon and select Hardware Debug from the drop down menu The project is built by e2studio Check that the console does not indicate any errors in building 2 Once building is completed start debugging by clicking on the arrow next to the Debug button insect icon and selecting Debug Configurations The project is built by e2studio Once the build is completed start debugging by clicking the a...

Page 66: ...networks and click on Allow access 5 The user account control UAC dialog box may be displayed Enter your administrator password and click on Yes 6 If a dialog box recommending a change of the perspective is displayed in the confirmation dialog box for switching perspectives select the Always use this setting checkbox and click Yes 7 The green ACT LED on the E2 Lite debugger is always on After down...

Page 67: ... utilities rx72m esi RX72M EtherCAT MotorSolution xml 2 Add the TwinCAT driver through the following procedure This is only required the first time From the Start menu select TWINCAT Show Realtime Ethernet Compatible Devices Select the connected Ethernet port from among the communications ports and press Install 3 Select the connected Ethernet port from among the communications ports to display it...

Page 68: ...Project in Templates to create a new project 6 Select Solution Explorer I O Device Scan 7 When Scan for boxes is executed the slave of Box1 will be detected and appear in Solution Explorer If the ESI file is not recognized it will be displayed as Box 1 PFFFFF In such cases select No for Activate Free Run to download the ESI file 8 If the data of another application has been written to the EEPROM r...

Page 69: ...10 Page 69 of 85 Aug 31 2020 9 Select ESC Access EEPROM Hex Editor Select Download from List 10 A list of ESI files registered with TwinCAT3 will appear Select the relevant file For the motor board select RX72M EtherCAT MotorSolution xml For the I O board select Renesas EtherCAT RX72M xml ...

Page 70: ... 10 Page 70 of 85 Aug 31 2020 11 Reflect the settings of the downloaded ESI file Since this requires resetting the slave temporarily delete the slave from the TwinCAT network After the slave has been reset the ESI file will be read by scanning it again Execute this with Activate Free Run ...

Page 71: ...k or right click Local Area Connection and select Properties 3 Select TCP IPv4 and click on the Properties button Set the IP address and subnet mask 6 7 2 Starting CODESYS 1 Start this from the Start menu of Windows selecting All Programs CODESYS CODESYS Gateway V3 or from the CODESYS icon which will have been created on the desktop after installation 2 Click on File Open Project and select the rx...

Page 72: ...on the PLC window and select Start PLC to start it The software PLC usually starts automatically as a service when Windows is activated The icon in the system tray at the bottom right of the desktop shows the operating status Note When the icons is not in the system tray Start the gateway server by selecting All Programs CODESYS CODESYS Gateway V3 CODESYS Gateway V3 from the Start menu If the icon...

Page 73: ..._motor_demo project for the first time 1 Using the EtherCAT slave device requires installing the ESI file that contains the device information Use Renesas EtherCAT RX72M xml and RX72M EtherCAT MotorSolution xml as the ESI files From the Tools menu of CODESYS select Device Repository 2 In the Device Repository dialog box click on Install to display the file dialog box Specify the ESI file RX72M Eth...

Page 74: ...ettings screen You can set up communications to connect the development environment to the software PLC service on this screen Click on the Scan network button on the Communication Settings tabbed page 2 The Select Device window will appear and an automatic search for the available devices on the local network will commence The procedure is successful when the software PLC service is detected Doub...

Page 75: ...ations R01AN5434EJ0110 Rev 1 10 Page 75 of 85 Aug 31 2020 3 If the scan was successful the PC will be registered with GateWay 4 Set the network to be used Double click on EtherCAT_Master to open the General screen for the corresponding settings Available state ...

Page 76: ...ommunications R01AN5434EJ0110 Rev 1 10 Page 76 of 85 Aug 31 2020 5 Select the network to be used After having selected the network press Browse on the EtherCAT_Master screen to confirm the MAC address 6 Build the program Select Build from the Build menu ...

Page 77: ...RX72M Group Single Chip Motor Control via EtherCAT Communications R01AN5434EJ0110 Rev 1 10 Page 77 of 85 Aug 31 2020 7 After completing the build log in Select Login from the menu ...

Page 78: ... 1 10 Page 78 of 85 Aug 31 2020 8 After having logged in normally the operation will be in the STOP state Note however that the state of operation may shift to RUN without having been in the STOP state 9 Start the operation Press the button to start or select the run icon on the toolbar ...

Page 79: ...ection will have been made and operation will start as shown below Device status The PLC is connected and the application is running The PLC is connected but the application is stopped There is an error Check the details of the error and the device settings The device information is not in the device repository Check the device information file and install it correctly ...

Page 80: ... Select Visualization from the device tree and double click it 2 This starts up the GUI screen for motor control Pattern select is used to change the type of motor rotation operation 1 Each set of rotations is divided into 90 180 and 360 and this sequence of rotations is repeated 2 One reverse rotation 3 A sequence of 10 rotations and then 10 rotations is repeated 4 A sequence of 10 rotations and ...

Page 81: ... the latest version from the Renesas Electronics website Startup Manual RX72M Group RSK Board EtherCAT Startup Manual Document No R01AN4689 RX72M Group Communications Board EtherCAT Startup Manual Document No R01AN4672 Download the latest version from the Renesas Electronics website Technical Updates Technical News Download the latest version from the Renesas Electronics website User s Manual Deve...

Page 82: ...e following Web page https www renesas com jp ja solutions proposal motor control html kits Proceed through the preparations according to Table 3 1 in the RMW user s manual r21uz0004jj0201 motor pdf which will be in the RMW folder No 3 1 3 5 3 6 3 7 3 8 Note The authentication file can be downloaded from Authentication file download at the same link as the RMW Use USB1 on the inverter board for th...

Page 83: ...RMW and specify the following files Environment file ecat_cia402_motor_rsskrx72m ecat_cia402_motor_rsskrx72m rmt map file ecat_cia402_motor_rsskrx72m HardwareDebug ecat_cia402_motor_rsskrx72m map Connect RMW and the motor board When Connection COM is specified the following is displayed if the connection was made correctly ...

Page 84: ...therCAT Communications R01AN5434EJ0110 Rev 1 10 Page 84 of 85 Aug 31 2020 Get the motor drive waveforms Analyzer Press the RUN button in the Scope Window Note The example below shows the waveforms when Target Position is changed from 0 to 40000 ...

Page 85: ...ge 85 of 85 Aug 31 2020 Revision History Rev Date Description Page Summary 1 00 June 10 2020 First edition issued 1 10 Aug 31 2020 12 To change the file configuration by supporting EtherCAT FIT module Rev 1 10 2 3 1 Table 2 7 is revised Table 2 8 is added 63 The folder name of 6 3 6 is changed ...

Page 86: ... in the vicinity of the LSI an associated shoot through current flows internally and malfunctions occur due to the false recognition of the pin state as an input signal become possible 5 Clock signals After applying a reset only release the reset line after the operating clock signal becomes stable When switching the clock signal during program execution wait until the target clock signal is stabi...

Page 87: ...ons failure or accident arising out of the use of Renesas Electronics products outside of such specified ranges 7 Although Renesas Electronics endeavors to improve the quality and reliability of Renesas Electronics products semiconductor products have specific characteristics such as the occurrence of failure at a certain rate and malfunctions under certain use conditions Unless designated as a hi...

Reviews: