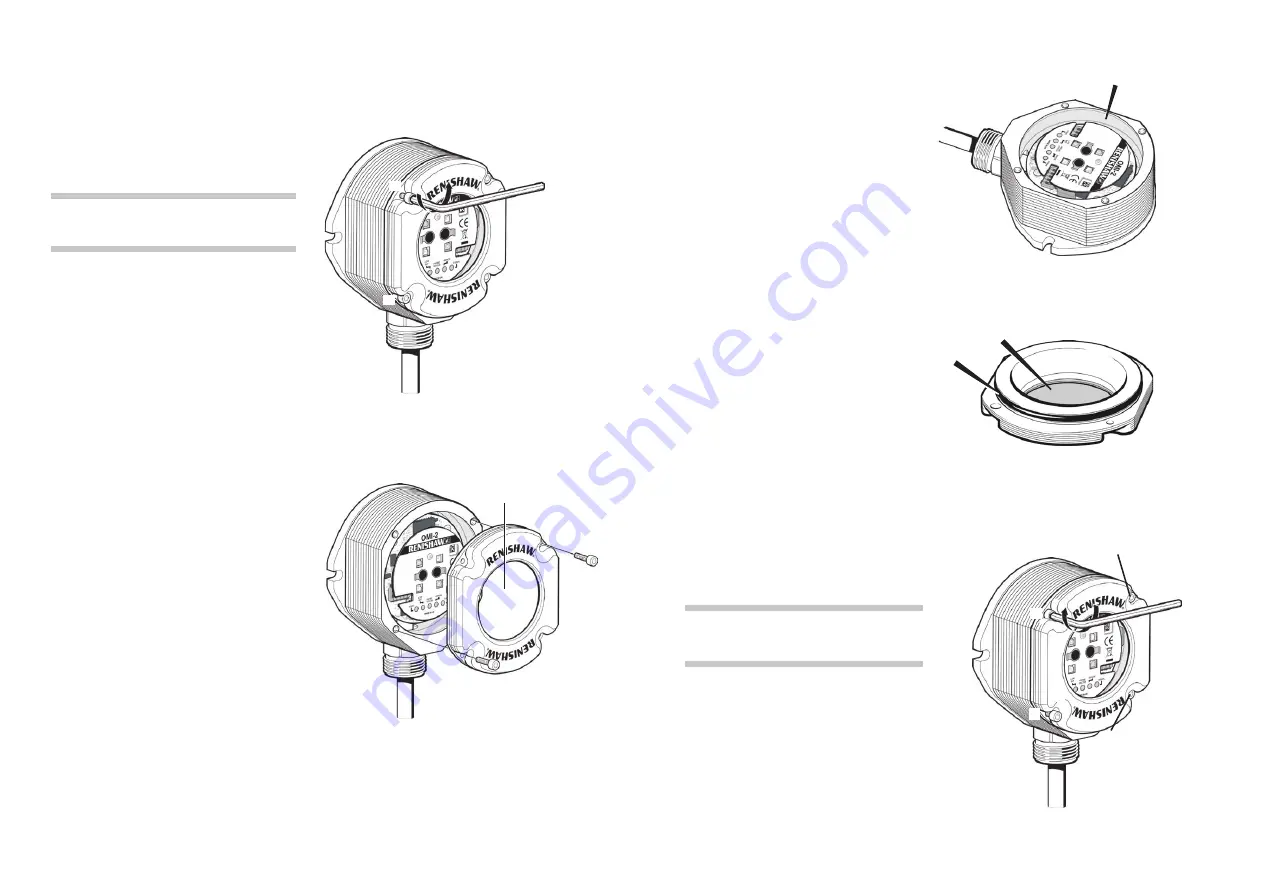
Removing the OMI-2 window
It is not necessary to remove the OMI-2 from
the machine when adjusting the switches or
installing new parts.
To remove the OMI-2 window:
CAUTION: DO NOT
remove the window by
twisting or rotating.
1. Clean the OMI-2 to ensure that no debris
enters the unit.
2. Remove the four cover screws using the
2.5 mm A/F hexagon key supplied with
the kit. Two screws are short and two are
long. Two of the cover holes are threaded
A
and two are plain
B
.
3. The window fits tightly in the OMI-2 body
and is removed using the two long screws
which are inserted into the threaded
holes
A
.
Tighten each screw a few turns at a time
to lift the window evenly. When it is clear
of the body, remove the window and
screws completely.
4. Discard the used window and O-ring.
Window
A
A
Fitting the OMI-2 window
1. Before fitting the window, check for any
damage to screws or scratch marks which
could prevent sealing.
2. Ensure that the O-ring seating
C
in the
OMI-2 body is clean, and there are no
scratch marks which could prevent complete
sealing.
3. Ensure that the O-ring
D
and window
E
are
clean.
4. Insert the two short screws into window
holes
A
and tighten.
5. Place the window, complete with O-ring,
onto the OMI-2 body.
NOTE:
The O-ring should be lubricated with
silicone grease to prevent nicking.
6. Insert the long screws into holes
B
. Tighten
each screw, a few turns at a time, to pull the
window down evenly. There may be some
resistance due to compression of air trapped
inside the body.
C
E
D
A
B
A
B
A
B
B
A
2.5 mm A/F
× 4
M3 screws (
A
)
2.5 mm A/F × 2
0.3 to 0.5 Nm
(0.22 to 0.37 lbf.ft)
M3 screws (
B
)
2.5 mm A/F × 2
0.9 to 1.1 Nm
(0.66 to 0.81 lbf.ft)