This is a publication by Conrad Electronic SE, Klaus-Conrad-Str. 1, D-92240 Hirschau (www.conrad.com).
All rights including translation reserved. Reproduction by any method, e.g. photocopy, microfilming, or the capture in electronic data
processing systems require the prior written approval by the editor. Reprinting, also in part, is prohibited. This publication represent the
technical status at the time of printing.
© Copyright 2015 by Conrad Electronic SE.
V3_1215_02-ETS-Mkd
Installation
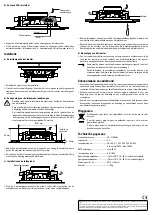
a) Removing the grille
• Remove the grille before installation.
• Gently lift the grille to separate it from the magnetic front frame of the speaker. Be
careful not to bend or fold the grille.
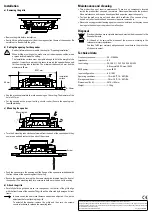
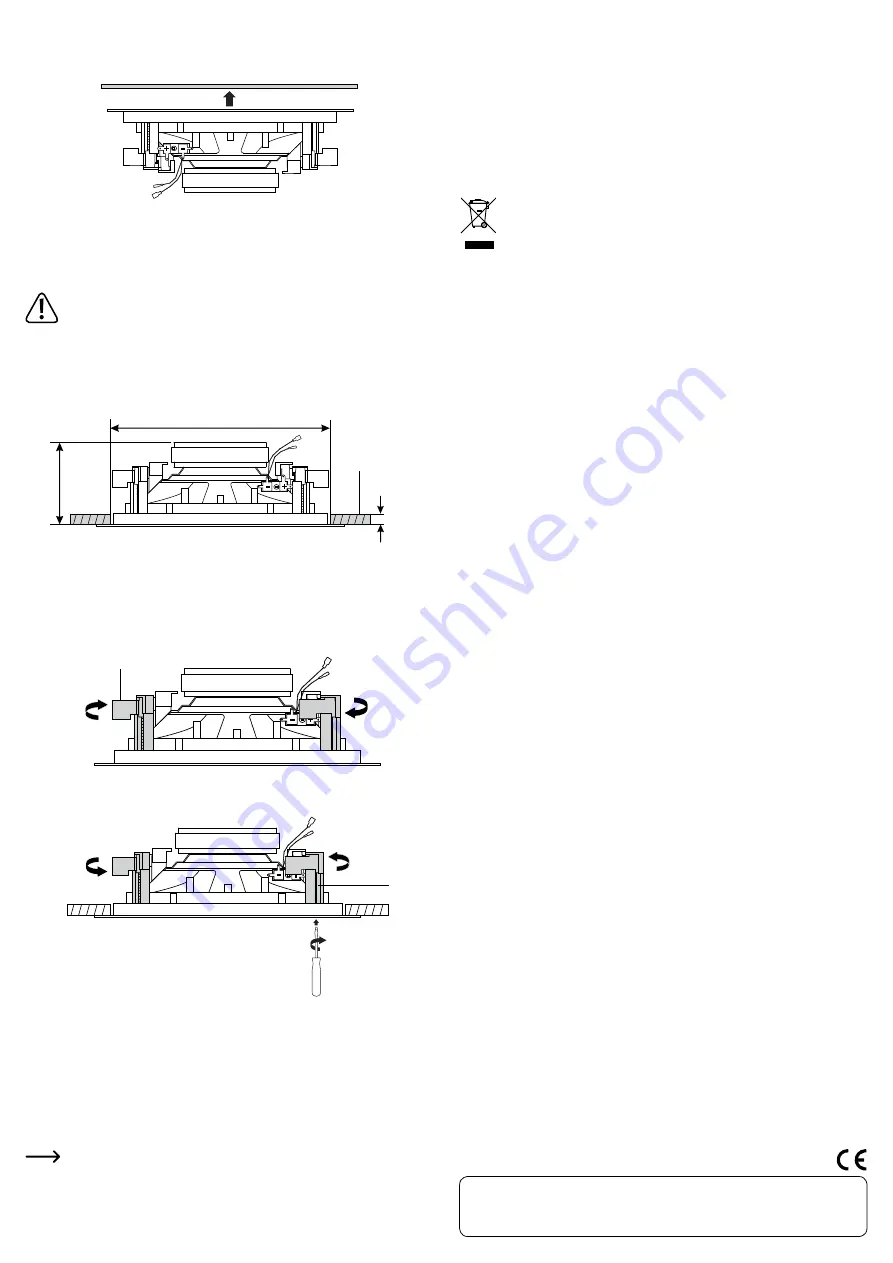
b) Cutting the opening for the speaker
Heed all information contained in the chapter “Preparing installation”.
When drilling or cutting holes, make sure not to damage any cables, wires
or pipes located inside the ceiling.
The installation surface must be stable enough to hold the weight of the
speaker. It must have a proper thickness to match the speaker flange and
for the mounting tabs to function. The minimum thickness is 8 mm, and the
maximum is 30 mm.
8 – 30 mm
Installation
surface
Ø 247 mm
98 mm
• Use the mounting template to mark an opening on the ceiling. The diameter of the
hole is 247 mm.
• Cut the opening with a proper tool (e.g. circular cutter). Ensure the opening is at
least 98 mm deep.
c) Mounting the speaker
Mounting tab
• Turn the 4 mounting tabs clockwise (viewed from the back of the speaker) until they
come to an end and rest onto the ends of the screws.
Screw
• Push the speaker into the opening until the flange of the speaker is imbedded with
the front frame of the speaker against the ceiling.
• Secure the speaker by turning the 4 screws clockwise (viewed from the front of
the speaker). The mounting tabs turn outward to hold on to the back of the ceiling.
d) Attach the grille
• Carefully hold the grille and move it to the speaker. Let the rim of the grille align
with the front frame of the speaker. The grille will be attracted by the magnetic front
frame.
In some cases, the audio level balance needs to be adjusted. If so, do the
adjustment before attaching the grille.
To uninstall the speaker, remove the grille and then turn the screws
counterclockwise to release the mounting tabs.
Maintenance and cleaning
• This product does not require maintenance. There are no components located
inside the product that you need to maintain. Never open/dismantle the product.
Have maintenance and repairs done by qualified experts or repair shops only.
• To clean the product, a dry, soft and clean cloth is sufficient. You can use a long-
haired, soft and clean brush and a vacuum cleaner to remove dust.
• Never use any aggressive cleaning agents or chemical solutions as they may cause
damage to the housing or the product to malfunction.
Disposal
Electronic devices are recyclable waste and must not be disposed of in the
household waste.
At the end of its service life, dispose of the product according to the
relevant statutory regulations.
You thus fulfill your statutory obligations and contribute to the protection
of the environment.
Technical data
Frequency response ...........................30 – 21000 Hz
Impedance ...........................................8 Ω
Input rating ...........................................PA: 100 V / 1 W, 2 W, 4 W, 8 W, 15 W
HiFi: normal 40 W / max. 100 W
RMS power ..........................................max. 40 W
Input configuration .............................8 Ω / 100 V
Operating conditions ..........................-10 to +60 ºC, 10 – 80 % RH
Storage conditions..............................-20 to +70 ºC, 10 – 80 % RH
Dimensions (Ø × H) .............................281.5 × 103 mm
Weight ...................................................1.75 kg


