background image

4

Positioning the Heater

Step by step guide

Important tips

Plug heating unit into the Heater socket (MUST NOT EXCEED 
400 WATTS).
1. 

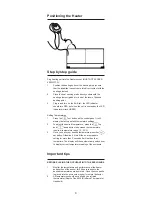
Position the heating unit over the basking area (ensure 
that the inhabitant cannot come into direct contact with the 
heating element).

2. 

Place the heat sensing probe directly underneath the 
heating element (globe etc.) and at the level of desired 
basking point.

3. 

Plug in and turn on the Ezi-Stat - the LED indicator 
should turn RED, but when the unit is on standby the LED 
indicator will turn GREEN.

 
Setting Temperatures 
1. 

Press the            set button on the control panel, it will 
display the factory default temperature settings 

2. 

To adjust the desired temperature , press the            up 
and        .    down button to decrease the temperature 
required (temperature range 10 - 35ºC).

3. 

Once you have your desired temperature press the        
set button. Othewise if it is left ilde on a temperture  
setting for more than 5 seconds it will set it as that 
temperture. The display will then automatically switch over 
to display current temperature reading of the enclosure.

BEFORE PLACING THE OCCUPANT INTO THE ENCLOSURE

1. 

Monitor the temperature and performance of the heater 

and position of the sensor for 24 hours to ensure the 

desired temperatures are achieved - Once the occupant/s 

is placed into the enclosure monitor for normal behavior.

2. 

All temperatures should be verified by an infrared 

thermometer (Reptile One MINI IR Infrared Thermometer 

Handheld). 

SET

Summary of Contents for EZISTAT EZ-400

Page 1: ...EZISTAT EZ 400 Next Best Thing to Nature Owner s Manual www reptileone com au APPROVAL NO SAA170475 Instruction Version 31 03 2017...

Page 2: ...e connecting an aquarium to a power supply The drip loop is the part of the cable below the level of the power supply It prevents water travelling down the cable and coming into contact with the power...

Page 3: ...ARANTEE CONDITIONS Please ensure you retain your original purchase receipt in the event that guarantee service is required Should the product malfunction in any way or if the unit is damaged and requi...

Page 4: ...ult temperature settings 2 To adjust the desired temperature press the up and down button to decrease the temperature required temperature range 10 35 C 3 Once you have your desired temperature press...

Page 5: ...under legislation in the applicable country of purchase This Guarantee shall not affect any such rights and should be read subject to such legislation 1 0 Terms and Conditions of Guarantee 1 1 Reptile...

Page 6: ...e shall not affect those rights or obligations where to the full extent permitted by law 1 All express and implied warranties and conditions under statute or general law are expressly excluded and Rep...

Page 7: ...prevent harm to the environment or human health from uncontrolled waste disposal recycle it responsibly to promote the sustainable reuse of material resources To return your used device please use the...

Page 8: ...8 Reptile One and Reptile One Next Best Thing to Nature are registered trademark or trademarks www reptileone com au TM Next Best Thing to Nature...

Reviews: