background image

32

ENG

FRA

NDL

ITA

ESP

DEU

Overview parameters

This menu is needed only for basic setup.


¾

Press the rotary control.


¾

Select the menu “Parameters” and activate it by pressing 
again.

The following parameters are available to you; you can find fur-
ther information in the table “Parameters” on the next page.

Note: It may take up to 10 minutes before changes of global life-
style functions are displayed on all room control units.

max

min.
max.

E-CL

SET

P0

1-5

IP1- IP4

rF teSt

Sn1-Sn4

RES

USER

P0

6-7

SET 

TIME

So 3

XX-XX

So 2

XX-XX

So 1

XX-XX

+

33

ENG

FRA

NDL

ITA

ESP

DEU

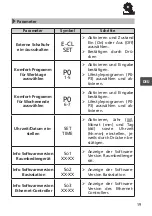
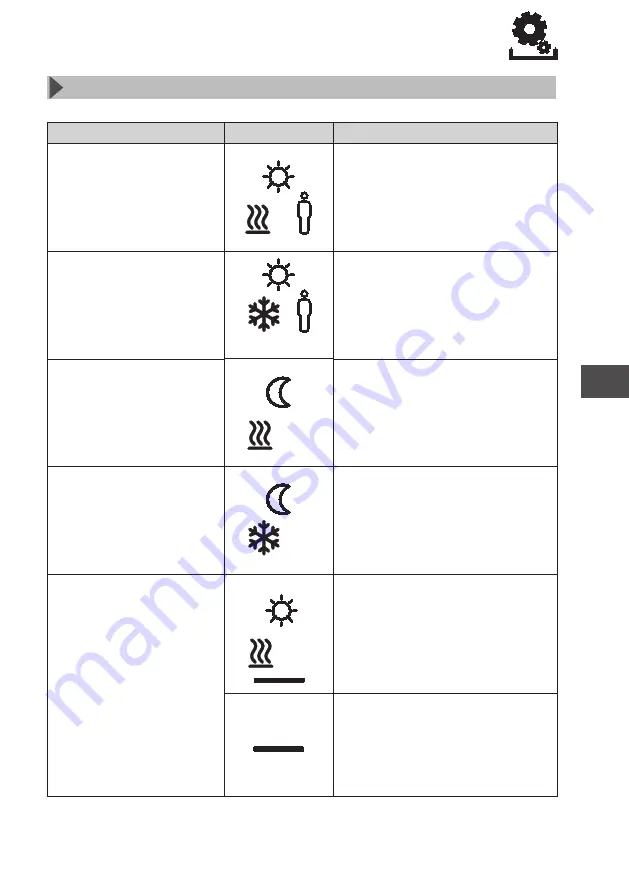
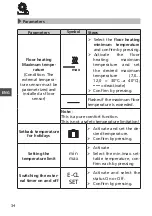
Parameters

Symbol

Steps

Temperature

for presence in  

heating mode


¾

Activate and set the de-
sired temperature.


¾

Confirm by pressing.

Temperature 

for presence in  

cooling mode


¾

Activate and set the de-
sired temperature.


¾

Confirm by pressing.

Setback temperature 

for heating mode


¾

Activate and set the de-
sired temperature.


¾

Confirm by pressing.

Setback temperature 

for cooling mode


¾

Activate and set the de-
sired temperature.


¾

Confirm by pressing.

Floor heating

Minimum tempera-

ture

(only RDF 64212-xx)

(Condition: The 

external tempera-

ture sensor must be 

parametrized and 

installed as floor 

sensor)


¾

Activate and select the 
desired comfort tempe-
rature (1.0 ... 6.0 ≈ 18 °C 
... 28 °C 

--

 = deactivate)


¾

Confirm by pressing.

Lights  up  when  the  floor 
temperature is fallen short 
of.

Parameters

33

Summary of Contents for RDF 64202-00

Page 1: ...ENG FRA NDL ITA ESP DEU RDF 642x2 00 127266 1724 11213416 11213416 ...

Page 2: ...ENG FRA NDL ITA ESP DEU 2 DEU 7 3 ENG 23 FRA 39 NDL 57 ITA 75 ESP 93 2 ...

Page 3: ...tion Les petits enfants peuvent avaler les piles bouton Placer RBG hors de portée des petits enfants Waarschuwing Levensgevaar door inslikken Kleine kinderen kunnen accu s draaiknop inslikken RBG buiten het bereik van kleine kinderen monteren Avvertenza Pericolo di morte per ingestione Le batterie e la manopola possono essere facilmente ingeriti da bambini piccoli Installare l unità di controllo f...

Page 4: ...ENG FRA NDL ITA ESP DEU 4 150 cm 30 cm AAA 1 x 2 x 1 x RDF 64212 00 RDF 64212 00 optional en option optioneel opzionale opcional 4 ...

Page 5: ...ENG FRA NDL ITA ESP DEU 5 5 ...

Page 6: ...ENG FRA NDL ITA ESP DEU 6 2 4 5 6 1 3 4a RDF 64212 00 Ø 3 5 mm 6 ...

Page 7: ...bersicht und Anzeigen 10 Bedienung 11 Funktest 11 Erstinbetriebnahme inkl Pairing 12 Komfort Programme Smart Start Stop Modus 12 Übersicht Lifestyle Funktionen 13 Lifestyle Funktionen 14 Übersicht Parameter 16 Parameter 17 Batteriewechsel 20 4 Reinigung und Fehlerbehebung 21 Fehler und Problembehebung 21 Reinigung 22 5 Außerbetriebnahme 22 Entsorgung 22 8 8 8 8 9 9 9 10 10 11 11 12 12 13 14 16 17 ...

Page 8: ... der gewünschten Soll Temperatur in der zugeordneten Heizzone Jegliche andere Verwendung gilt als nicht bestimmungsgemäß für die der Hersteller nicht haftet 1 Sicherheit Folgende Symbole zeigen Ihnen dass Sie etwas tun müssen 9 eine Voraussetzung erfüllt sein muss Warnung Gefahr für Leib und Leben besteht Warnung Lebensgefahr durch Verschlucken Kleinkinder können Batterien Drehknopf verschlucken R...

Page 9: ...int Sensor Messgenauigkeit int NTC 0 3 K Dieses Produkt ist mit dem CE Zeichen gekennzeichnet und entspricht damit den Anforderungen aus den Richtlinien 9 2014 30 EU mit Änderungen Richtlinie des Rates zur An gleichung der Rechtsvorschriften der Mitgliedsstaaten über die elektromagnetische Verträglichkeit 9 2014 35 EU mit Änderungen Richtlinie des Rates zur Angleichung der Rechtsvorschriften der M...

Page 10: ...tiv Menü Service aktiv Betauung festge stellt Kühlbetrieb deaktiviert Wichtiger Hinweis Fehlfunktion Modus Kühlen aktiv Kindersicherung aktiv Blinkt Smart Start Stop Modus aktiv Leuchtet Modus Heizen aktiv Batterie schwach Anwesenheit aktiv nur im Automatik Modus Stand By Modus aktiv Party Funktion aktiv Sendeleistung Urlaubs Funktion Blinkt geplant Leuchtet aktiv Automatik Modus aktiv Mindestfußb...

Page 11: ...atur ein Menü Auswahl mit Funktionen enthält alle wichtigen Lifestyle Funktio nen Parameter enthält zahlreiche Parameter wie Heiz Absenktemperaturen Datum u v m Dieses Menü be nötigen Sie nur für grundlegende Änderungen Service enthält Einstellungen für den Fachhandwerker durch PIN gesichert siehe Handbuch der Basisstation Funktest Drehknopf länger drücken zur Aktivierung des Funktests 9 An der Ba...

Page 12: ...asisstation Jahr Datum und Uhrzeit durch Drehen Drücken einstellen Komfort Programme enthalten vordefinierte Heizzeiten die für Werktage 1 5 bzw das Wochenende 6 7 genutzt werden kön nen Außerhalb der Heizzeiten schaltet die Anlage in den Nacht Modus Die Komfort Programme wählen Sie im Menü Parameter aus Der Smart Start Stop Modus des Systems berechnet die benötigten Vorlaufzeiten damit zur Start ...

Page 13: ... Menü Lifestyle Funktionen durch erneu tes Drücken Wählen Sie die gewünschte Lifestyle Funktion aus Folgende Lifestyle Funktionen stehen Ihnen zur Verfügung nä here Informationen finden Sie in der Tabelle Funktionen auf den nächsten Seiten Hinweis Es kann bis zu 10 Minuten dauern bis Änderungen glo baler Lifestyle Funktionen an allen Raumbediengeräten ange zeigt werden 13 ...

Page 14: ...e genutzt Nur Werktags im Automatik modus verfügbar Durch Drücken aktivieren Beenden durch Auswahl einer anderen Lifestyle Funktion Tag Standard ein stellung permanente Rege lung nach eingestell ter Soll Temperatur Durch Drücken aktivieren Nacht permanente Absen kung auf program mierte Nacht Tem peratur Durch Drücken aktivieren Automatik automatische Temperaturrege lung entsprechend aktivierten Ko...

Page 15: ...tigen Urlaubsmodus Temperatur wird au tomatisch auf einge stellte Urlaubstem peratur abgesenkt Durch Drücken aktivieren 1 Start und 2 End Datum dd mm wählen durch Drü cken bestätigen Urlaubsmodus durch erneutes Aufrufen deaktivieren Lüftungssteuerung stellt die Lüftungsstufe nach Auswahl 0 3 ein Durch Drücken aktivieren Lüftungsstufe auswählen 00 Feuchteschutzlüftung 01 Reduzierte Lüftung 02 Nenn ...

Page 16: ...rch erneutes Drücken Folgende Parameter stehen Ihnen zur Verfügung nähere Infor mationen finden Sie in der Tabelle Parameter auf der nächsten Seite Hinweis Es kann bis zu 10 Minuten dauern bis Änderungen glo baler Systemparameter an allen Raumbediengeräten angezeigt werden max min max E CL SET P0 1 5 IP1 IP4 rF teSt Sn1 Sn4 RES USER P0 6 7 SET TIME So 3 XX XX So 2 XX XX So 1 XX XX 16 ...

Page 17: ...us Aktivieren und ge wünschte Temperatur einstellen Durch Drücken bestäti gen Absenk Temperatur Kühl Modus Aktivieren und ge wünschte Temperatur einstellen Durch Drücken bestäti gen Mindest Temperatur Fußbodenheizung nur RDF 64212 xx Bedingung Externer Temperatursensor muss als Bodensen sor parametriert und montiert sein Aktivieren und ge wünschte Wohlfühl Temperatur einstellen 1 0 6 0 18 C 28 C d...

Page 18: ...ung akti vieren und gewünsch te Maximal Tempera tur einstellen 7 0 12 0 30 C 40 C deaktivieren Durch Drücken bestäti gen Blinkt wenn maxima le Fußbodentemperatur überschritten Hinweis Reine Komfort Funktion Keine Sicherheitstemperaturbegrenzung Absenk Temperatur Urlaub Aktivieren und ge wünschte Temperatur einstellen Durch Drücken bestäti gen Temperatur begrenzung einstel len min max Aktivieren Mi...

Page 19: ...auswählen P0 6 7 Aktivieren und Eingabe bestätigen Lifestyleprogramm P0 P3 auswählen und ak tivieren Uhrzeit Datum ein stellen SET TIME Aktivieren Jahr jjjj Monat mm und Tag dd sowie Uhrzeit hh mm einstellen je weils durch Drücken be stätigen Info Softwareversion Raumbediengerät So1 XX XX Anzeige der Software Version Raumbedienge rät Info Softwareversion Basisstation So2 XX XX Anzeige der Software...

Page 20: ...eter Symbol Schritte Netzwerk Verbindungsdaten IP Adresse IP1 IP4 IP Adresse wird in 4 Schritten angezeigt au tomatischer Durchlauf Netzwerk Verbindungsdaten Subnetzmaske Sn1 Sn4 Subnetzmaske wird in 4 Schritten angezeigt au tomatischer Durchlauf Reichweitentest rF teSt Aktivieren Anzeige der Funkver bindung 0 100 für 3 Minuten Abbruch durch Drücken Reset Benutzerebene Alle Benutzerein stellungen ...

Page 21: ...t wenden Sie sich an Ihren Elektroinstallateur Err 0001 Interner Tem peratursensor defekt Raumbediengerät muss aus getauscht werden Err 0002 Externer Temperatur sensor defekt Austausch erforderlich wen den Sie sich an Ihren Elektro installateur Err 0004 Batterie kapazität kritisch Batterien umgehend wech seln Err 0005 Basisstation trotz erfolgrei chem Pairing nicht gefunden Spannungsversorgung der...

Page 22: ...des Menschen schützt und die Umwelt schont Informationen wo Sie Rücknahmestellen für Ihre Geräte finden erhalten Sie bei Ihrer Stadtverwal tung oder den örtlichen Müllentsorgungsbetrieben Entsorgung 5 Außerbetriebnahme Dieses Handbuch ist urheberrechtlich geschützt Alle Rechte vor behalten Es darf weder ganz noch teilweise ohne vorheriges Ein verständnis des Herstellers kopiert reproduziert gekürz...

Page 23: ...y 25 3 Operation 26 Overview and display 26 Operation 27 Radio test 27 Commissioning incl pairing 28 Comfort programs Smart Start Stop mode 28 Lifestyle functions overview 29 Lifestyle functions 30 Overview parameters 32 Parameters 33 Changing the batteries 36 4 Cleaning and Troubleshooting 37 Troubleshooting 37 Cleaning 38 5 Decommissioning 38 Disposal 38 23 ...

Page 24: ...to life in case of swallowing Little children can swallow batteries the rotary control Install the room control unit outside the reach of little child ren Do not leave the room control unit unattended during a bat tery change Retain this manual and provide it to future owners Technical data 2 Versions Floor temperature monitoring Voltage supply Radio technology Battery lifetime Radio range Protect...

Page 25: ...0 C int sensor Measuring accuracy of internal NTC 0 3 K Conformity This product is labelled with the CE Marking and thus is in com pliance with the requirements from the guidelines 9 2014 30 EU with amendments Council for Coordination of the Regulations of EU Member Countries regarding Electro magnetic Compatibility 9 2014 35 EU with amendments Council for Coordination of the Regulations of EU Mem...

Page 26: ...tive Menü Service aktiv Bedewing detected cooling mode deactivated Important note malfunction Cooling mode active Child safety lock active Flashing Smart Start Stop mode active Lighting up Heating mode active Low battery Presence active only in Automatic mode Stand by mode active Party function active Radiated power Holiday function Flashing planned Lighting up active Automatic mode active Minimum...

Page 27: ...sired target temperature Menu selection with Functions includes all important lifestyle functions Parameters includes several parameters as e g hea ting and setback temperatures date and many more Service includes settings for the specialist secured by PIN see manual of the base station A long press of the rotary knob activates the radio test 9 The LED of the connected heating zone is toggled for ...

Page 28: ...ion Set year date and time by rotating confirm entries by press ing Comfort programs include pre defined heating times to be used for working days 1 5 or for the weekend 6 7 Outside the heat ing times the installation switches to night mode You can select the comfort programs in the Parameter menu The Smart Start Stop Mode of the system calculates the required line up times in order to provide the...

Page 29: ...e the menu Lifestyle functions by pressing the rotary control again Select the desired lifestyle function The following lifestyle functions are available to you you can find further information in the table Functions on the next pages Note It may take up to 10 minutes before changes of global life style functions are displayed on all room control units 29 ...

Page 30: ...tyle function Day default settings Permanent regula tion after setting the target temperature Activate by pressing Night Permanent setback to a programmed night temperature Activate by pressing Automatic Automatic tempera ture regulation ac cording to the corre spondingly activated comfort programs Activate by pressing Switching off Deactivates the room control unit the temperature is still displa...

Page 31: ...ing Select 1 the start date and 2 the end date dd mm confirm by pressing Deactivate the holiday mode by calling the function again Ventilation control Sets the ventilation level according to se lection 0 3 Activate by pressing Selection of ventilation level 00 Anti moisture ventilation 01 Reduced ventilation 02 Nominal ventilation 03 Intensive ventilation Child safety lock Locks the room oper atin...

Page 32: ...sing again The following parameters are available to you you can find fur ther information in the table Parameters on the next page Note It may take up to 10 minutes before changes of global life style functions are displayed on all room control units max min max E CL SET P0 1 5 IP1 IP4 rF teSt Sn1 Sn4 RES USER P0 6 7 SET TIME So 3 XX XX So 2 XX XX So 1 XX XX 32 ...

Page 33: ...ng mode Activate and set the de sired temperature Confirm by pressing Setback temperature for cooling mode Activate and set the de sired temperature Confirm by pressing Floor heating Minimum tempera ture only RDF 64212 xx Condition The external tempera ture sensor must be parametrized and installed as floor sensor Activate and select the desired comfort tempe rature 1 0 6 0 18 C 28 C deactivate Co...

Page 34: ...ximum temperature 7 0 12 0 30 C a 40 C deactivate Confirm by pressing Flashes if the maximum floor temperature is exceeded Note This is a pure comfort function This is not a safety temperature limitation Setback temperature for holidays Activate and set the de sired temperature Confirm by pressing Setting the temperature limit min max Activate Select the min max set table temperature con firm each...

Page 35: ...te SET TIME Activate set year yyyy month mm and day dd as well as time hh mm confirm each by pressing Info software version of room control unit So1 XX XX Display of the room con trol unit software version Info base station software version So2 XX XX Display of the base sta tion software versionw Info software version Ethernet Controller So3 XX XX Display of the software version of the Ethernet Co...

Page 36: ... leave the room control unit unattended during a bat tery change 2 1 3 Parameters Symbol Steps Network connection data subnet mask Sn1 Sn4 The subnet mask is dis played in 4 steps auto matic cycle Range test rF teSt ActivateI Indication of the radio connection 0 100 for 3 minutes Cancel by pressing User level reset Reset of all user settings to factory settings RES USER Activate and select Yes Pre...

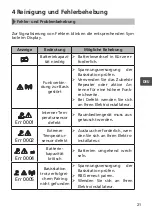
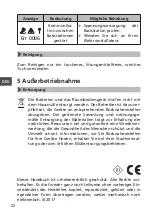
Page 37: ...The room control unit must be changed Err 0002 External tem perature sensor defective Replacement necessary con tact your electric installer Err 0004 Very low battery Change the batteries imme diately Err 0005 Base station not found in spite of success ful pairing Check the voltage supply of the base station Perform another pairing of the room control unit Contact your electric installer Err 0006 ...

Page 38: ...rotects human health and the environ ment If you need information about collection points for your devices please contact your local municipality or your local waste disposal services Disposal 5 Decommissioning This manual is protected by copyright All rights reserved It may not be copied reproduced abbreviated or transmitted neither in whole nor in parts in any form neither mechanically nor elec ...

Page 39: ...39 ...
Page 40: ...RESOL Elektronische Regelungen GmbH Heiskampstraße 10 45527 Hattingen Germany Tel 49 0 2324 9648 0 Fax 49 0 2324 9648 755 www resol de info resol de 40 ...

Reviews: