1
Note:
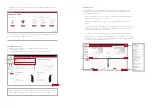
To transfer settings from a legacy fitting to ReSound ENZO 3D fitting, select
‘use session’ in the fitting data mismatch screen of the connection flow. To start a
fresh fitting choose ‘reset to initial fit’.
Note:
To transfer settings from session to replaced instrument, select ‘use session’
in the fitting data mismatch screen of the connection flow. To start a fresh fitting
choose ‘reset to initial fit’.
Completing a follow-up visit from ReSound Aventa
Upgrading a patient from legacy hearing instruments to ReSound ENZO 3D
ReSound Aventa 3.12
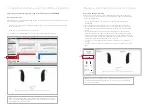
If the patient has an existing hearing instrument fit in ReSound Aventa, then ReSound Aventa 3.11 will open
when you begin a new fitting.
1. Click the ‘Go to Smart Fit’ button in the left navigation panel to close ReSound Aventa and arrive at the
Smart Fit Launcher.
2. Follow steps in the ‘First Fitting’ section of this guide.
ReSound ENZO 3D hearing instruments cannot be fitted in ReSound Aventa software.
Connecting during a follow-up
When returning for a follow-up visit, the software will open to the last saved session.
Depending on the saved preferences, the session will open to either the Patient Profile
screen or the Fitting screen.
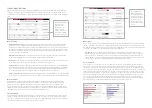
1. Insert the battery and close the battery door of each hearing instrument to be
programmed.
2. Select the desired interface and click ‘Connect’ in the collapsible side bar panel.
3. The hearing instruments will appear in the ‘Select Instruments’ section. When the
hearing instrument to be programmed has been identified, select it by checking the
left box.
4. The hearing instrument that has already been programmed for this patient will
already be assigned to the right or left side. When the other instrument is selected,
it will automatically be assigned to the opposite side. It is recommended to beep the
instrument for confirmation that the instrument selected in the software is in fact the
instrument being used in the fitting and on the correct side.
5. Continue in the lower right of the screen once the instruments are selected and
assigned.
6. Continue to the connection flow and follow steps in the ‘First Fitting’ section of this
guide.
Replacing one hearing instruments of a pair
2
Summary of Contents for ENZO 3D
Page 1: ...ReSound ENZO 3D fitting guide A guide for professionals...
Page 8: ......


