background image

8

9

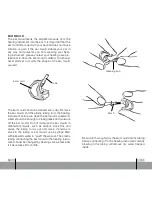
REMOviNg THE HEaRiNg iNSTRuMENT 

To remove the hearing instrument, simply pull the tube 
outward with your thumb and forefinger. Consult your 
hearing care professional if you have difficulty remov-
ing the hearing instrument.

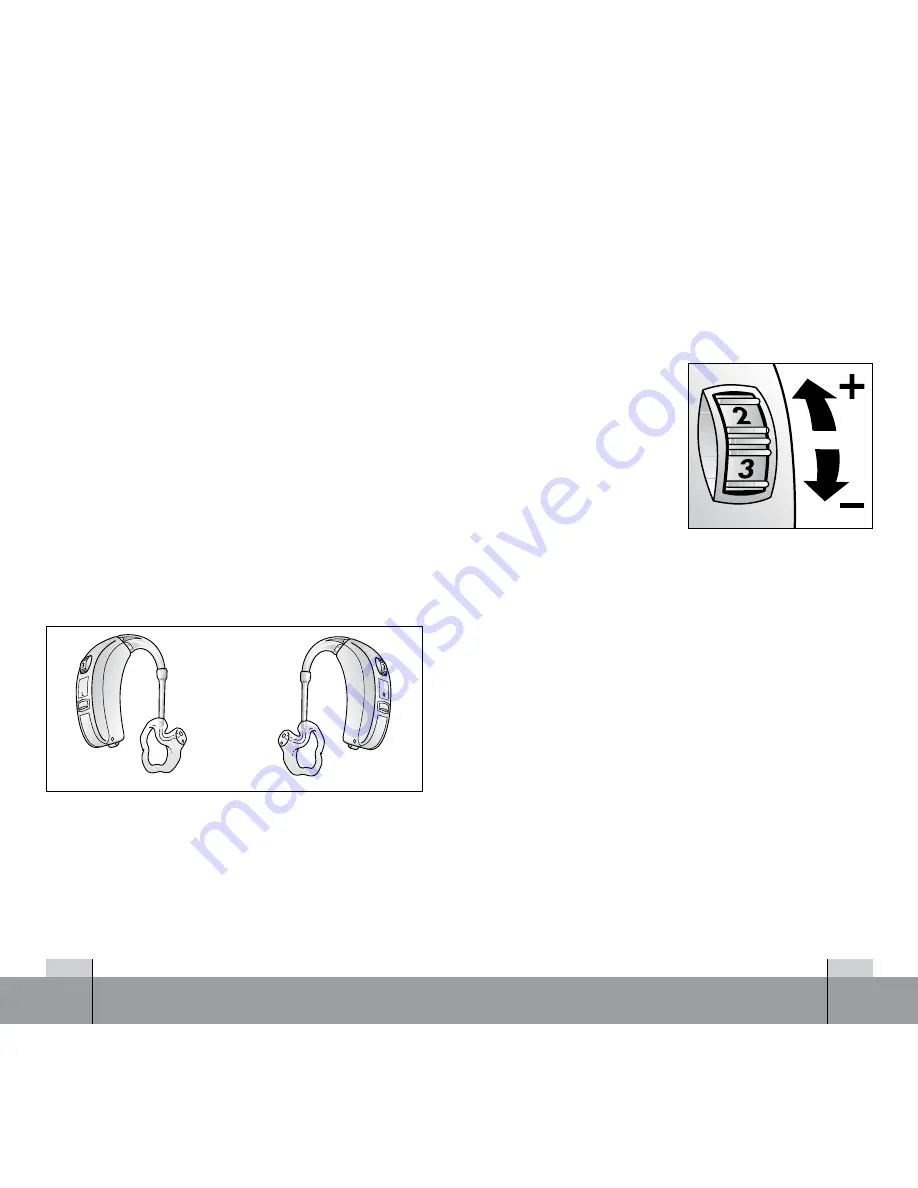
RECOgNiziNg LEfT aNd RigHT iNSTRuMENT

If you have two hearing instruments, they may be set 
differently for your right and left ears. Do not switch the 
hearing  instruments  without  consulting  your  hear ing 
care professional. If you detach the ear moulds from 
the hearing instruments when cleaning and/or storing 
them, verify that you have connected the ear moulds 
to  the  appropriate  hearing  instrument  before  fitting 
them to your ears. 

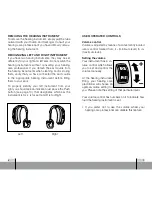
To  properly  identify  your  left  instrument  from  your 
right you should see an indication just above the Push 
button  (see  page  10),  that  designates  which  ear  the  
instrument is for. L is for Left and R is for Right.

              Left                                       Right

uSER-OPERaTEd CONTROLS

volume control

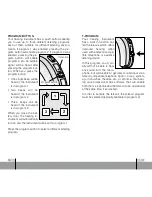
Volume is adjusted by means of a conveniently located 
rotary control marked from »1« (minimum level) to »4« 
(maximum level). 

Setting the volume


Your instrument has a vo-
lume control which allows 
you to set and control the 
volume manually. 

At  the  hearing  instrument 
fitting,  your  hearing  care 
practitioner will choose an 
optimal volume setting for 
you. Please note the setting of that particular level. 

Your volume control has numbers on it to indicate how 
loud the hearing instrument is set.

•  If  you  prefer  not  to  use  the  volume  wheel  your  

hearing care professional can disable this feature.

Summary of Contents for Sparx Lite SL90-V

Page 1: ...1 OPERATING INSTRUCTIONS Model SL90 VI ReSound Sparx Lite Super Power BTE...

Page 2: ...nd Warning Hearing instruments their component parts and their batteries can be dangerous if swallowed or improperly used Misuse of these instruments could result in severe injury or death CONTENTS Pa...

Page 3: ...small knob located on the battery door This will cause the battery door to open The hearing instrument will always be in program 1 when it is first turned on Additional information about the pro gram...

Page 4: ...switch on your instrument by closing the battery door Tip Opening and closing your mouth can ease insertion CHANGING THE BATTERY Insert the new battery with the side facing up as shown on the side of...

Page 5: ...your ears To properly identify your left instrument from your right you should see an indication just above the Push button see page 10 that designates which ear the instrument is for L is for Left a...

Page 6: ...lable in program 2 Program Button Your hearing instrument has a push button enabling you to use up to three different listening programs each of them suitable for different listening environ ments If...

Page 7: ...you will typically not hear any sound from the microphone Therefore most environmental sounds will not be heard in the ear that is set to DAI Your hearing care professional has software to modify thi...

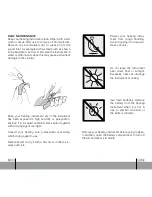
Page 8: ...cumulated dirt or grease from the sound inlet for example with a small brush as shown in the illustration but never immerse the instrument in water or other liquids since this may cause permanent dama...

Page 9: ...tubing from the hearing instrument before you clean the ear mould Lukewarm water should be enough to clean grease and moisture off the ear mould Do not immerse the ear mould in disinfectant liquids s...

Page 10: ...ent in mi nes or other explosive areas unless those areas are certified for hearing instrument use Warning to hearing aid dispenser Special care should be exercised in selecting and fitting a hearing...

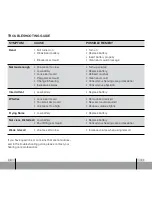
Page 11: ...mould Weak telecoil Volume set too low If you have questions or concerns that are not addres sed in the troubleshooting guide please contact your hearing care professional POSSIBLE REMEDY Turn on Repl...

Page 12: ...AND NOTICES A hearing aid will not restore your hearing to normal However when fitted properly and used regularly it will improve your ability to communicate Your hear ing instrument is only one compo...

Page 13: ...must wear it regularly Keep a positive attitude Start with a comfortable volume in a quiet environ ment Learn to recognize familiar sounds around your home before wearing your hearing instruments in m...

Page 14: ...26 27...

Page 15: ...0 1869 343 466 www gnresound co uk Australia GN ReSound Pty Ltd Unit R1 Regents Park Estate 391 Park Road Regents Park NSW 2143 Tel free 1800 658 955 Fax 02 9743 7472 www gnresound com au New Zealand...

Reviews: