background image

7

Volume Control (optional)

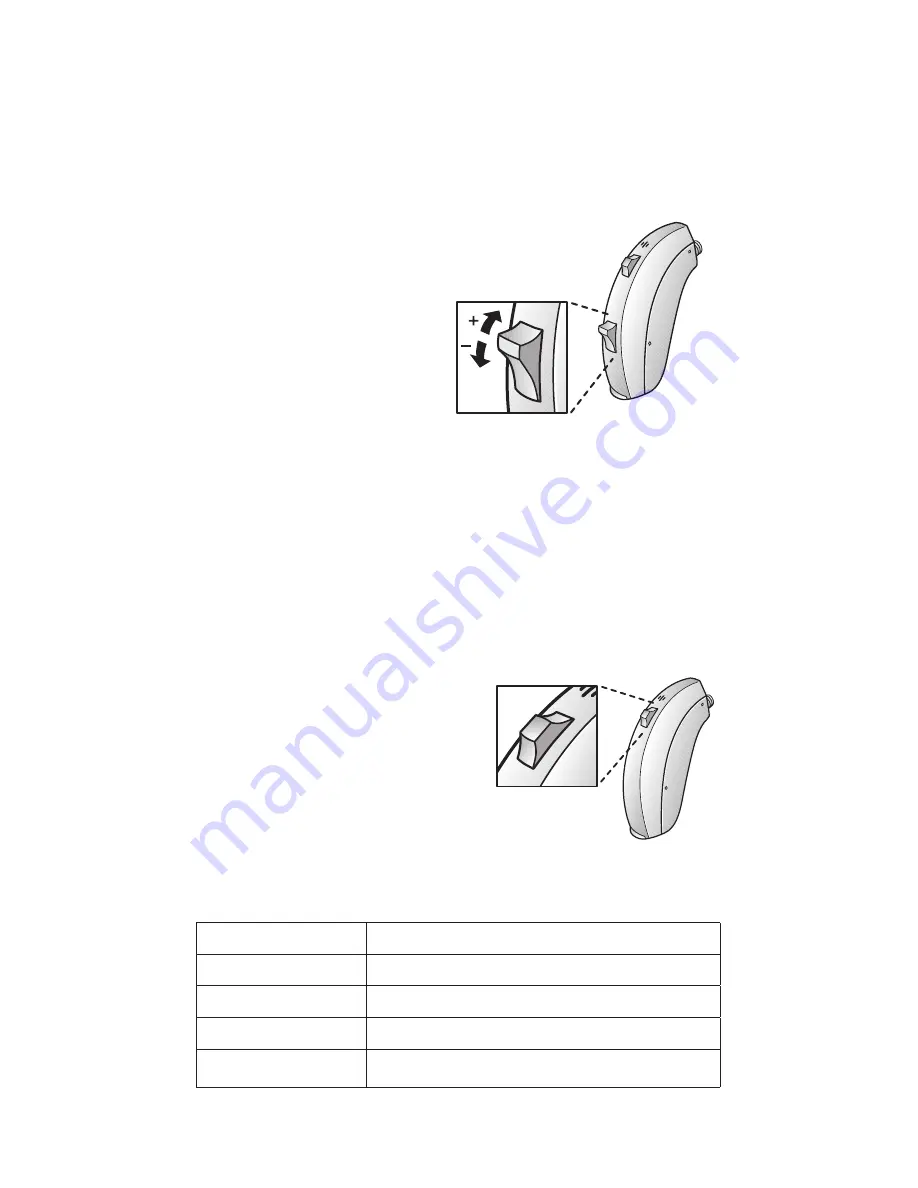
When using the instrument you can increase the volume by turning 
the volume control up, and /or reduce the volume by turning it 
down.
For each volume step, you will hear a “beep” signal indicating the 
change. The loudness of the “beeps” will increase as you turn the 
volume up and decrease as 
you turn it down. If you reach 
the upper or lower  limit of the 
volume control range, there will 
be a more prominent “beep” 
signal indicated by a lower 
pitch.

Programme Selector 

You can have up to four 
different programmes on your hearing instrument. The selection of 
programmes can be changed by your hearing care professional.

1.  You can switch between programmes by pushing the 

programme selector once.

2.  You will then hear one or more “beeps”. The number of “beeps” 

indicates which programme you have selected.

3.  You can always return to programme 1 by turning your 

instrument off and then on again, or by placing it in stand-by 
mode and then returning to its operating mode.

Your Programme Environments: 

(to be completed together your hearing care professional):

Programme

Description of when to use

1

2

3

4

Summary of Contents for Ziga Lite ZL-61

Page 1: ...45 45 75 11 19 www resound com Australia GN ReSound Pty Ltd Unit R1 Regent Park Estate 391 Park Road Regent Park NSW 2143 Tel free 1800 658 955 Fax 02 9743 7472 www gnresound com au 17518500_GB_rev A...

Page 2: ...ReSound Ziga LiteTM USER GUIDE ReSound Ziga LiteTM BTE Models ZL 61 ZL 71 ZL 81 17518500_GB_rev A...

Page 3: ...ple adjust quickly to wearing hearing instruments in their ears and hearing the new sounds other people may need more time The intent of this user guide is to provide information on the many aspects o...

Page 4: ...h earmould 5 Inserting the Instrument with dome 6 Removing the Hearing Instrument 6 Volume Control optional 7 Programme Selector 7 Stand by Function 8 Telephone Use 8 Using tele loop systems 8 Direct...

Page 5: ...ment On Off Switch 3 Sound Outlet 4 1st Microphone Sound Inlet 5 2nd Microphone Sound Inlet 6 Volume Control optional 7 Direct Audio Input 8 Left Right indicator Right Red Left Blue 9 Battery lock 10...

Page 6: ...nts it is advisable to 1 Use your hearing instruments every day 2 Wear your hearing instruments for just a couple of hours a day during the first week 3 Gradually increase the time you wear your heari...

Page 7: ...ent from squealing while the tube or mould is being inserted in the ear It delays the switch on time by 10 seconds after closing the battery compartment A beep each second is presented during this tim...

Page 8: ...tant that the tube and the dome fit correctly into your ear 4 When the dome is placed correctly you should not be able to see the tube sticking out when you face a mirror Note You should never attempt...

Page 9: ...lower pitch Programme Selector You can have up to four different programmes on your hearing instrument The selection of programmes can be changed by your hearing care professional 1 You can switch be...

Page 10: ...ramme the receiver of the telephone should be held as shown in the drawing You may need to move the handset around slightly to find the best reception If you do not wish to have a telecoil programme y...

Page 11: ...rtain level the instrument will emit five soft beeping signals This sequence will continue every five minutes until the instrument automatically switches off The occurrence of the sequence can differ...

Page 12: ...rect heat or sunlight since excessive heat can damage the instrument or deform the casing Cleaning the Earmould The earmould should be cleaned regularly 1 Remove the earmould and the tubing from the h...

Page 13: ...he dome over the grooves on the tube to mount it 1 2 2 Make sure that it is securely fastened 1 2 Tulip Dome The Tulip Dome consists of two leaves It is important that the largest leaf is the outermos...

Page 14: ...g scanning procedures Other types of radiation burglar alarms room surveillance systems radio equipment mobile telephones etc contain less energy and will not damage the hearing instrument They could...

Page 15: ...leave them in the instrument for a prolonged period If your hearing instrument is equipped with a low battery warning feature replace battery immediately after low battery warning is reached 6 Used ba...

Page 16: ...ta Maximum Output 2cc Coupler IEC 60118 7 ZL61 DI Classic 123 dB SPL Typical ZL61 DI Open 123 dB SPL Typical ZL71 DVI Classic open 126 dB SPL Typical ZL71 DVI Thin Tube 129 dB SPL Typical ZL81 DVI 133...

Page 17: ...sound outlet filter Volume set too low Squealing Sound not clear or distorted Loose earmould The dual stabilizer II system needs re initialization Dome not placed correctly Build up of earwax Tube co...

Page 18: ...ome Consult your hearing care professional Consult your physician Consult your hearing care professional Consult your hearing care professional ome itivity er Remove and reinsert Consult your hearing...

Reviews: