background image


Smart Resource Booking Technology  


www.resourcexpress.com


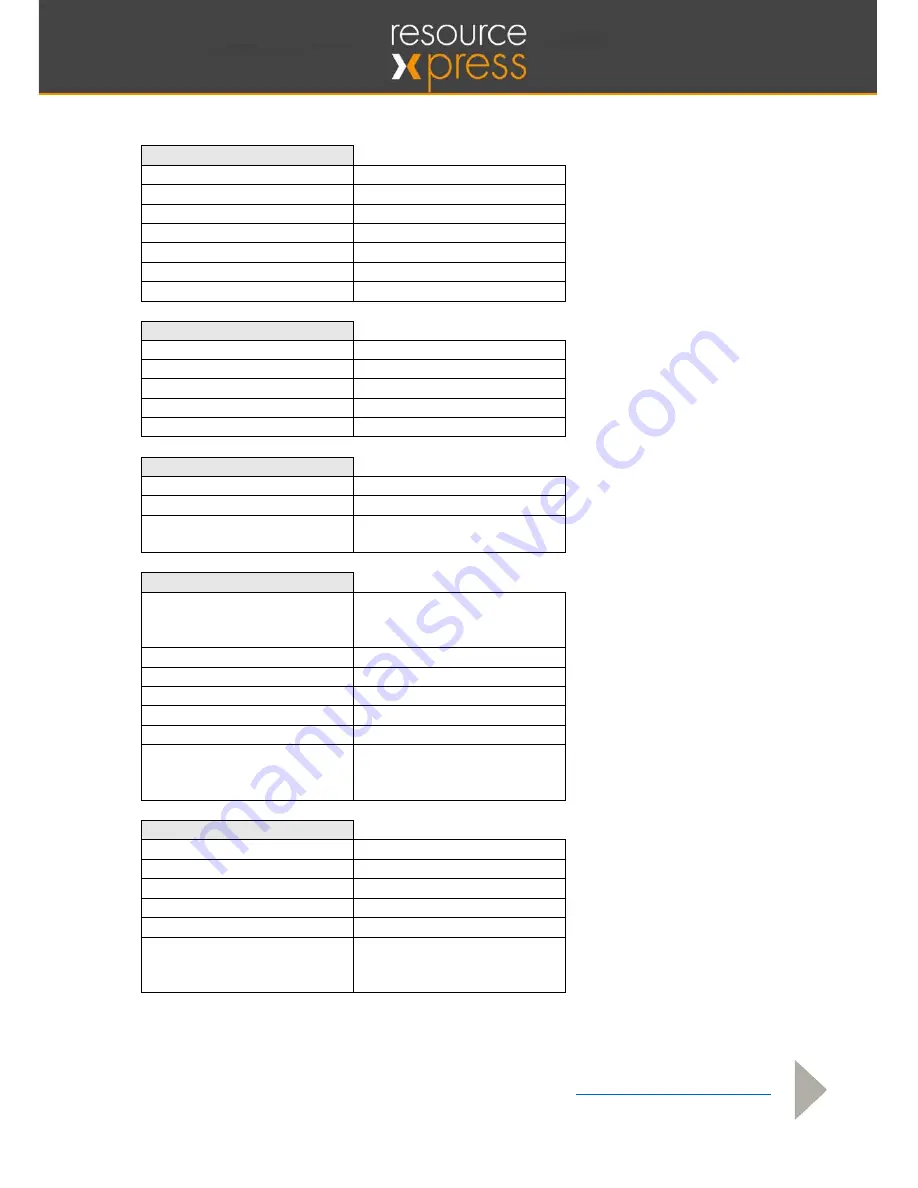
Specification  

Panel Information  


Screen size  

10.1”  

Resolution  

1280 x 800  

Brightness  

450 cd/m

2


Contrast Ratio  

600:1  

Aspect ratio  

16:9  

Viewing Angle  

80/80-80/80  

Touch Technology  

Capacitive 5 Point  


Hardware and OS  


CPU 

Quad Core,1.6GHz  

Graphics Hardware  

RK 616  

Internal Memory  

2GB, DDR SDRAM  

Flash Memory  

8GB NAND Flash  

Operating System  

Android KitKat 


Communications  


Bluetooth  

4.0  

Wi-Fi  

802.b/g/n  

Wired Ethernet  

wired 10/100 Ethernet 

with POE  


General Information  


I/O Ports  

DC/ SD/USB 2.0x 1/Micro  

USB/Mini HDMI/Ethernet  

Port  

DC Input  

9-12v  

Power Supply  

12v/2.0A  

Power consumption  

14W (max)  

Operation Temperature  

0-40 centigrade  

Relative humidity  

0.85  

Certifications  

ROHS. FCC & CE  

compliant, PSU is also UL,  

UN38.3 compliant  


Dimensions  


Size  

W252 x H178 x D24mm  

Weight  

594g  

Product carton size  

L323 x W240 x H112mm  

Master carton (3 units)  

L570 x W325 x H242mm  

Master carton weight  

4.5Kg  

Certifications  

ROHS. FCC & CE  

compliant, PSU is also UL,  

UN38.3 compliant  


Summary of Contents for QX+

Page 1: ...Configuration Installation Guide ...

Page 2: ... its use will be confined to the officers of your company and that no part of its contents will be disclosed to third parties without the prior written consent of QED Advanced Systems Ltd This online publication is to be returned to QED Advanced Systems Ltd when it is no longer required for the agreed purpose Version Document version Date Acknowledgements QED Advanced Systems Ltd respectfully ackn...

Page 3: ...iption 4 Specification 5 Rear Panel Controls 6 Procedures 7 Power On 7 Configure Wi Fi 7 Ethernet Configuration 10 Configure ResourceXpress URL 11 Appendix A Changing the Default Security PIN 13 Appendix B Mounting Instructions 14 Glass Walled Rooms 14 Solid or Partition Walls 16 Appendix C Safety and Warnings 17 ...

Page 4: ...h the ResourceXpress innovative and intelligent resource management system It has a large 10 1 wide screen with 1280 x 800 resolution for a clear display of room information Robust capacitive 5 point touchscreen technology provides excellent responsiveness to touch Wi Fi 802 11b g n or LAN connection via the 10 100 Mbps Ethernet port with POE Power over Ethernet Low profile sleek design with 75mm ...

Page 5: ...KitKat Communications Bluetooth 4 0 Wi Fi 802 b g n Wired Ethernet wired 10 100 Ethernet with POE General Information I O Ports DC SD USB 2 0x 1 Micro USB Mini HDMI Ethernet Port DC Input 9 12v Power Supply 12v 2 0A Power consumption 14W max Operation Temperature 0 40 centigrade Relative humidity 0 85 Certifications ROHS FCC CE compliant PSU is also UL UN38 3 compliant Dimensions Size W252 x H178 ...

Page 6: ...rcexpress com 6 Rear Panel Controls Top 1 LED 2 SD Slot and Cover 3 Menu Enter Button 4 Function Keys Up Down 5 Function Keys Up Down Bottom 6 Power Switch 7 DC In 8 Mini HDMI Out 9 Add in module slot 10 Micro USB 11 USB Type A 12 Ethernet RJ45 ...

Page 7: ...ed power cable The LED See 1 above will be lit up on the top edge of the device Configure Wi Fi After the power up sequence the image below will be displayed on the screen Touch the four corners of the screen starting top left and going clockwise as indicated by the numbers below The PIN code prompt will appear The default PIN code is 11223344 ...

Page 8: ...current PIN a panel at the top of the screen will appear select the three dots in the top right corner From this menu select Quit Pressing the Menu Enter button No 3 on Rear Panel Controls Illustration on the top of the panel will exit to the screen as shown below Select Settings ...

Page 9: ...ww resourcexpress com 9 Select Wi Fi Ensure it is switched to ON Choose the correct network and enter the password Press the Menu Enter button No 3 on Rear Panel Controls Illustration on the top of the panel to return to the Home Screen ...

Page 10: ...Smart Resource Booking Technology www resourcexpress com 10 Ethernet Configuration From the Home screen select Settings then select More followed by Ethernet to turn the feature on ...

Page 11: ...logy www resourcexpress com 11 Configure ResourceXpress URL As when configuring Wi Fi touch the four corners of the screen starting from top left and going clockwise The PIN code prompt will appear The default PIN code is 11223344 ...

Page 12: ...ter the correct URL for the appropriate resource profile see ResourceXpress Administration Configuration Guide The information that will need to be changed is the server host name or IP number example IP number shown above and the ID number Change server to the IP address or hostname for the ResourceXpress Server Replace ID 1 with the correct ID number for the resource profile and select Save to q...

Page 13: ...rs of the screen starting from the top left and going clockwise as previously described a prompt for the current PIN code will then appear After entering the current PIN a panel at the top of the screen will appear select the three dots in the top right corner Select Change PIN Enter the Old PIN and the New PIN and select Save to change remembering to make a note of the new PIN ...

Page 14: ...g rear of screen bracket half 3 Thoroughly clean the area on the glass to be bonded using sachets provided and wait for all liquid to evaporate Note light use of a fine abrasive such as Scotchbrite prior to cleaning will ensure a sound surface for bonding The VHB tape should already be fixed to the other half of the bracket but if not ensure the area on the bracket is also prepared as above 4 Peel...

Page 15: ...tside edges of the bracket half on the glass and slide it down until it sits on the stop tabs see image above 7 Making sure the screen is still level hold it firmly whilst tightening the 2 x M4 screws on the underneath of the bracket 8 Finally attach the power cable and plug in once finished cover the cable in protective trunking if required NOTE VHB Tape supplied by QED is designed to bond on nor...

Page 16: ...e bracket to the mark in step 1 and mark four fixing hole positions onto the wall 3 Drill suitably sized holes for wall plugs supplied see guide supplied with bracket cavity wall plug not supplied and fit wall plugs 4 Using the four pan head screws supplied fix the bracket half to the wall 5 Align the retaining tabs with the outside edges of the bracket half fixed to the wall and slide the screen ...

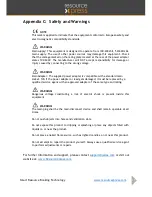
Page 17: ...le with a standard main socket NB If the power adapter or lead gets damaged it must be replaced by a qualified service agent with an approved adapter of the same type and rating WARNING Dangerous voltage constituting a risk of electric shock is present inside this equipment WARNING The main plug shall be the main disconnect device and shall remain operable at all times Do not push objects into hol...

Reviews: