14
Removing A Complete Exhalation Valve Assembly
1.
Lay the suit on a clean flat surface and open the zip to its fullest extent.
2.
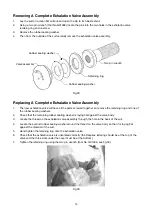
Using a two pin wrench (Tool No.G01486) locate the pins into the two holes in the exhalation valve
retaining ring and unscrew.
3.
Remove the rubber sealing washer.
4.
Then from the outside of the suit carefully remove the exhalation valve assembly.
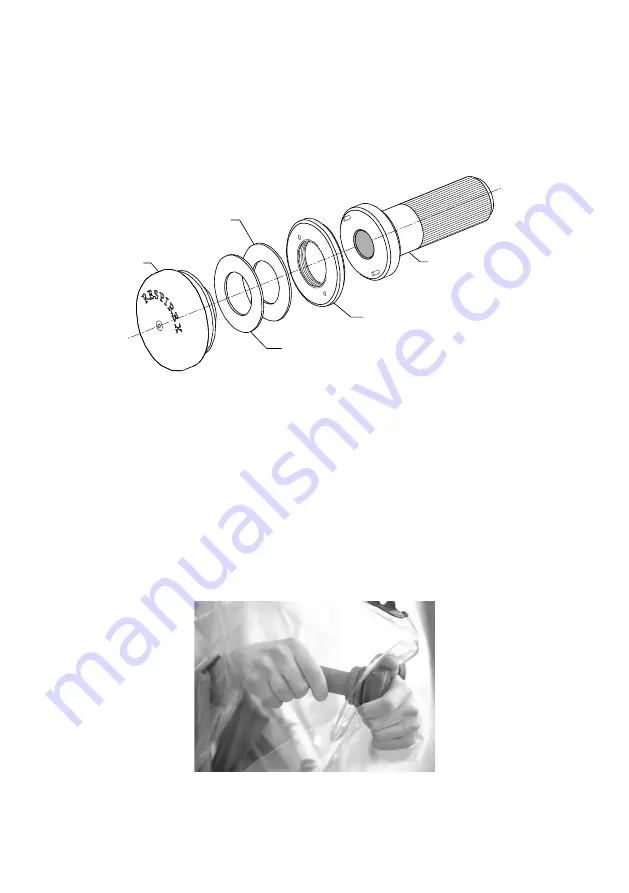
Fig.29
Replacing A Complete Exhalation Valve Assembly
1.
The new exhalation valve will have all the parts screwed together, so remove the retaining ring and one of
the rubber sealing washers.
2.
Check that the remaining rubber sealing washer is laying flat against the valve body.
3.
Locate the thread on the exhalation valve assembly through the hole in the back of the suit.
4.
Locate the second rubber sealing washer around the thread on the valve body so that it is laying flat
against the material of the suit .
5.
Hand tighten the retaining ring onto the exhalation valve.
6.
Check that the exhalation valve is orientated correctly (the Respirex lettering should be at the top of the
valve and the three slots under the cover must be at the bottom).
7.
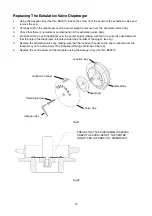
Tighten the retaining ring using the two pin wrench (Tool No. G01486, see fig.30).
Fig.30
Rubber sealing washer
Valve assembly
Two pin wrench
Retaining ring
Rubber sealing washer


