


5-6
REM
staR
M s
ERiEs
U
sER
M
anUal
p
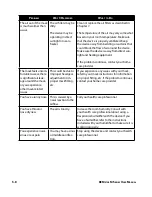
RoblEM
W
hy
i
t
h
appEnEd
W
hat
to
d
o
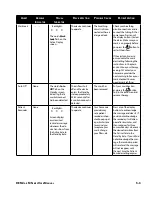
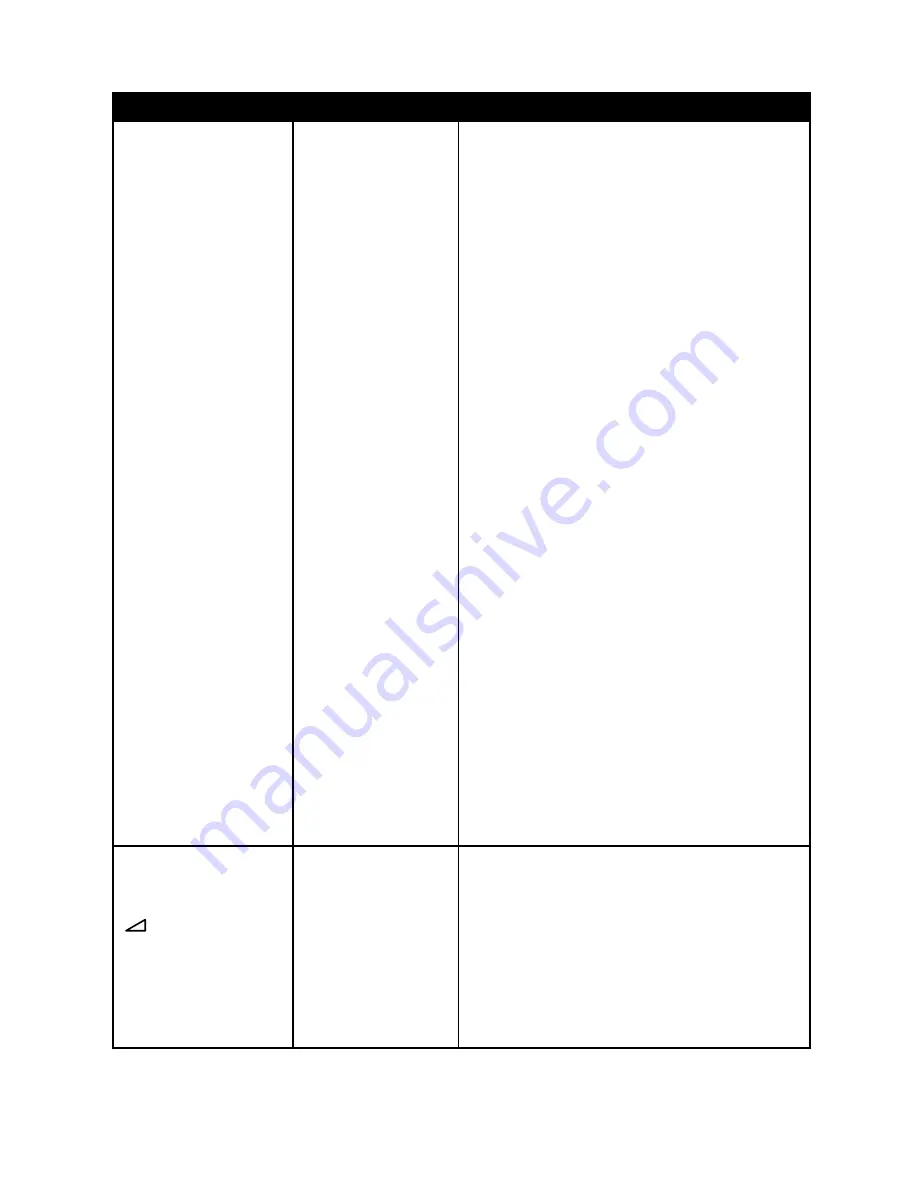
The device has fallen
off your table or night
stand.
The device may not
have been properly
seated on the night
stand, or the place-
ment of the tubing
may have caused the
device to fall.
Always make sure your device is placed on
a hard, flat surface so the rubber feet on the
bottom of the device can adhere to the surface
(make sure there is no fabric under the device).
The device (and humidifier, if using) must be
level for proper operation.
Also, place the device away from the edge of
the night stand or table, so it doesn’t acciden-
tally get knocked off the table.
If you are using a humidifier with the device,
make sure that the device and humidifier are
placed below your head and mask, so that any
condensation in the tubing drains back into
the water chamber.
If the device and humidifier fall and water gets
into the device, drain all water out of the device
and make sure it is completely dry before reap-
plying power.
If the placement of the tubing causes the de-
vice to fall, make sure that you use proper hose
management when setting up your device.
Route the tubing behind the bed’s headboard,
as shown in Chapter 3, Setup.
If the device falls or water gets into the device
upon falling, let the device dry completely be-
fore restarting it. If the device does not operate
correctly after falling, contact your home care
provider.
The Ramp feature does
not work when you
press the Ramp button
( ).
Your home care
provider did not
prescribe Ramp for
you, or your CPAP
pressure is already
set to the minimum
setting.
If Ramp has not been prescribed for you, dis-
cuss this feature with your home care provider
to see if they will change your prescription.
If your provider has enabled Ramp, but the fea-
ture still does not work, check the CPAP setting
on your Active Display screen. If CPAP is set to
the minimum setting (4.0 cm H
2
O), the Ramp
feature will not work.


