background image

When the radio frequency channel of the Digital Transmitter and the 
radio are same, the “zzz” sound will stop. Adjust the volume to 
medium level in iPod or audio player, and  start playing music. Now 
you will hear the music playing from the mp3 or audio player will 
output from the radio. 

Note: If volume level from mp3 or audio 

player is high, the music output from the radio will sound 
distorted.

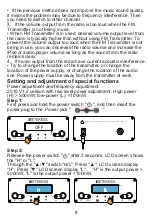
5. Adjust the volume in your radio until the satisfactory output is 
reached. 
6. When interference occurs, the music from radio will not sound clear. 
In this case, please switch to different channels by repeating Step 2 
and 3 until the music sound quality is clear again. 

Adjustment of Radio Frequency Channels


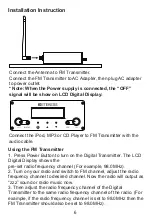
1. Press Power Button to turn on the FM Transmitter 
2. Adjust the FM frequency channels: (Radio frequency channels 
adjustment range is 76.0MHz~108.0MHz.) 
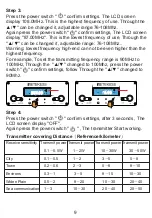
3. Press Frequency Up/Down Button to increase/decrease 0.1MHz 
radio frequency channels on the Transmitter. 
4. Press and hold the Frequency Up/Down Button to continuously 
increase/decrease radio frequency channels on the Digital 
Transmitter. 

Power On/Off and Power


Press Power Button turn off the FM Transmitter. 

Important Notice


• This product should be kept in dry condition and away from water. 

• Keep the product off direct sunlight or high temperature environment. 

• Please unplug the power plug when it is not in use. 

Troubleshooting


1

If the FM Transmitter does not function normally, 

• Please check whether all wires/ cables being connected tight and 

correct. 

• If the product cannot be powered on, check whether the AC adapter 

works and connects properly. 
2

If music output from the radio is distorted (not clear), 

• First, reduce volume from iPod or audio player to medium or lower 

volume range, and then turn up volume from radio to desired level. 
The music sound quality should improve. 

7

Summary of Contents for TR508

Page 1: ...FM TRANSMITTER TR508 VOL VOL 108 00 FM MHz ST Instruction Manual Before use please read it carefully and properly keep...

Page 2: ...ea is likely to cause interference in which case the user at his or her own risk and expense will be required to correct the interference Declaration of Conformity declares that the POD FM conforms to...

Page 3: ...es Hardware Basics Installation Instruction Using the FM Transmitter Adjustment of Radio Frequency Channels Power On Off Important Notice Troubleshooting Setting and adjustment of special functions Ou...

Page 4: ...signed to operate non stop 24 7 The higher you place the antenna the farther you will transmit Complete easy to follow plug play instructions are included plus tips on getting the best distance possib...

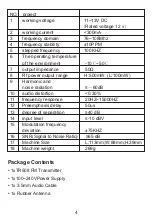
Page 5: ...ower output range H 500mW L 100mW 9 Harmonic and noise radiation 60dB 10 audio distortion 0 30 11 frequency response 20HZ 15000HZ 12 Preemphasis delay 50us 13 degree of separation 40 dB 14 input level...

Page 6: ...IC volume 3 3 5mm Jack for Audio Cable input 4 3 5mm Jack for electret microphone And the computer use the same microphone input 5 Power Button On Off 6 Frequency Up Button To increase the radio frequ...

Page 7: ...r 1 Press Power Button to turn on the Digital Transmitter The LCD Digital Display shows the pre set radio frequency channel For example 98 0MHz 2 Turn on your radio and switch to FM channel adjust the...

Page 8: ...djustment range is 76 0MHz 108 0MHz 3 Press Frequency Up Down Button to increase decrease 0 1MHz radio frequency channels on the Transmitter 4 Press and hold the Frequency Up Down Button to continuous...

Page 9: ...from the radio have current acoustic interference Try to change the location of the transmitter or change the location of the power supply or change the location of the audio line Power supply must b...

Page 10: ...itting frequency range is 90MHz to 100MHz Through the changed to 100Mhz press the power switch confirm settings follow Through the changed to 90Mhz Step 4 Press the power switch confirm settings after...

Page 11: ...exposure to meet occupational requirements Exposure awareness can be facilitated by the use of a product label directing users to specific user aware ness information Your Retekess radio has a RF Exp...

Page 12: ...This equipment has been tested and found to comply with the limits for a Class B digital device pursuant to Part 15 of the FCC Rules These limits are designed to provide reasonable protection against...

Page 13: ...Industrie Canada applicables aux appareils radio exempts de licence L exploitation est autoris e aux deux conditions suivantes 1 l appareil ne doit pas produire de brouillage 2 l utilisateur de l appa...

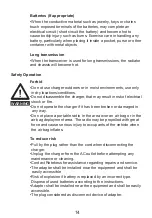
Page 14: ...eadsets or earpieces at high volume When using the radio without a headset or earpiece do not place the radio s speaker directly against your ear Use careful with the earphone maybe possible excessive...

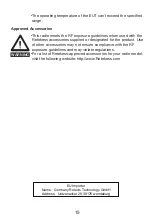
Page 15: ...k or fire Do not operate the charger if it has been broken or damaged in any way Do not place a portable radio in the area over an air bag or in the air bag deployment area The radio may be propelled...

Page 16: ...ssories may not ensure compliance with the RF exposure guidelines and may violate regulations For a list of Retekess approved accessories for your radio model visit the following website http www Rete...

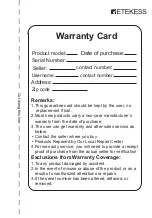
Page 17: ...f purchase 3 The user can get warranty and after sales service as below Contact the seller where you buy Products Repaired by Our Local Repair Center 4 For warranty service you will need to provide a...

Page 18: ...an Eshow Electronic Commerce Co Ltd Add 7 F Sanjiang Building No 170 Nanyang Road Huiji District Zhengzhou Henan China Facebook facebook com Retekess ru E mail support retekess com ru Web retekess com...

Reviews: