Inserting rather than auto-loading is also necessary if you wish to browse the
contents, or if you need to switch (or ‘flip’) disks whilst running a program using a
multi-disk set.
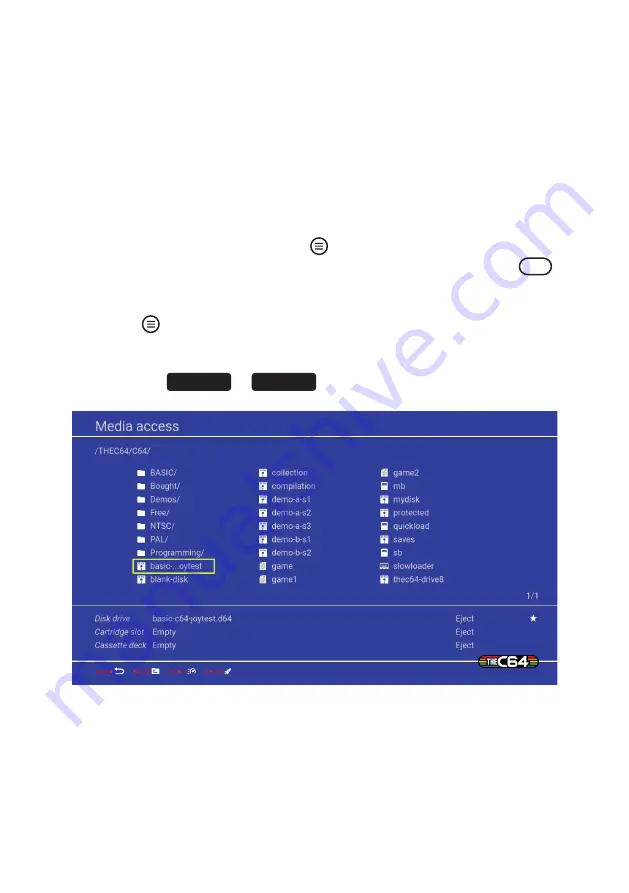
INSERTING OR SWAPPING DISKS
Inserting a virtual disk is only possible from Classic mode using Media access.
1. Connect a suitably prepared USB stick
2. From BASIC in Classic mode, press
and select Media access
3. Highlight the virtual disk file in Media access you wish to insert and press
FIRE
4. The disk file appears in the current media section in the bottom third of the
Media access screen, next to ‘Disk drive’ to confirm it has been inserted
5. Press
to return to the current computer.
6. If flipping or swapping disks in mid-program, follow the instructions in the
currently running C64 or VIC 20 program to learn what to do next. Typically
you press
SPACE
or
RETURN
to confirm the disk has been changed.
If you inserted a disk from BASIC without running a program first, nothing obvious
has happened unless the inserted disk has filename flags, in which case those flags
are automatically applied. So, if you specified a computer model or any screen
settings then they take immediate effect upon your return to BASIC.
71
Summary of Contents for THEC64
Page 2: ......
Page 3: ...USER MANUAL i ...
Page 11: ...1 CHAPTER SETTING UP Unpacking THEC64 Connecting and Starting THEC64 Initial Set Up 1 ...
Page 14: ......
Page 15: ...2 CHAPTER THEC64 JOYSTICK Joystick Button Assignments Alternative USB Controllers 5 ...
Page 24: ......
Page 34: ......
Page 42: ......
Page 48: ......
Page 86: ......
Page 87: ...9 CHAPTER UPGRADING THEC64 Find Your Current Build Version How to Upgrade Your Firmware 77 ...
Page 90: ......
Page 91: ...APPENDICES 81 ...
Page 112: ......
Page 113: ......
Page 114: ......


