


Before You Begin
This cable allows you to mount the face and shafts to your RetroSound® radio
separately from its main body. One end of the extension cable has a large white
connector and two smaller white connectors. This end of the cable will be installed
into the Radio Face and radio shafts. The other end has a large white connector
and two RJ-11 telephone plug connectors. This end of the cable will be installed
into the Radio Body. Should you have any questions about the use or installation
of this product, please email us at
tech@retromanufacturing.com
.
Step #1
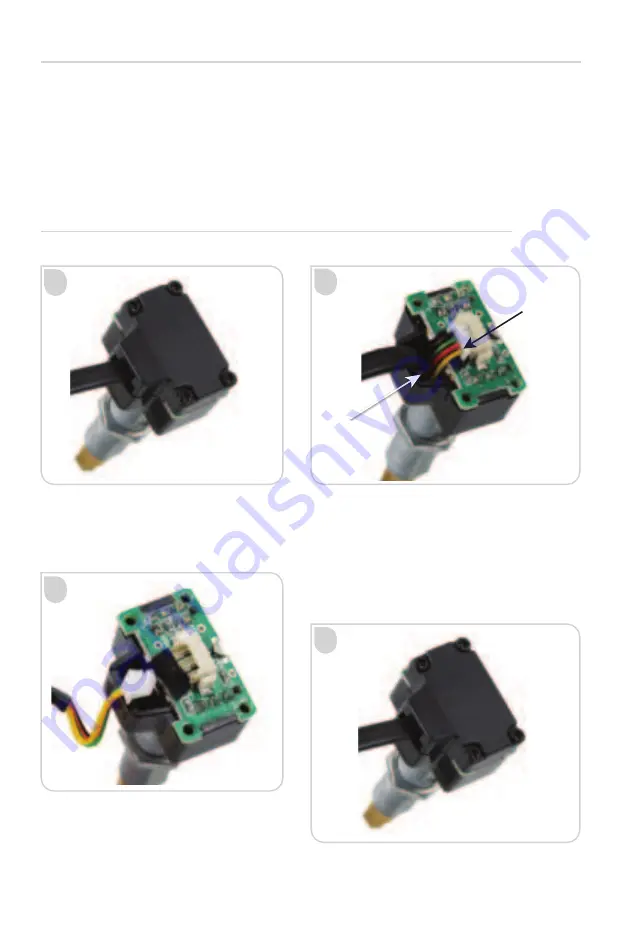
Installing the extension cable into the radio shafts
Remove the plastic shaft cover
by removing the four small black
screws at the back of the shaft
(do
not lose the screws).
Re-install the shaft cover with the four
small black screws.
Repeat these steps
with the second shaft.
Plug the extension cable’s connector
into the PC board of the shaft.
Please do not force the connector
into the socket; it only installs one-
way; see the location of the yellow
wire in the image above.
Unplug the white connector from the PC
board in the rear of the shaft. Notice the
bend in the wire; you will need to bend
the wiring of the new extension cable
when installing it.
(NOTE: the bend in
the wire acts as a strain relief for the
cable when the back is re-installed)
.
A
C
B
D
NOTE: Location
of the yellow wire
NOTE: Bend
in wire for
strain relief


