background image

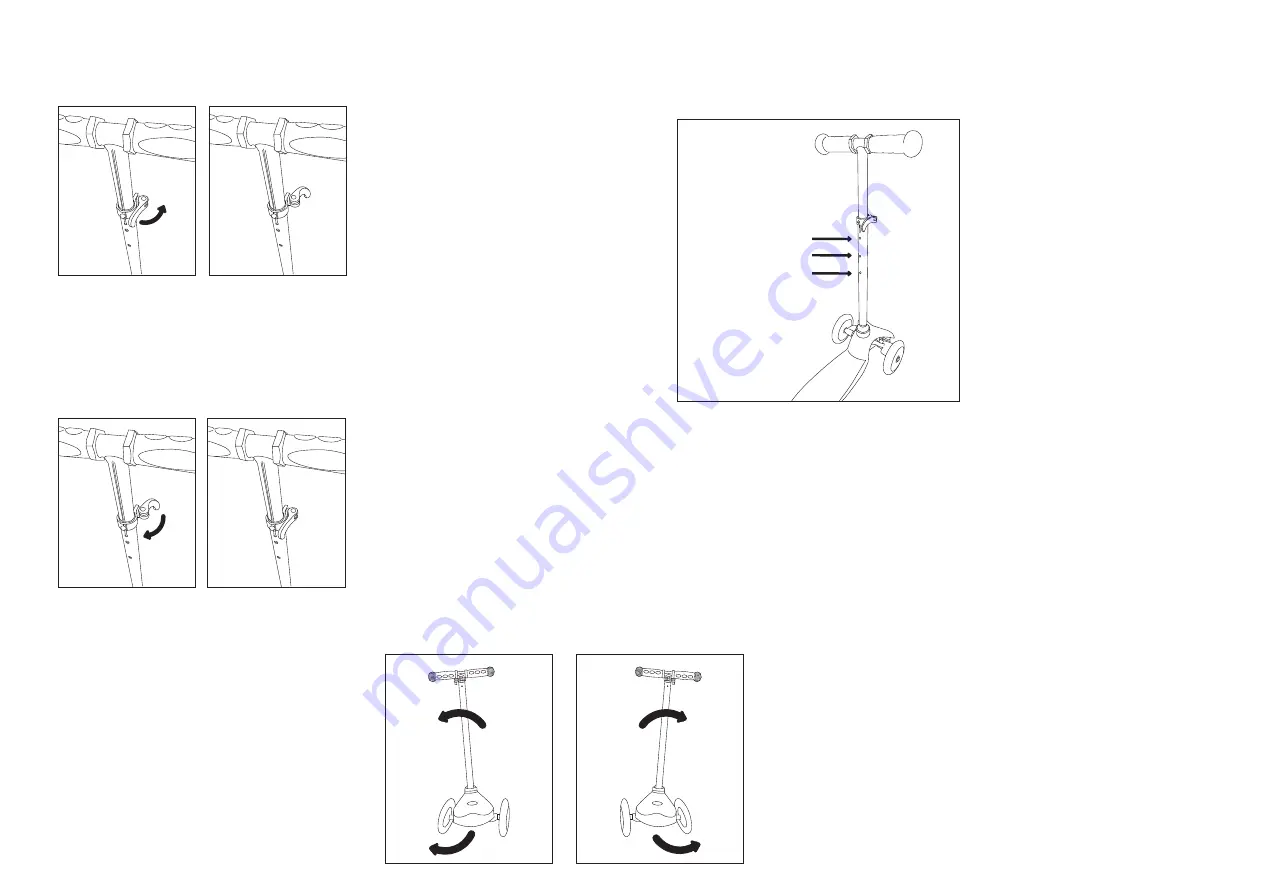
Open handlebar Quick Release Lever by pulling it away from the handlebar assembly.

ADJUSTMENT

Grasp the grips with both hands. Place one foot 

on the deck and push with the other foot. Once 

you are moving, position both feet on the deck 

approximately at 45⁰ angle to direction of travel.  

To turn, lean in the direction you would like to 

go. Lean right to turn right, lean left to turn left.

RIDING

1

Lock close the Quick-Release Lever tightly against the handlebar assembly. 

The lever should begin to offer resistance at about the half-way point in its travel. The lever should 

require some force to close. If it closes too easily, or if the effort to close the clamp is too great, adjust 

the clamping force by loosening or tightening the adjusting nut on the opposite side of the lever.

3

Slide T-Bar upwards to one of the three Lock-Button hole positions. Make sure 

Lock-Button fully engages into the desired Lock-Hole.

2

Height - 25 in.
Height - 23 in.

Height - 21 in.

Turn Right

Turn Left

1

2

3

Summary of Contents for CHIPMUNK

Page 1: ...cessarily mean a child s size is appropriate to fit or maintain control on this scooter Read and understand the enclosed owner s manual and all other literature before riding this product Always wear safety equipment such as helmet knee pads and elbow pads when riding your scooter and keep helmet s chinstrap securely buckled Always wear closed toe shoes Ride on smooth paved surfaces away from moto...

Page 2: ...le pressing Red Locking Button insert Handlebar steering Mast into scooter Body deck Mounting Hole flat side facing rider Retrospec logo facing forward Insert Mast until you hear a click indicating the mast is locked into the scooter body Some force may be required ASSEMBLY Handlebar Steering Mast Reverse procedure Locate Red Locking Button on side of the scooter behind front wheels Press Red Lock...

Page 3: ...DING 1 Lock close the Quick Release Lever tightly against the handlebar assembly The lever should begin to offer resistance at about the half way point in its travel The lever should require some force to close If it closes too easily or if the effort to close the clamp is too great adjust the clamping force by loosening or tightening the adjusting nut on the opposite side of the lever 3 Slide T B...

Page 4: ...ammonia based cleaners they may damage surfaces and plastic parts Get in the habit of inspecting your scooter on a regular basis and before every ride CARE The manufacturer warrants this product to be free of manufacturing defects for a period of 90 days from the date of purchase This Limited Warranty does not cover normal wear and tear or any damage failure or loss caused by improper assembly mai...

Reviews: