background image

User’s Manual Electric Bike

13

14

General Operation

Switching your E-Bike On/Off

Switching ON: Hold the MODE button for 2s.

Switching OFF: Hold the MODE button for 2s again. 

In the OFF position system current “leakage” is less than 1 uA. 

When parking your bike for more than 10 minutes, the system switches off 

automatically.

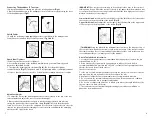
Display Interface

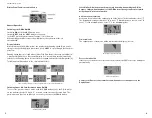
After switching on the E-Bike system, the display shows Running Speed. Once you’re 

riding, to change the displayed information, press MODE to cycle through the functions 

as below: 

Running Speed (Km/h) → Trip Distance (Km) →Trip Time (Hour) → Average Speed (Km/h) 

→ Max Speed (Km/h). Each function will display for 2 seconds and then automatically 

returns to the Running Speed interface. When stopped and speed reads 0 mph (km/h), 

Total Distance will be added to the circulation interface.

The circulation interface of the condition that the speed is 0 mph (km/h)

Switching Smart-Aid Push-Assistance Mode On/Off

To access the push-assistance mode, hold the DOWN button for 2s, the E-Bike will go 

on at a uniform speed of 6 Km/h, “P” is shown on the screen at the same time. The 

push-assistance function switches off as soon as you release the DOWN button.

Push Assistance Mode

Start-Aid Push-Assistance function may only be used when pushing the E-Bike. 

Danger of injury when the wheels of the E-Bike do not have ground contact while 

using the push-assistance function.

Assistance Level Selection

Assistance levels indicate the output power of the motor. The default value is level “1”.

The default power ranges from level “0” to level “5”. Output power is zero on Level “0”. 

Level “1” is the minimum power. Level “5” is the maximum power.

Assistance Level 1

Power Indicator

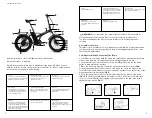
The output power of the motor will be indicated by the display - below:

Motor Power Indicator Interface

Error code Indication

If there are errors about the electronic control system, the ERR/error code will appear 

automatically. 

Error Code Indication

Contact your Dealer or Customer Service when an error code appears on the 

Display Panel.

Display Panel Functions and Indicators

Summary of Contents for Jax

Page 1: ...USER S MANUAL 500W Jax ...

Page 2: ...ork 1 year All other components 6 months This warranty does not include labor and transportation charges The company cannot accept any responsibility for consequential or special damage This warranty applies only to the original retail purchaser who must have a proof of purchase in order to validate any claim This warranty applies only in the case of defective components and does not cover the eff...

Page 3: ...pean CPSC EN standards Always comply with the local laws and ordinances NEVER ride on the same side of the road as oncoming traffic NEVER carry a passenger this bicycle is designed for a single rider only NEVER hang item s over the handlebars this could interfere with steering or catch in the front wheel causing a crash NEVER hold on to another motor vehicle or bicycle NEVER ride too close to anot...

Page 4: ...of the frame Fig 6 7 The lever should require some effort to close If the lever is too difficult to close or closes with little effort tighten or loosen the nut on the end of the latch to adjust the lever tension Fig 5 1 Tires Check for cuts and wear Maintain pressure indicated on tires sidewall for maximum efficiency and safety 2 3 Wheels Check that axles are sealed spin smoothly and are secured ...

Page 5: ...ow your seat can go and lower limit line how high your seat can go marked on the front of the seatpost Lower Limit Line Never adjust the seat height so that the limit line at the lower end of the seat post is showing outside of the frame Fig 15 Upper Limit Line Always adjust the seat height so that the limit line at the upper end of the seat post is showing outside of the frame Fig 16 WARNING Usin...

Page 6: ... assistance system will help riders save their energy when starting the bike rolling How Start Aid Works When pressing the Start Aid button the bike can be started at a speed of 3 5MPH 6km h When the bike starts moving forward start to pedal and release the Start Aid button Note You can pedal one crank revolution to start the motor without using the Start Aid button Contents 1 Important System Cau...

Page 7: ... DOWN 2 Operation Your new electric assistance bicycle is a revolutionary means of transport using an aluminum frame Li Ion battery a super high efficiency electric hub motor and controller with electric pedal assistance system to support normal pedaling These components will ensure safe riding with excellent function and performance It is important for you to note the following guidelines to ensu...

Page 8: ... Off To access the push assistance mode hold the DOWN button for 2s the E Bike will go on at a uniform speed of 6 Km h P is shown on the screen at the same time The push assistance function switches off as soon as you release the DOWN button Push Assistance Mode Start Aid Push Assistance function may only be used when pushing the E Bike Danger of injury when the wheels of the E Bike do not have gr...

Page 9: ...battery and charger should be minimum 4 in 10cm away from the wall and in a cool well ventilated environment Place nothing around or on the charger while in use Fig 5 2 Procedure for Charging Charge the bike battery according to the following procedure 1 When charging the battery by AC house wall plug it is not necessary to be on 2 Securely insert the charger output plug into the battery then plug...

Page 10: ... the house or according to this instruction 3 please well maintain the battery to avoid natural over discharge 4 no charging when the power supply is lower than 100V if the above has no effect please contact your vendor or authorized service Check the distance between the magnetic ball point and the wheel speed sensor and make sure the distance should within 5mm 1 check and repair the power outlet...

Page 11: ...round 6 White speed sensor III Power wire is connected with the power 1 Red 48V 2 Black ground 19 20 12 Main Technical Specification Sheet Please find model name of your bike below Here is some of the general technical data for this electric bike Please find the crossed technical data regarding the bike motor below Please find the crossed technical data battery and charger below Maximum Speed with...

Reviews: