background image

Control System Startup Guide                 

Copyright 2019 REV Robotics, LLC 

10 

9.


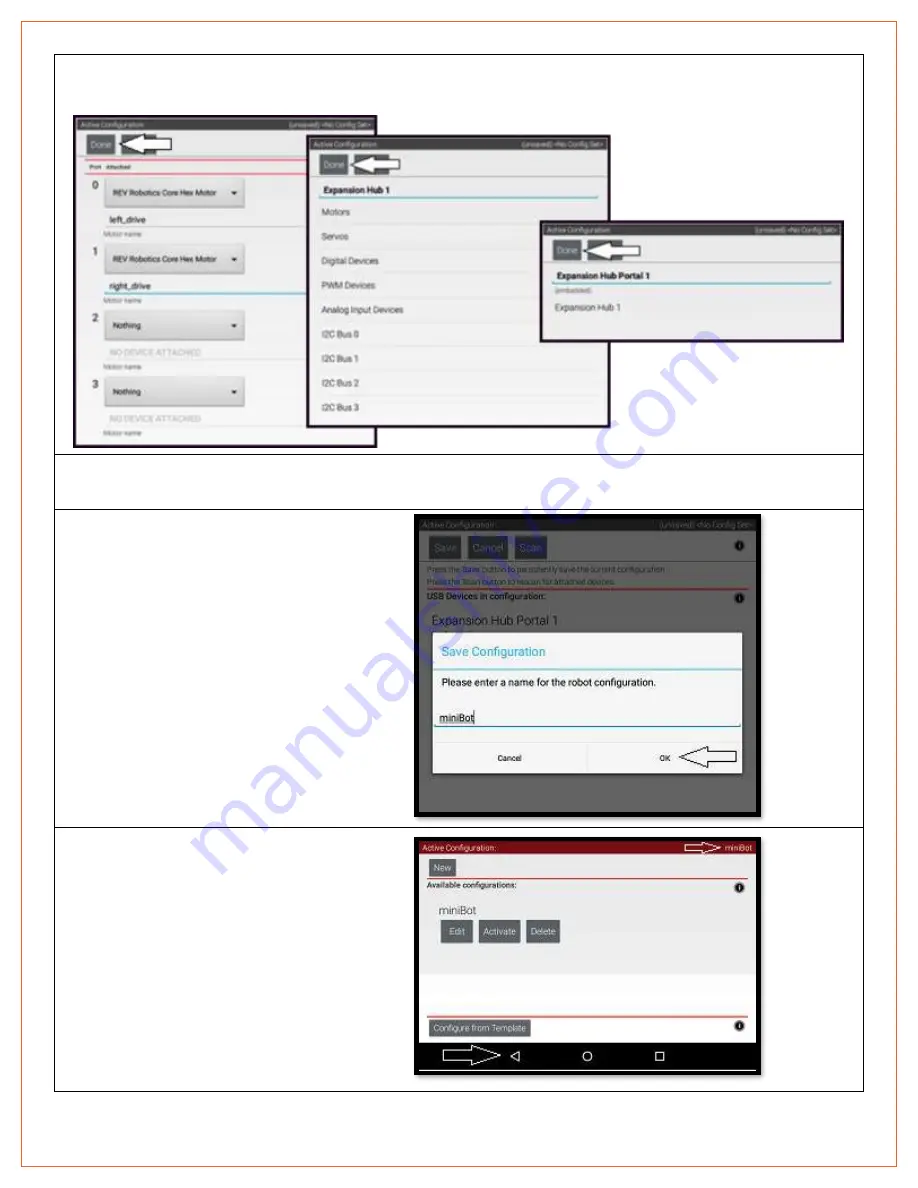
Press the “Done” button (at the top left corner of the page) 3 times.


10.


Press “Save”.


11.


Enter “miniBot” as your 

configuration name, then select 

“OK”. 


12.


You now have an active 

configuration called “miniBot”. 

Press the Android back button to 
return to the Driver Station page. 


Summary of Contents for REV-31-1159

Page 1: ...Control System Startup Guide Copyright 2019 REV Robotics LLC f Control System Startup Guide ...

Page 2: ...nd configure your robot The examples here assume you have built a simple robot with two drive motors TABLE OF CONTENTS 1 Required Materials 1 2 Driver Station and Control Hub Paring 2 3 Configure Your Robot 7 4 Program Your Robot 11 5 Connect the Expansion Hub 17 6 Switching to 5 GHz 19 7 Factory Reset 21 8 Additional Resources 21 ...

Page 3: ...red Materials Control Hub REV 31 1595 Slim Battery REV 31 1302 Amazon Fire Tablet USB Game Pad REV 31 1159 Micro USB Hub REV 31 1426 Optional Additional Materials needed to Connect the Expansion Hub Expansion Hub REV 31 1153 XT30 Extension Cable Communication Cable RS 485 ...

Page 4: ...s procedure will need to be repeated See Section 2 ELECTRICAL COMPONENTS of the Building Guide on the FIRST Global website for more information Pairing the Driver Staion with the Control Hub 1 Power on the Control Hub by plugging the 12V Slim Battery into the orange XT30 connector labeled BATTERY on the Control Hub 2 The Control Hub is ready to pair with the Kindle Fire when the LED turns green No...

Page 5: ...stem Startup Guide Copyright 2019 REV Robotics LLC 3 4 Open the FG Driver Station application from the Kindle HOME Screen 5 On the Driver Station page open the menu from the top right corner then select Settings ...

Page 6: ...Control System Startup Guide Copyright 2019 REV Robotics LLC 4 6 Select Pair with Robot Controller 7 Select Wifi Settings ...

Page 7: ...es the name of the network printed on your control hub This should start with FIRST 9 Enter the password to the Wifi network in the password field This defaults to password Press CONNECT 10 After pressing connect press the back arrow at the bottom of the display until you return to the main driver station screen ...

Page 8: ...tartup Guide Copyright 2019 REV Robotics LLC 6 11 After a couple of seconds the Driver Station page will indicate the network name a ping time and battery voltage Your Driver Station is now paired with your Control Hub ...

Page 9: ...to give your sensors and actuators meaningful names that you can reference while programming For this example we will use the robot we built in the Practice Bot Build Walkthrough video located on the FIRST Global website This robot has two motors that we will now configure Configureing Your Robot for the First Time 1 Select the menu on the Driver Station page Then select Configure Robot ...

Page 10: ...Control System Startup Guide Copyright 2019 REV Robotics LLC 8 2 Select New in the top left hand corner 3 Select Expansion Hub Portal 1 4 Select Expansion Hub 1 5 Select Motors ...

Page 11: ...ore Hex Motor 7 Press Enter motor name here and name the motor left_drive This is the name that you will use when you are programming your robot to control this motor Always give things descriptive names so that you can remember what they do when you are programming 8 Repeat the process for Port 1 and name the motor right_drive ...

Page 12: ...0 9 Press the Done button at the top left corner of the page 3 times 10 Press Save 11 Enter miniBot as your configuration name then select OK 12 You now have an active configuration called miniBot Press the Android back button to return to the Driver Station page ...

Page 13: ...how to use the Blocks programming interface on the tablet to program a simple Op Mode An Op Mode is how you tell your robot to perform certain actions given certain inputs For more information on other programming methods see the FIRST Global website http first global Getting Started Programming Your Robot 1 Select Program Manage from the Driver Station Menu ...

Page 14: ...Control System Startup Guide Copyright 2019 REV Robotics LLC 12 2 Select the menu button in the top right Then select Blocks 3 Select Create New Op Mode 4 Name the Op Mode MiniBot and select OK ...

Page 15: ...rom the FIRST Global site called Software Tool Overview This will show you how to program your Mini Bot so you can drive it using your game controller 7 Your program should look like this when you are finished 8 Now that you have completed programming press the Save Op Mode button Now press the Exit button at the top of the display ...

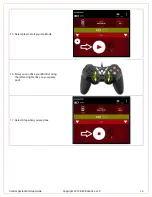
Page 16: ...LLC 14 9 Plug your game controller into the micro USB slot on the Amazon Fire Table 10 On the game controller hold START and press A to pair the controller with the Driver Station 11 A game controller icon will appear for User 1 in the top right of the screen ...

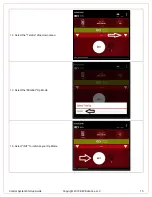
Page 17: ...Control System Startup Guide Copyright 2019 REV Robotics LLC 15 12 Select the TeleOp drop down menu 13 Select the MiniBot Op Mode 14 Select INIT to initialize your Op Mode ...

Page 18: ...System Startup Guide Copyright 2019 REV Robotics LLC 16 15 Select play to start your Op Mode 16 Now you can drive your Mini Bot using the left and right sticks on your game pad 17 Select Stop when you are done ...

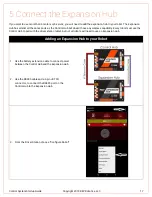
Page 19: ... doesn t have any wireless capability Every robot must use the Control Hub to pair with the driver station tablet but not all robots will need to use an Expansion Hub Adding an Expansion Hub to your Robot 1 Use the battery extension cable to connect power between the Control Hub and the Expansion Hub 2 Use the RS485 cable and a 3 pin JST PH connector to connect the RS485 port on the Control Hub to...

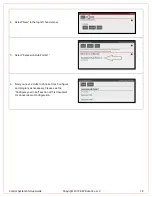
Page 20: ...botics LLC 18 4 Select New in the top left hand corner 5 Select Expansion Hub Portal 1 6 Now you have 2 Hubs to choose from Configure and program as necessary Please see the Configure your robot section of this document for an overview of configuration ...

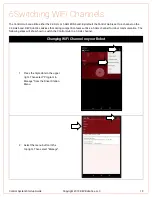
Page 21: ...nnel on the 2 4 GHz band REV Robotics advises that during competition teams utilize a 5 GHz channel for robot communication The following steps will show how to switch the Control Hub to a 5 GHz channel Changing WiFi Channel on your Robot 1 Press the triple dots in the upper right Then select Program Manage from the Driver Station Menu 2 Select the menu button in the top right Then select Manage ...

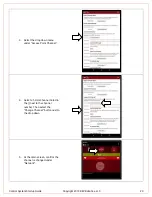
Page 22: ...cs LLC 20 3 Select the drop down menu under Access Point Channel 4 Select a 5 GHz channel noted in the next to the channel number Then select the Change Channel button next to the drop down 5 At the main screen confirm the channel is changed under Network ...

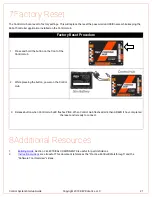
Page 23: ...s and hold the button on the front of the Control Hub 2 While pressing the button power on the Control Hub 3 Release button when Control Hub LED flashes PINK When Control Hub flashes BLUE then GREEN it has completed the reset and is ready to connect 8Additional Resources 1 Building Guide Section 2 ELECTRICAL COMPONENTS is useful for part definitions 2 Instructional videos are all useful This docum...

Reviews: