background image

8

MOTOR REPLACEMENT

TROUBLESHOOTING

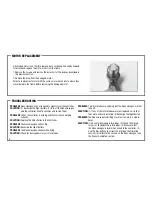
A damaged motor is not hard to replace, but a soldering iron will be needed 
to remove and replace the motor wires from the frame.

1.  Remove the screws and remove the lower half of the body as described in 

the previous section.

2. Remove the prop from the damaged motor.

Select a replacement motor with the same color wires and note where they 
are soldered to the frame before removing the damaged motor.

PROBLEM:

  Nano Hexagon will not respond to signals from the controller. 

SOLUTION:

  (1) Recharge the flight battery. (2) Turn off the Nano Hexagon 

and the controller. Wait 15 seconds and re-link them.

PROBLEM:

  LED on the controller is flashing and the controller is working 

correctly. 

SOLUTION:

  Replace the AA batteries in the controller.

PROBLEM:

  The Nano Hexagon will not flip. 

SOLUTION:

  Recharge the flight battery. 

PROBLEM:

  The Nano Hexagon shakes while flying. 

SOLUTION:

  Check for damaged motors or rotor blades.

PROBLEM:  

The rotor blades are spinning, but the Nano Hexagon will not 
take off. 

SOLUTION:

  (1) If any of the rotor blades were just replaced, verify that 

they were correctly installed. (2) Recharge the flight battery.

PROBLEM:

  The Nano Hexagon is drifting or will not remain in a stable 

hover. 

SOLUTION:

  (1) Check for damaged rotor blades. (2) Check the motors 

for hair or lint below the rotor blades. (3) Make sure that 
the Nano Hexagon is level when linked to the controller. (4) 
Use the trim buttons to correct the drift (see the Trimming 
section). (5) Calibrate the sensors on the Nano Hexagon (see 
the Sensor Calibration section).

Summary of Contents for NANO Hexagon

Page 1: ......

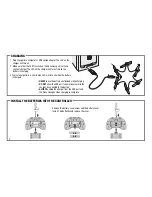
Page 2: ...rger will turn off while the battery is charging 3 Typical charge time is 40 minutes LED will turn on when the battery is charged NEVER leave the battery unattended while charging DO NOT allow the USB port to power down while the charger is connected to the battery ALWAYS unplug the charger from the USB port and the Nano Hexagon when charging is complete Remove the battery cover screw and the batt...

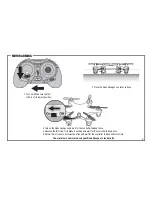
Page 3: ...agon is ready to fly 2 Place the Nano Hexagon on a level surface 3 Turn on the Nano Hexagon and wait for the controller to beep twice 4 Advance the left stick to its highest position and wait for the controller to beep once 5 Return the left stick to its lowest position and wait for the controller to beep one more time ...

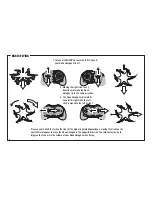
Page 4: ...tick is moved to the left or right 1 To take off SLOWLY advance the left stick until your Nano Hexagon lifts off Please keep in mind that when the front of the model is pointed toward you moving the sticks on the controller will appear to move the Nano Hexagon in the opposite direction To avoid confusion try to imagine that you are in the middle of your Nano Hexagon when flying ...

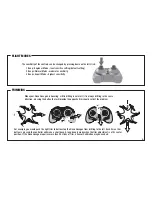
Page 5: ...gon from drifting to the left Each time a trim button is pressed the controller will make a short beep A long beep is made when the trim adjustment is at its center position If the Nano Hexagon requires more than 20 clicks of trim a Sensor Calibration may be needed The sensitivity of the controls can be changed by pressing down on the left stick 1 Beep Beginner Mode least sensitive setting default...

Page 6: ...en the right stick is centered the sensors may need calibration 1 Place the Nano Hexagon on a level surface 2 Center the trim adjustments The controller will make a long beep when the trim is at the center position 3 Change the control sensitivity to the Expert Setting page 5 Move both sticks to their lowest position and to right as far as possible The LEDs on the hex will flash for a few seconds ...

Page 7: ...e B arms will have counterclockwise pitch IMPORTANT If the props are installed incorrectly the Nano Hexagon will not fly B B B A A A If the battery will not hold a charge or the flight time is much less than normal a replacement battery may be needed A soldering iron will be needed to remove and install the battery 1 Remove the 6 screws on the bottom of the Nano Hexagon 2 Carefully separate two ha...

Page 8: ...and the controller is working correctly SOLUTION Replace the AA batteries in the controller PROBLEM The Nano Hexagon will not flip SOLUTION Recharge the flight battery PROBLEM The Nano Hexagon shakes while flying SOLUTION Check for damaged motors or rotor blades PROBLEM The rotor blades are spinning but the Nano Hexagon will not take off SOLUTION 1 If any of the rotor blades were just replaced ver...

Page 9: ...battery power is low Recharge the battery before attempting another flight A dangerous situation can occur when attempting to recharge an over discharged battery ALWAYS keep a supply of sand accessible when charging Dumping sand on the battery will extinguish a LiPo chemical fire ALWAYS KEEP OUT OF REACH OF CHILDREN Adult supervision required Before flying go to www knowbeforeyoufly org Do not tou...

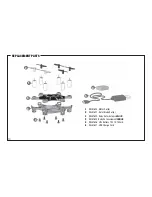
Page 10: ...MENT PARTS 1 2 4 5 3 3 3 1 RVLE1620 Motor Set 6 2 RVLE1621 Rotor Blade Set 6 3 RVLE1622 Body Set w screws BLACK 3 RVLE1623 Body Set w screws ORANGE 4 RVLE1626 LiPo Battery 1S 3 7V 150mA 5 RVLE1627 USB Charge Cord ...

Page 11: ...from state to state 1 This device complies with Part 15 of the FCC Rules and RSS 210 of Industry Canada Operation is subject to the following two conditions 1 This device may not cause harmful interference and 2 This device must accept any interference received including interference that may cause undesired operation 2 Changes or modifications not expressly approved by the party responsible for c...

Page 12: ...ECLARATION OF CONFORMITY Product Revell Control 2 4GHz 4 Channel Tx Rx Item number 23947 8 Equipment class 1 23947 8 transmitter The objects of the declaration described here are in conformity with the requirements of the specifications listed below following the provisions of the European 2006 95 EC Low Voltage Directive EN 60950 1 2006 Safety The objects of the declaration described here are in ...

Reviews: