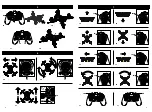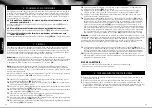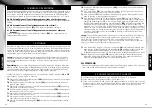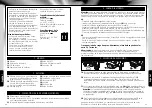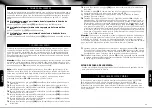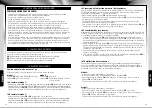
10A Switching to Mode 1:
• Hold control
2A
to the top left and control
2B
to the top right
• Simultaneously switch the ON/OFF switch
2F
to ON (the model remains off)
• To calibrate the controls rotate
2A
and
2B
completely at least twice
• Then press and hold a trim button for at least two seconds
10B Switching to Mode 2:
• Hold control
2A
and
2B
to the top left
• Simultaneously switch the ON/OFF switch
2F
to ON (the model remains off)
• To calibrate the controls rotate
2A
and
2B
completely at least twice
• Then press and hold a trim button for at least two seconds
10 ADVANCED SETTINGS
Mode 1
Control
2A
: Forward/backwards and rotation
Control
2B
: Thrust and banking
Mode 2
Control
2A
: Thrust and rotation
Control
2B
: Forwards/backwards and banking
Switching between Flight mode 1 and 2
The term flight mode refers to the assignment of the controls:
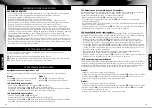
10C Reversal of the control direction of the controls
The control direction of the controls can be adjusted in the setup menu. Only use this
function if you have already gathered adequate experience operating the
model (Mode 2, the model is switched on):
• Hold the control for thrust
2A
all the way down
• Simultaneously press the control for forward/backwards
2B
down vertically for at
least one second.
• The display shows SE. Now the control directions of the axes are reversed with the
trim buttons.
• To save the settings and exit the menu, press the control for forward/backwards
2B
down vertically for at least 2 seconds
10D Sensitivity of the controls
The flying speed of the model can be adapted by changing the sensitivity of the
controls. Only use this function if you have already gathered adequate experience with
the model (Mode 2, the model switched on):
1. Hold the control for thrust
2A
all the way down and hold. Press the control for
forward/backwards
2B
down vertically for at least one second. When SE appears in
the display, release all controls.
2. Now push the control for thrust
2A
down vertically. Each time it is pressed again,
you switch between rotation, forwards/backwards and banking. Three blinking dots
in the trim strip indicate what can currently be changed.
3. By pressing the appropriate trim button, the sensitivity can be adjusted between
a value of 20 (slow) and 60 (fast).
4. To save the settings and exit the menu, press the control for forward/backwards
2B
down vertically for at least 2 seconds.
10E Recalibration of the sensors
Sometimes it is necessary to recalibrate the gyro sensors of the model. Before starting
the recalibration, the battery must be fully charged and the rotors must be inspected
for damage. If the model continuously drifts in one direction and the trim does not
provide sufficient compensation, proceed as follows:
Mode 2:
• The model and remote control are switched on and paired
• Switch to the second speed level by pressing control
2B
• Now hold control
2A
to the bottom right and simultaneously move control
2B
back
and forth
• When the status LEDs blink, the process is finished
Mode 1:
• The model and remote control are switched on and paired
• Switch to the second speed level by pressing control
2B
down vertically
• Now hold control
2A
to the bottom right and simultaneously hold control
2B
down
and move quickly back and forth
• When the status LEDs blink, the process is finished
English
English
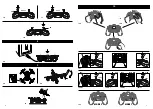
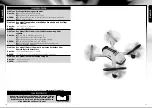
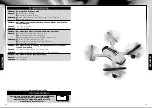
9 CHANGING THE PROPELLERS
If the rotor blades on the model are damaged, they must be replaced.
To do so, proceed as follows:
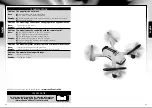
9A
Ensure the correct arrangement of the rotors during installation.
9B
Use the accompanying removal tool to pull off the rotors.
9C
Carefully press the new rotor on the motor shaft.
INSTRUCTIONS FOR SAFE FLYING
GENERAL FLYING TIPS:
• Always place the model on a level surface. An inclined surface can, under certain
circumstances, have a negative impact on the starting behavior of the model.
• Always operate the controls slowly and with a gentle touch.
• Always maintain visual contact with the model and do not look at the remote control!
• Move the thrust control down again somewhat as soon as the model lifts off from
the ground. Maintain flying altitude by adjusting the thrust controller.
• If the model lowers, move the thrust control slightly upward again.
• If the model climbs, move the thrust control down slightly.
• To fly along a curve, tapping the directional controller very slightly in the respective
direction often suffices.
There is a general tendency during preliminary attempts at flight to operate the
model‘s controls too aggressively.Always operate the controls slowly and carefully.
Never fast and fitfully.
• Beginners should first master trimming before attempting to master the thrust controller.
The model does not necessarily have to fly straight at the beginning - initially, it is
more important to maintain a constant height of approximately one meter above the
ground by repeatedly tapping the thrust control. Only then should the pilot practice
steering the model left and right.
24
25


