background image

www.revell-control.de

ISTRUZIONI DI MANUTENZIONE

Per informazioni sugli ordini e consigli su come  

sostituire i pezzi di ricambio, nonché altre informazioni 

utili su tutti i modelli Revell Control consultate il sito 

www.revell-control.de.

Per ulteriori suggerimenti visitare il sito internet 

www.revell-control.de.

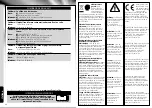
Attenzione:

 Pericolo 

da riscaldamento e  

parti in movimento!  

È necessaria la 

supervisione di  

un adulto!

Atención:

 peligro por 

generación de calor y 

piezas en movimiento 

durante el funciona-

miento. Es necesaria la 

supervisión por parte de 

un adulto.

Let op:

 Gevaar door 

hitteontwikkeling en 

draaiende onderdelen 

wanneer de auto in 

gebruik is! De auto mag 

alleen onder toezicht 

van volwassenen 

worden gebruikt!

Attention :

 Lors de 

l’utilisation, danger dû à 

un fort développement 

de chaleur et à des 

éléments rotatifs ! La 

surveillance par des 

adultes est nécessaire !

Attention:

 Risk from  

heat development and 

rotating parts during 

operation! Adult 

supervision is required!

Achtung:

 Gefährdung 

durch Hitzeentwicklung 

und sich drehende 

Teile im Betrieb!  

Die Aufsicht von 

Erwachsenen ist nötig!

Con la presente Revell GmbH, 

dichiara che questo prodotto rispetta 

i requisiti di base e le ulteriori 

clausole applicabili della direttiva 

1999/5/CE. La dichiarazione di 

conformità è disponibile all’indirizzo 

www.revell-control.de.

Revell GmbH declara que este 

producto cumple los requisitos 

esenciales y cualesquiera otras 

disposiciones aplicables o exigibles 

de la Directiva 1999/5/CE. La 

declaración de conformidad puede 

consultarse en www.revell-control.de.

Hiermee verklaart Revell GmbH, dat 

dit product in overeenstemming is 

met de fundamentele eisen en de 

overige toepasselijke bepalingen 

van de richtlijn 1999/5/EC. U kunt 

de conformiteitsverklaring vinden  

op www.revell-control.de.

Revell GmbH déclare par la présente 

que ce produit est conforme aux 

exigences et autres dispositions  

de la directive 1999/5/CE.  

La déclaration de conformité  

est consultable sur le site  

www.revell-control.de.

Revell GmbH hereby declares that 

this product conforms with the basic 

requirements and the additional 

applicable provisions of Directive 

1999/5/EC. The Declaration of 

Conformity can be found at  

www.revell-control.de.

Hiermit erklärt die 

Revell GmbH, dass 

sich dieses Produkt 

in Übereinstimmung 

mit den grund-

legenden Anforderungen und den 

übrigen einschlägigen Bestim-

mungen der Richtlinie 1999/5/EC 

befindet. Die Konformitätserklärung 

ist unter www.revell-control.de zu 

finden.

Legge sui rifiuti elettronici:

 Una 

volta concluso l’utilizzo, rimuovere le 

batterie e smaltire separatamente i 

vecchi apparecchi elettrici presso i 

punti di raccolta comunali per i rifiuti 

elettrici ed elettronici. Le altre parti si 

smaltiscono come rifiuti domestici. 

Grazie per la collaborazione!

Legislación sobre residuos 

eléctricos:

 cuando el producto alcance 

el final de su vida útil saque todas las 

baterías y deséchelas en el contenedor 

de recogida selectiva apropiado. 

Deseche los aparatos eléctricos fuera 

de uso en el punto limpio destinado 

para ello en su municipio. Deseche las 

demás piezas en la basura normal. 

¡Gracias por su colaboración!

Wetgeving voor inzameling van 

afgedankte elektrische en 

elektronische apparatuur:

 Verwijder 

alle verbruikte batterijen afzonderlijk. 

Lever oude elektrische apparaten in bij 

uw gemeentelijke inzamelpunt voor 

afgedankte elektrische en elektronische 

apparatuur. De overige onderdelen 

horen bij het huisvuil. Dank voor uw 

medewerking!

Réglementation sur les déchets 

d‘équipement électrique et 

électronique :

 À la fin de leur 

utilisation, retirer toutes les piles et les 

éliminer séparément. Remettre les 

vieux appareils électriques aux centres 

de collecte des déchets d‘équipement 

électrique et électronique de votre 

commune. Le reste peut être jeté dans 

les ordures ménagères. Merci pour 

votre collaboration !

Electrical and electronic waste 

ordinance:

 After the end of use, 

remove all batteries and separately 

dispose of all electrically operated 

devices at the communal collection 

centres for electrical and electronic 

waste. Dispose of the remaining parts 

with household waste. Thank you for 

your cooperation!

Elektro schrott-

gesetz:

 Nach  

Gebrauchsende  

bitte alle Batterien 

entnehmen und  

separat entsorgen. 

Alte elektrisch betriebene Geräte bei 

den Sammelstellen der Gemeinden  

für Elektroschrott abgeben. Die übrigen 

Teile gehören in den Hausmüll. Danke  

für die Mithilfe!

It

aliano

ELIMINAZIONE DEI GUASTI

Problema:  Le eliche non si muovono.
Causa: 

A) 

Nessuna connessione esistente.

B) 

Batteria scarica e/o esaurita.

Soluzione:  A) 

Disattivare tutto e attivare nell‘ordine corretto.

B) 

Ricaricare la batteria.

Problema:  Il modellino si ferma senza motivo durante il volo e cade.
Causa: 

• La batteria è scarica.

Soluzione: 

• Ricaricare la batteria.

Problema:  Non si riesce a controllare il modellino con il radiocomando.

Causa: 

Causa: 

A) 

Il tasto ON/OFF è su „OFF“.

B) 

Le batterie sono posizionate in modo scorretto.

C) 

Le batterie non hanno energia sufficiente.

Soluzione:  A) 

Portare l‘interruttore ON/OFF su „ON“.

B) 

Verificare la corretta posizione delle batterie.

C) 

Inserire batterie nuove.

Problema:  Il modellino ruota solo attorno al proprio asse verticale,  

o si capovolge dall‘inizio.

Causa: 

• Errata disposizione delle eliche.

Soluzione: 

• Montare le eliche come descritto nelle istruzioni.

Problema:  Il modellino non esegue alcun loop.
Causa: 

• Batteria troppo scarica.

Soluzione: 

• Ricaricare la batteria.

66

Summary of Contents for STEADY QUAD CAM

Page 1: ...of Hobbico Inc REVELL IS THE REGISTERED TRADEMARK OF REVELL GMBH GERMANY Made in China 23922 2 SPEED LEVEL HEADLESS MODE 720P ERSATZTEILE REPLACING SPARE PARTS EPIÈCES DÉTACHÉES RESERVEONDERDELEN PIEZAS DE REPUESTO PEZZI DI RICAMBIO V 01 12 43676 Rotor Set Rotor Satz 43677 Battery Akku ...

Page 2: ...e 2016 Revell GmbH Henschelstr 20 30 D 32257 Bünde A subsidiary of Hobbico Inc REVELL IS THE REGISTERED TRADEMARK OF REVELL GMBH GERMANY Made in China 23922 2 SPEED LEVEL HEADLESS MODE 720P Modello Modelo Model Modèle Model Modell Lade Datenkabel Rotorenabzieher micro SD Karte Charging data cable rotor remover micro SD card Câble de chargement données arrache rotors carte micro SD Laad gegevenskab...

Page 3: ...A 5C 5D 5B B B A A A A B B 2D T X R X M1 M2 Expert 2F 2A 2B 1E 1F 7 7A 7B T X R X M1 M2 Expert 2A T X R X M1 M2 Expert 2A 7C 7D T X R X M1 M2 Expert 2B T X R X M1 M2 Expert 2B 7E 7F T X R X M1 M2 Expert 2B T X R X M1 M2 Expert 2B 7G 7H T X R X M1 M2 Expert 2A T X R X M1 Expert 2A 7I T X R X M1 M2 Expert 2H T X R X M1 M2 Expert 2I 7J 4 5 ...

Page 4: ... Expert T X R X M1 M2 Expert T X R X M1 M2 Expert T X R X M1 M2 Expert T X R X M1 M2 Expert 10 10A 10B 10C 10D 1 10D 2 10D 3 10D 4 10E 1 Sec 2 Sec MODE 2 MODE 1 MODE 1 MODE 2 2 Sec T X R X M1 M2 Expert 1 Sec T X R X M1 M2 Expert 2C 2E 2E 2D 2A 2A 2B 2B 2B 2B 2A 6 7 T X R X M1 M2 Expert 2C 2D ...

Page 5: ...re Zeit nicht gebraucht wird Sicherheitshinweise zum Ladegerät Nicht wiederaufladbare Batterien dürfen nicht geladen werden Dieses Ladegerät ist nicht geeignet für Personen einschliesslich Kindern mit körperlichen oder geistigen Einschrän kungen oder mit unzu reichender Kenntnis und Erfahrung mit Ladegeräten ausser unter Aufsicht oder nach sachkundiger Anleitung durch einen Erziehungsberechtigten ...

Page 6: ...ist immer auf eine feuerfeste Unterlage und eine brandsichere Umgebung zu achten 4A Zum Laden muss das Modell ausgeschaltet sein Den Akku in das Akkufach 1D schieben bis er einrastet Das Lade Datenkabel mit dem USB Anschluss des Modells verbinden Den USB Stecker des Lade Datenkabels in eine beliebige USB Schnittstelle an einem Computer oder ähnlichem mit mindestens 500 mA Leistung stecken Während ...

Page 7: ...ng 2A kurz gegenzusteuern Hinweis Für ein ruhiges Flugverhalten des Modells sind nur minimale Korrekturen an den Reglern nötig Die Richtungsangaben gelten wenn man das Modell von hinten betrachtet Fliegt das Modell vorwärts auf den Piloten zu so muss in die jeweils entgegengesetzte Richtung gesteuert werden Das Modell wie in Punkt 5 einschalten und die Rotoren durch bewegen der Regler 2A und 2B na...

Page 8: ...Zurück und Seitwärts durchschalten Drei blinkende Punkte in der Trimmleiste zeigen an was gerade verändert werden kann 3 Durch drücken der jeweiligen Trimmung lässt sich die Empfindlichkeit zwischen einem Wert von 20 langsam und 60 schnell einstellen 4 Zum Speichern und Verlassen des Menüs Regler für Vor Zurück 2B mindestens 2 Sekunden lang senkrecht nach unten drücken 10E Neu Kalibrierung der Sen...

Page 9: ... Problem Das Modell stoppt ohne ersichtlichen Grund während des Flugs und sinkt ab Ursache Der Akku ist zu schwach Abhilfe Den Akku aufladen Problem Das Modell lässt sich mit der Funk Fernsteuerung nicht steuern Ursache A Der ON OFF Schalter steht auf OFF B Die Batterien wurde falsch eingelegt C Die Batterien haben nicht mehr genug Energie Abhilfe A Den ON OFF Schalter auf ON stellen B Überprüfen ...

Page 10: ...harging units unless under supervision or following proper directions from a parent or legal guardian Children must be supervised the charging unit is not a toy Transformers mains adapters or chargers that are used together with the model must be checked regularly for damage to cables plugs housings and other parts and any damages must be repaired before the devices may be used again The model is ...

Page 11: ...he remote control Power supply DC 6 V Batteries 4 x 1 5 V AAA not included 2 REMOTE CONTROL 2A Control for thrust and rotation Briefly press vertically Headless mode Longer vertical pressing Flip function 2B Control for forward backwards and banking Briefly press vertically Second speed level 2C Trim for rotation 2D Trim for forwards backwards 2E Trim for sideways 2F ON OFF switch 2G Display 2H Bu...

Page 12: ...ove the thrust control up and raise the helicopter approximately 0 5 to 1 metre in altitude 6 TRIM ADJUSTMENT OF THE CONTROL 6B If the model moves by itself slowly or quickly around its own axis press the trim adjustment for rotation 2C incrementally in the opposite direction 6C If the model automatically moves slowly or quickly forwards or backwards gradually press the forwards backwards trim 2D ...

Page 13: ...conds 10E Recalibration of the sensors Sometimes it is necessary to recalibrate the gyro sensors of the model Before starting the recalibration the battery must be fully charged and the rotors must be inspected for damage If the model continuously drifts in one direction and the trim does not provide sufficient compensation proceed as follows Mode 2 The model and remote control are switched on and...

Page 14: ...ed correctly C The batteries do not have enough power Remedy A Set the ON OFF switch to the ON position B Check whether the batteries are inserted correctly C Insert new batteries Problem The model only turns on its vertical axis or rolls over when started Cause Incorrect arrangement of the propellers Remedy Install the propellers and arms as outlined in the manual Problem The model will no longer...

Page 15: ...circuiter les bornes de raccordement Retirer les piles de la télécommande si celle ci n est pas utilisée pendant une période prolongée Consignes de sécurité pour le chargeur Ne pas recharger les piles jetables Ce chargeur ne doit pas être utilisé par des personnes enfants y compris souffrant d un handicap physique ou mental ou n ayant pas assez de connaissances ou d expérience en ce qui concerne l...

Page 16: ...elatives à la batterie pour le modèle Alimentation Puissance nominale 1 x DC 3 7 V 2 Wh Batterie Li Po rechargeable incluse Capacité 520 mAh Indications relatives à la batterie aux piles de la télécommande Alimentation DC 6 V Piles 4 x 1 5 V AAA non incluses 2 TÉLÉCOMMANDE 2A Régulateur de poussée et de rotation Courte pression verticale Mode headless Longue pression verticale Fonction flip 2B Rég...

Page 17: ... rapidement ou lentement vers l avant ou l arrière pousser graduellement le compensateur de vol avant et arrière 2D dans la direction opposée Un réglage correct du compensateur est la condition de base requise pour un comporte ment de vol irréprochable du modèle La syntonisation est simple mais nécessite de la patience et du doigté Veuillez respecter scrupuleusement les consignes suivantes Diriger...

Page 18: ...on verticale vers le bas sur le régulateur avant arrière 2B pendant au moins 2 secondes 10E Recalibration des capteurs Il est parfois nécessaire de recalibrer les capteurs gyro du modèle Avant de commen cer la recalibration veuillez d abord charger complètement la batterie et vérifier que les rotors ne sont pas endommagés Si le modèle continue à dériver dans la même direction et que la course de c...

Page 19: ...Solution A Mettre l interrupteur ON OFF en position ON B Vérifiez que les piles sont correctement insérées C Insérer de nouvelles piles Problème Le modèle ne fait plus que tourner autour de son axe vertical ou culbute lors du décollage Cause Disposition incorrecte des hélices Solution Installer les hélices tel que décrit dans la notice d utilisation Problème Le modèle n effectue plus de loopings C...

Page 20: ...eladen Deze lader is niet geschikt voor kinderen en voor personen met lichamelijke of geestelijke beper kingen of met ontoereikende kennis over en ervaring met laders behalve onder toezicht van of na vakkundige instructie door een persoon die bevoegd is om de ouderlijke macht uit te oefenen Op kinderen moet toezicht worden gehouden de lader is geen speelgoed Transformatoren adapters en laders die ...

Page 21: ...leur voorbehouden Benodigde accu voor het model Voeding Nominaal vermogen 1 x DC 3 7 V 2 Wh Oplaadbare LiPo accu inbegrepen Capaciteit 520 mAh Benodigde batterijen accu s voor de zender Voeding DC 6 V Batterijen 4 x 1 5 V AAA niet inbegrepen 2A Regelaar voor liftkracht en draaiing Kort loodrecht indrukken Headless Mode Lang loodrecht indrukken flipfunctie 2B Regelaar voor voor achteruit en zijwaar...

Page 22: ...wat geduld en gevoel voor vereist Neem de volgende aanwijzingen in acht Beweeg de liftkrachtregelaar voorzichtig naar boven en laat de helikopter opstijgen tot een hoogte van 0 5 à 1 meter 7H Beweeg de liftkracht draaiingsregelaar 2A naar rechts om het model rechtsom te laten draaien 7I Als u op de knop 2H drukt neemt de camera een foto Zorg er eerst voor dat er een micro SD kaart in het micro SD ...

Page 23: ... gedrukt om de wijzigingen op te slaan en het menu te verlaten 10E De sensoren opnieuw kalibreren Soms kan het nodig zijn om de gyroscopische sensor van het model opnieuw te kalibreren Controleer voordat u het model opnieuw kalibreert of de accu vol is en de rotoren niet beschadigd zijn Als het model nog steeds wegdrijft in een richting en het beschikbare trimbereik niet voldoende is om dit te com...

Page 24: ...ichtbare oorzaak tijdens de vlucht en verliest hoogte Oorzaak De accu is te zwak Oplossing De accu opladen Probleem Het model kan niet worden bestuurd met de zender Oorzaak A De ON OFF schakelaar staat op OFF B De batterijen zijn verkeerd geplaatst C De batterijen hebben niet voldoende energie meer Oplossing A Zet de ON OFF schakelaar op ON B Controleer of de batterijen juist zijn geplaatst C Plaa...

Page 25: ...prolongado Instrucciones de seguridad relativas al cargador Las baterías no recargables pilas no se deben recargar Este cargador no es adecuado para personas niños incluidos con limitaciones físicas o mentales o cuyos conocimientos o experiencia en el manejo de cargadores sea insuficiente salvo que estén super visados o hayan recibido las instruc ciones pertinentes por parte de un adulto responsab...

Page 26: ...cluso en el aire Para apagar los rotores tras el aterrizaje empuje la palanca de gas y giro 2A completamente hacia abajo y manténgala en esa posición 5D Para la grabación de fotos y vídeos es necesario introducir una tarjeta microSD en la ranura para tarjetas microSD 1F No es posible utilizar tarjetas de memoria HC Apague primero el helicóptero y a continuación la emisora al terminar de volar Dese...

Page 27: ...ue se controla la palanca de vuelo hacia delante detrás y vuelo lateral 2B Por ejemplo si se girase el modelo 180 y se volase hacia el piloto en teoría se debería invertir el control del vuelo hacia delante detrás y vuelo lateral es decir accionar la palan ca de forma contraria a lo normal Al activar el modo Headless esto no es necesa rio ya que el procesador interno invierte automáticamente el co...

Page 28: ... 4 Para guardar y salir del menú pulse la palanca de vuelo hacia delante detrás 2B por lo menos durante dos segundos en vertical hacia abajo 10E Recalibración de los sensores En ocasiones puede ser necesario recalibrar los sensores giroscópicos del modelo Antes de recalibrar se debe comprobar si la batería está completamente cargada y si los rotores presentan daños Proceda de la siguiente forma si...

Page 29: ...modelo se detiene sin motivo aparente durante el vuelo y pierde altura Causa la carga de la batería es insuficiente Solución cargue la batería Problema El modelo no se puede controlar con la emisora Causa A el interruptor ON OFF se encuentra en la posición OFF B las baterías se han colocado incorrectamente C la carga de las baterías es insuficiente Solución A coloque el interruptor ON OFF en la po...

Page 30: ...ate per molto tempo Avvertenze di sicurezza sul caricabatterie Non ricaricare batterie monouso Questo caricabatterie non è adatto a persone incluso bambini con ridotte capacità motorie o mentali oppure con scarsa conoscenza ed esperienza con i caricabatterie salvo non sorvegliati o guidati da un adulto esperto I bambini devono essere controllati il caricabatterie non è un giocattolo Controllare re...

Page 31: ...2 Wh Batterie LiPo integrata Capacità 520 mAh Requisiti per batterie monouso ricaricabili del radiocomando Alimentazione DC 6 V Batterie 4 x 1 5 V AAA non in dotazione 5 PREPARAZIONE DELL AVVIO OK OK 5A Per avviare il modello attivare per prima cosa il radiocomando e inserire le batterie nell apposito vano del modello facendole scattare nella posizione corretta 5B Attivare poi il modello con una p...

Page 32: ... la rotazione 2C nel senso opposto 6C Se il modellino si muove velocemente o lentamente in autonomia avanti o indietro premere gradualmente la compensazione in avanti indietro 2D nel senso opposto 6A Se il modellino si muove velocemente o lentamente in autonomia a destra o sinistra premere gradualmente la compensazione per il volo laterale 2E nel senso opposto Una corretta compensazione è il requi...

Page 33: ...almeno 2 secondi perpendicolarmente verso il basso 10E Ricalibratura dei sensori Talvolta può essere necessario ricalibrare i sensori del giroscopio del modello Prima di iniziare la ricalibratura assicurarsi di ricaricare completamente le batterie e controllare che i rotori non siano danneggiati Se il modello sbanda sempre nella stessa direzione e il percorso di regolazione non è sufficiente per l...

Page 34: ...i apparecchi elettrici presso i punti di raccolta comunali per i rifiuti elettrici ed elettronici Le altre parti si smaltiscono come rifiuti domestici Grazie per la collaborazione Legislación sobre residuos eléctricos cuando el producto alcance el final de su vida útil saque todas las baterías y deséchelas en el contenedor de recogida selectiva apropiado Deseche los aparatos eléctricos fuera de us...

Reviews: