background image

Manuale del d’uso ed installazione – M9016 MINI WASH 

Del  04-11-2008- C:\SETTORE DENTALE\M9016\MANUALE ISTRUZIONE\M9016.doc 


Pag. 16 di 34


Have the power lead replaced by a skilled technician if it is damaged. 


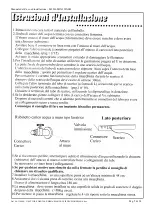
Installation instructions 


1. Remove all the material from the packaging very carefully. 
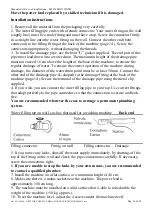
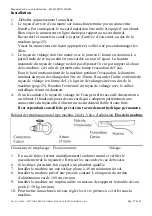
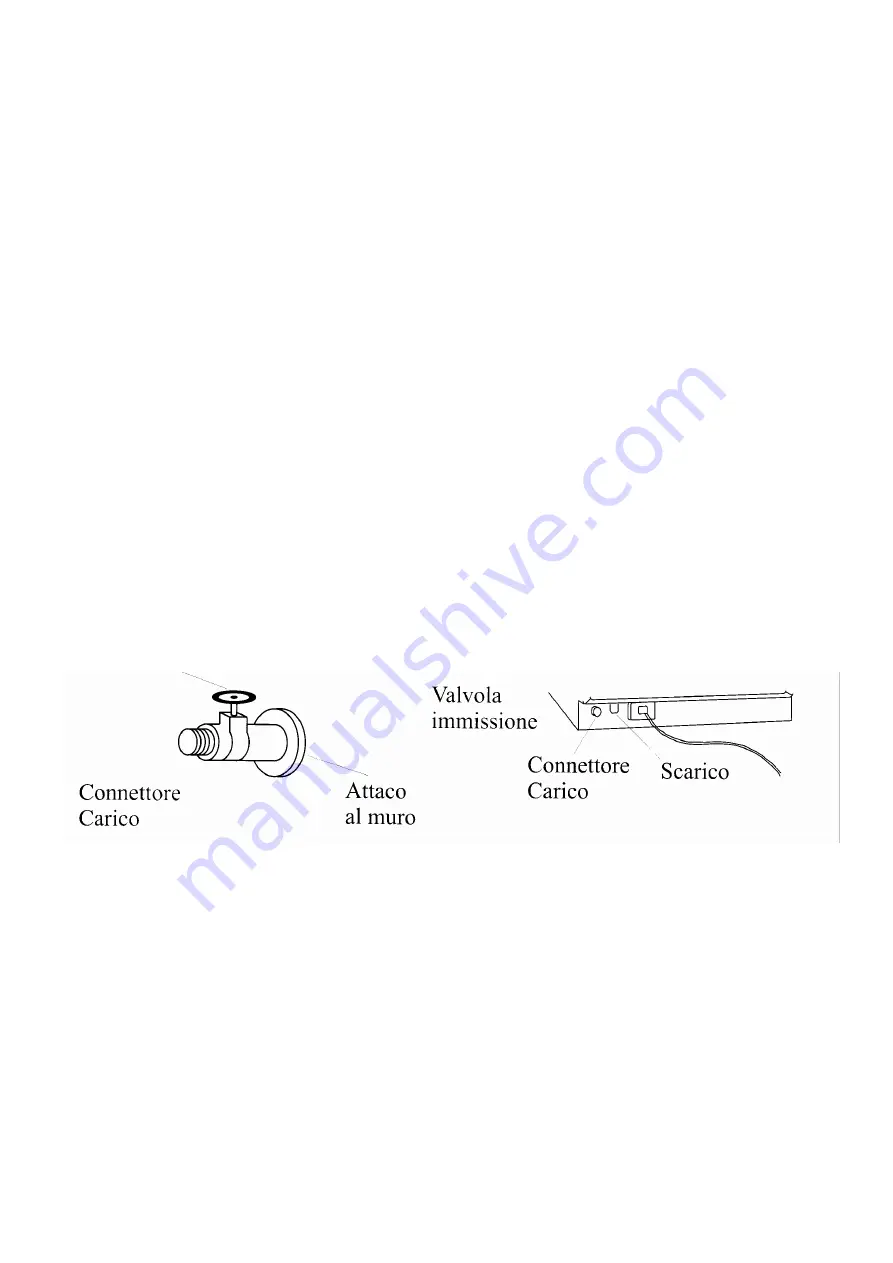
2. The water filling pipe ends with a female connector. Your water fitting on the wall 
(supply line) must be a male fitting and must have a tap. Screw the connector firmly 
in a straight line onto the water fitting on the wall. Connect the other end (bent 
connector) to the filling fitting at the back of the machine (page 14 ). Screw the 
connectors appropriately, without damaging the threads. 
3. To install the drainage pipe, use the bent “U” gasket supplied. The end part of this 
pipe must lead down into a water drain. The maximum height of the drainage pipe 
must not exceed 16 cm above the height of the base of the machine, to ensure the 
regular drainage of water. To ensure the correct operation of the machine during 
drainage, the diameter of the water drain point must be at least 30 mm. Connect the 
other end of the drainage pipe (L-shaped) to the drainage fitting at the back of the 
machine (page 14 ) Secure the terminal of the drainage pipe using the metal clip 
supplied. 
4. If you wish, you can connect the water filling pipe to your tap. Use correct fittings 
that adapt perfectly to the pipe connectors so that the connection is secure and leak-
free. 

You are recommended whatever the case to arrange a permanent plumbing 
system. 


Water filling tap on wall, such as that used for a washing machine       

Back end


Filling connector              Fitting on wall           Filling connector     Drainage      


5. If you notice any leaks, shut-off the water supply immediately, by shutting-off the 
tap of the fitting on the wall and check the pipe connections carefully. If necessary, 
screw the connections tight. 
6.

 If you are unable to stop the leaks by your own means, you are recommended 

to contact a qualified plumber. 

7. Install the machine on a flat surface, at a minimum height of 48 cm. 
8. Make sure there is a mains socket near the machine. The power lead is 
approximately 180 cm long. 
9. The machine must be installed on a solid surface that is able to take double the 
weight of the machine (>50 kg approx.). 
10. To set the machine level, adjust the 4 screws under the machine itself. 

Summary of Contents for M9016

Page 1: ...363800358 Numero REA 180051 C C I A A di Reggio Emilia Capitale sociale Euro 10 400 i v Tel 0039 0 522 875159 Fax 0039 0 522 875579 e mail reverberi_a libero it Cod ISTRUZIONI D USO ED INSTALLAZIONE U...

Page 2: ...tata realizzata Per evitare disturbi elettrici all autoclave importante accertarsi che il valore della resistenza di terra sia efficiente e ben coordinato con le protezioni del vostro impianto elettri...

Page 3: ...Manuale del d uso ed installazione M9016 MINI WASH Del 04 11 2008 C SETTORE DENTALE M9016 MANUALE ISTRUZIONE M9016 doc Pag 3 di 34...

Page 4: ...Manuale del d uso ed installazione M9016 MINI WASH Del 04 11 2008 C SETTORE DENTALE M9016 MANUALE ISTRUZIONE M9016 doc Pag 4 di 34...

Page 5: ...Manuale del d uso ed installazione M9016 MINI WASH Del 04 11 2008 C SETTORE DENTALE M9016 MANUALE ISTRUZIONE M9016 doc Pag 5 di 34...

Page 6: ...Manuale del d uso ed installazione M9016 MINI WASH Del 04 11 2008 C SETTORE DENTALE M9016 MANUALE ISTRUZIONE M9016 doc Pag 6 di 34...

Page 7: ...Manuale del d uso ed installazione M9016 MINI WASH Del 04 11 2008 C SETTORE DENTALE M9016 MANUALE ISTRUZIONE M9016 doc Pag 7 di 34...

Page 8: ...Manuale del d uso ed installazione M9016 MINI WASH Del 04 11 2008 C SETTORE DENTALE M9016 MANUALE ISTRUZIONE M9016 doc Pag 8 di 34...

Page 9: ...Manuale del d uso ed installazione M9016 MINI WASH Del 04 11 2008 C SETTORE DENTALE M9016 MANUALE ISTRUZIONE M9016 doc Pag 9 di 34...

Page 10: ...Manuale del d uso ed installazione M9016 MINI WASH Del 04 11 2008 C SETTORE DENTALE M9016 MANUALE ISTRUZIONE M9016 doc Pag 10 di 34...

Page 11: ...Manuale del d uso ed installazione M9016 MINI WASH Del 04 11 2008 C SETTORE DENTALE M9016 MANUALE ISTRUZIONE M9016 doc Pag 11 di 34...

Page 12: ...Manuale del d uso ed installazione M9016 MINI WASH Del 04 11 2008 C SETTORE DENTALE M9016 MANUALE ISTRUZIONE M9016 doc Pag 12 di 34...

Page 13: ...IFIES THE GROUND CONDUCTOR Do not use the machine for purposes other than those for which it has been built To prevent the autoclave from being subjected to electrical disturbance it is important to m...

Page 14: ...ts FRONT INSIDE BACK 1 AIR VENT 2 FRONT PANEL 3 DOOR OPENING BUTTON 4 ON LED 5 NO SALT LED 6 NORMAL ECONOMY BUTTON 7 ON OFF BUTTON 8 PROGRAM SELECTOR 9 WATER DECALCIFIER 10 WATER SPRAYING ARM 11 WATER...

Page 15: ...ic shocks or could break the machine Keep the machine out of children s reach Do not press on or raise the internal part of the door when it is open You could cause structural deformations with conseq...

Page 16: ...t least 30 mm Connect the other end of the drainage pipe L shaped to the drainage fitting at the back of the machine page 14 Secure the terminal of the drainage pipe using the metal clip supplied 4 If...

Page 17: ...ill contribute in forming scale white substance and or fouling on the stainless steel surfaces of the pipe of the machine and of the heating element fitted in the groove under the removable guard of t...

Page 18: ...lar marking If the tools do not have such marking you are recommended not to put them in the machine Do not load the containers over the plastic protrusions of the basket They may not be supported cor...

Page 19: ...4 Fill the decalcifier with salt 1 Unscrew the cap of the salt container on the right hand side inside the machine by turning it anti clockwise 2 Put the salt in the container using the plastic spoon...

Page 20: ...in its original position NORMAL function button If you have connected the machine to a cold water supply fitting press the NORMAL button The NORMAL function will allow you to wash the parts with hot...

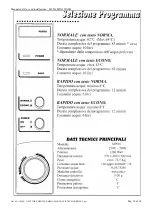
Page 21: ...C Total program time 63 minutes Water consumption 10 litres RAPID with NORMA button Water temperature minimum 8 C Total program time 12 minutes Water consumption 6 litres RAPID with ECONO button Wate...

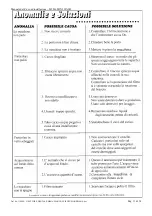
Page 22: ...sprays Do not overload the chamber 2 Check the spraying arm and make sure nothing is stopping it from turning freely 3 Use more detergent Do not use hard or lumpy detergent Use only detergent for wash...

Page 23: ...heels bags brushes etc and the accumulators are not covered by guarantee This guarantee is only valid if accompanied by the sales invoice and stamp of the dealer The guarantee conditions are automatic...

Page 24: ...LE FIL DE TERRE Ne pas utiliser l appareil dans des buts diff rents de ceux pour lesquels il a t con u Afin d viter des dysfonctionnements lectriques de l autoclave il est important de s assurer que...

Page 25: ...NE VUE DE DOS 1 BOUCHE D VACUATION 2 PANNEAU FRONTAL 3 TOUCHE OUVERTURE PORTE 4 VOYANT D ALLUMAGE 5 VOYANT ABSENCE SEL 6 TOUCHE NORM ECON 7 TOUCHE ON OFF 8 S LECTEUR PROGRAMME 9 D TARTREUR 10 PULV RIS...

Page 26: ...ndommager la machine La machine doit toujours tre hors de la port e des enfants Ne pas craser ou lever la partie interne de la porte lorsque cette derni re est ouverte sous peine de provoquer des d fo...

Page 27: ...er l autre extr mit du tuyau de vidange en forme de L la prise de vidange situ e au dos de la machine page 25 Boucher l extr mit du tuyau de vidange avec le collier m tallique fourni en dotation 4 Si...

Page 28: ...lanche et les incrustations sur les surfaces en acier inoxydable sur le tuyau de la machine et sur la r sistance situ e dans le logement sous la protection amovible du filtre Pour ralentir la formatio...

Page 29: ...gative ne pas les charger dans la machine Ne pas placer les conteneurs sur les saillies en plastique du panier au risque de les endommager Il est conseill de ne pas charger d ustensiles ayant un manch...

Page 30: ...la fa on suivante 1 D visser le bouchon du conteneur de sel situ sur le c t droit l int rieur de la machine Verser le sel ici 2 Verser le sel dans le conteneur avec la cuill re en plastique fournie en...

Page 31: ...ltre et le nettoyer puis le remonter dans sa position d origine TOUCHE fonction NORMA Si la machine est raccord e une arriv e d eau froide appuyer sur la touche NORMA La fonction NORMA permet de laver...

Page 32: ...2 C Dur e totale du programme 63 minutes Consommation d eau 10 litres RAPIDE avec touche NORMA Temp rature de l eau 8 C mini Dur e totale du programme 12 minutes Consommation d eau 6 litres RAPIDE ave...

Page 33: ...ger le panier 2 V rifier la pr sence d obstacles qui pourraient g ner la rotation du pulv risateur V rifier si la protection du filtre s est d plac e en g nant la rotation du pulv risateur 3 Augmenter...

Page 34: ...roulettes sachets brosses etc et les accumulateurs sont exclus de la garantie La garantie n est valable que si elle est accompagn e de la facture et du tampon du vendeur La garantie devient automatiq...

Reviews: