background image

Operation and Maintenance Manual – Steam sterilizers mod. Sterilix 2 Plus & Vacuum Plus & Star & Star Fast 

Rev. 09 of  18-04-02 - E:\Documenti1\Manuali superati non in uso\Vacuum Star GB-R09.doc 


Page 38 of 42


Via Don Luigi Sturzo n°6 

42020 BARCO ( Reggio Emilia ) ITALY 

Tel. 0039 ( 0 )522 / 875159 

Fax 0039 ( 0 )522 / 875579


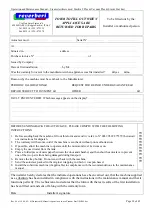
FORM TO FILL OUT WHEN 

APPLIANCES ARE 

RETURNED FOR REPAIRS


To be filled out by the: 


Installer or authorized person


Autoclave mod

…………………………………………………..….…


Serial N°


……………..……………………………………………….... 


At


…………………………….………………………………………………………………………………………………………………………………….


Situated in 

………………………………………………

address

………………………………………………………………………………………….


Purchase invoice N°


………………..………………………………………………….. 

of


…………….….…….……………………………………..


Issued by Company


……………………………………………………………………………………………………………………………………...


Date of first installation

 …………………………….. 

by Mr.


…………………………………………………………………………………….…


Was the warranty form sent to the manufacturer when appliance was first installed?            yes         no 


Reason why the machine must be sent back to the Manufacturer: 
 
PERIODIC CALIBRATION   

 
REQUEST FOR REPAIR UNDER GUARANTEE   


REPAIR SUBJECT TO PAYMENT   


OTHER

………………………………………………………………………


FAULT ENCOUNTERED: Which message appears on the display?


………………..………………………………………………. 


………………………………………………………………………………………………………………………………………………………………………. 


………………………………………………………………………………………………………………………………………………………………………. 


………………………………………………………………………………………………………………………………………………………………………. 


………………………………………………………………………………………………………………………………………………………………………. 


……………………………………………………………………………………………………………………………………………………………………….


BEFORE SENDING BACK THE AUTOCLAVE, PLEASE COMPLY WITH THE FOLLOWING 
INSTRUCTIONS: 
 
1.


Before sending back the machine, fill out this form and send it via fax to N° 0039 0522 875579 then await 
our instructions for dispatch.  

2.


The warranty will become void if the machine is sent back without prior authorization.  

3.


If possible, allow the machine to operate until the minimum level Led comes on.  

4.


Empty the used water from the tank.  

5.


Place a folded piece of newspaper between the door and chamber and then shut the autoclave to prevent 
one of the two parts from being damaged during transport. 

6.


Remove the tray-holder. Do not send it back with the machine.  

7.


Send the autoclave packed in the original wrapping in which it was purchased.  

8.


Install the substitute machine (if applicable) in compliance with the recommendations in the maintenance 
manual. 


The installer hereby declares that the indicated operations have been carried out, that the machine supplied 
as a substitute has been installed in compliance with the instructions in the maintenance manual and that it 
functions perfectly. The technician also declares that the form with the test results of the first installation 
has been filled out and sent off along with the warranty form. 
 
Date 

……………………………………


Installer's signature 

….………………………………………………….…


Summary of Contents for STERILIX 2 PLUS

Page 1: ...CAL APPLIANCE DIVISION COMPANY WITH CERTIFIED QUALITY SYSTEM UNI EN ISO 9001 EN 13485 Cod 3125 Operation and maintenance manual STEAM STERILIZERS MODELS STERILIX 2 PLUS STERILIX VACUUM PLUS STERILIX STAR GB ...

Page 2: ... read all its parts Keep the manual in a suitable place so that it remains in a perfect condition Following improvements or variations to the appliances the contents of this manual may be liable to modification without prior notice or other obligations This manual contains an installation form which must be fully filled out by the technician when he installs the machine This form will be considere...

Page 3: ... 18 8 4 Supplementary drying program DRY 18 8 5 Bowie and Dick Test 19 8 6 Sterilizing chart 20 8 7 Notes and warnings 21 8 8 Cycle charts 22 8 9 Monthly inspection proposal 23 8 10 Example of correct cycle prints 24 9 Useful information 25 10 Key to displayed messages 26 10 1 Troubleshooting solutions remedies 28 11 Maintenance 30 11 1 General maintenance 30 11 2 Daily routine maintenance 30 11 3...

Page 4: ... and electronic devices that ensure an optimal sterilizing process along with total safety The operating cycles can be visually checked on a display installed on the control panel of the machine or by means of a printer supplied on request The machine has been built so that the work cycle will automatically stop and the situation be indicated by an error message on the display if the operator fail...

Page 5: ... an anti condensation function after each cycle if the door is not opened within 30 min Gradual heating to obtain a more accurate temperature and a better sterilizing process AUTOMATIC WATER FILLING by means of an electric pump Built in DRYING CYCLE STERILIX 2 PLUS by means of an evaporation system STERILIX VACUUM PLUS STERILIX STAR and STERILIX STAR FAST by means of a vacuum pump AUTOMATIC AIR EX...

Page 6: ...s of 3 dedicated fuses 2 quick acting 1 A types F 1 A and one 100 mA delayed action type T 100 mA see enclosed wiring diagram Only have these fuses changed by a skilled electrician The machines have been designed to operate up to an altitude of 1200 mm above sea level Contact the manufacturer if the machine must operate at a higher altitude as special models and or devices may be required The nois...

Page 7: ... safe distance from the machine to prevent accidental contact with hot parts Never ever operate the appliance unless the power cable is in a perfect condition and the structure undamaged It is advisable to keep the door half open with switch 10 turned off in 0 position when the appliance is not in use Pay the utmost attention to those parts of the appliance that become hot during operation and tha...

Page 8: ...AM BUTTON 4 134 PROGRAM START INDICATOR LED 5 121 C PROGRAM BUTTON 6 121 C PROGRAM START INDICATOR LED 7 PUMP BUTTON 8 MAXIMUM LEVEL INDICATOR LED 9 MINIMUM LEVEL INDICATOR LED 10 MAIN SWITCH 11 DOOR OPENING LEVER 12 WATER FILL UNION 13 PRESSURE AND VACUUM GAUGE 14 WATER DRAIN UNION 15 PRINTER CONNECTING SOCKET 16 MANUAL WATER FILL PLUG STERILIX 2 PLUS 16 BACTERIOLOGICAL FILTER STERILIX VACUUM PLU...

Page 9: ...Operation and Maintenance Manual Steam sterilizers mod Sterilix 2 Plus Vacuum Plus Star Star Fast Rev 09 of 18 04 02 E Documenti1 Manuali superati non in uso Vacuum Star GB R09 doc Page 9 of 42 ...

Page 10: ...Remove the polystyrene from the top and sides the weight of the model is given in chap 2 technical specifications Lift the machine out of the box in a vertical direction using the 2 hooks supplied in the bag inside the pack These should be inserted into the two holes at the sides of the casing see drawing on page 11 Remove the pluriball wrapping from around the machine and make sure that all parts...

Page 11: ...ual Steam sterilizers mod Sterilix 2 Plus Vacuum Plus Star Star Fast Rev 09 of 18 04 02 E Documenti1 Manuali superati non in uso Vacuum Star GB R09 doc Page 11 of 42 DRAWING ILLUSTRATING HOW THE MACHINE MUST BE LIFTED FROM THE PACK ...

Page 12: ...chine to allow for aeration and make sure that the internal chamber is perfectly parallel to the ground Comply with the following instructions to simply and efficiently check that the machine has been positioned correctly Open the door of the machine using the handle 11 Remove the tray holders complete with trays Pour distilled water into the boiler using a normal glass Check how the water settles...

Page 13: ... M9003 with date stamp from one of our authorized centers To install the printer just connect its jackplug to socket N 15 of the autoclave Now connect the printer plug to a power socket Carefully read the supplied printer operation manual Power the printer by means of its switch Power the autoclave During the sterilizing cycle the printer will automatically indicate the progressive number of the c...

Page 14: ...play 2 along with an acoustic signal the maximum level indicator led 8 will also come on HOW TO CORRECTLY FIT THE TUBE THAT FILLS THE CANISTER WITH WATER NO OK Once the filling phase has terminated a number will appear to indicate the temperature in the chamber at that moment which can range from 15 to 80 C Only after the above described messages have appeared will the machine be ready to operate ...

Page 15: ...t art M9050 supplied as an optional 7 If loose instruments must be sterilized it is advisable to cover the trays with a paper or fabric napkin to prevent direct contact with the tray surface do not place the instruments straight on to the trays 8 Scissors and forceps should be slightly opened Mirrors and containers should be placed upside down for the sterilizing process 9 It is advisable to keep ...

Page 16: ...Starting may be delayed if the internal temperature is high The 121 C cycle lasts 45 minutes the last 15 min of which are used to dry the instruments A flashing number 45 will appear on the display to indicate the warming up phase The sterilizing cycle will begin when the pressure in the chamber reaches about 1 Bar shown on the pressure gauge 13 and the machine has reached the preset temperature t...

Page 17: ...34 C cycle lasts 35 minutes the last 15 min of which are used to dry the instruments A flashing number 35 will appear on the display to indicate the warming up phase The sterilizing cycle will begin when the pressure in the chamber reaches about 2 1 Bar shown on the pressure gauge 13 and the machine has reached the preset temperature cycle start indicator led 4 will flash the time will be counted ...

Page 18: ... high Deduct the time as required according to table 8 4 and using button 1 depending on the material being sterilized During the last phase a code indicating the time remaining in the automatic drying phase A15 will appear on display 2 A vacuum will be formed in the chamber and the pressure value on the pressure gauge 13 will reset At the end of the sterilizing process the message End will appear...

Page 19: ... the temperature in the chamber Clamp the door in place with the relative lever 11 Once the door has been closed the machine will proceed with the automatic warming up phase and then with the sterilizing process Starting may be delayed if the internal temperature is high The message Bod will flash until the pressure reading on the pressure gauge becomes 2 1 bar after which it will remain permanent...

Page 20: ... drying 15 15 Minutes displayed 35 35 45 45 DrY Str 35 45 Materials metallic solids glassware metal instruments fabrics gauzes and cotton metallic solids rubber materials plastic materials handles turbines delicate solids rubber materials plastic materials packaged or wrapped materials excluding turbines and handpieces packaged or wrapped materials excluding turbines and handpieces Boxes Hollow it...

Page 21: ...lizing cycles and any faults that may have occurred 6 There must always be trays and tray holders in the chamber Without these accessories abnormal pressures and temperatures could develop inside and these could cause the cycle to abort 7 It is advisable to place a phial containing culture spores in the chamber along with each load sterilized in order to make sure that the sterilizing process is v...

Page 22: ... Sterilizing and T upkeep 3 Drying 4 Upkeep A Door closing B Vacuum and water added to chamber C Heating for 1 minute D Pressure relief down to 0 bar E Pressure starts to rise F 0 9 bar pressure check G Sterilizing begins H Constant monitoring of sterilizing process I Draining and start of drying phase L End of cycle and start of upkeep phase M Thermodynamic vacuum and drying FRACTIONATED CYCLE mo...

Page 23: ...rature 07 11 2000 20 134 VAPOR LINE The utilized indicator is enclosed for each inspection Always use biological indicators 3 types of integrator are indicated as an alternative ORIGINAL V A P O R L I N E C O D 1 4 6 8 T H E R M A L O G S H E L I X T E S T C O D 3 3 6 9 VEER The indicator must be placed in the relative holder Only use with the STERILIX STAR and STERILIX STAR FAST model in 134 cycl...

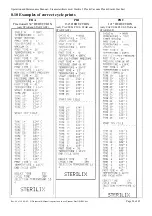
Page 24: ...t Rev 09 of 18 04 02 E Documenti1 Manuali superati non in uso Vacuum Star GB R09 doc Page 24 of 42 8 10 Examples of correct cycle prints FRA Fractioned 134 DEDUCTION only STAR and STAR FAST PR1 134 DEDUCTION only VACUUM PLUS STAR and STAR FAST PR2 121 DEDUCTION only VACUUM PLUS STAR and STAR FAST ...

Page 25: ... NON PACKAGED instruments and articles B The machine has been designed to stop the sterilizing cycle in progress in the event of a power failure In this case message rEt will appear on the display If this happens it will be necessary to repeat the sterilizing process by opening the door and activating the selected program again C Sterilizer mod STERILIX VACUUM PLUS STERILIX STAR and STERILIX STAR ...

Page 26: ...t Boiler temperature over 160 or probe wire broken or faulty probe connection 12 dPr The machine has not carried out the vacuum phase 13 Pr0 This message is displayed at the beginning of the cycle when no program has been selected select the program without opening the door 14 Pr1 Indicates that PROGRAM 1 has been selected 134 15 Pr2 Indicates that PROGRAM 2 has been selected 121 16 A Displayed du...

Page 27: ...ter the sterilizing cycle has terminated 43 oCH Vacuum OK message There are no leaks in the hydraulic circuit of the machine 44 LLn Vacuum faulty message There are leaks in the hydraulic circuit of the machine 45 TEST VUOTO OK Vacuum test message 46 USd Message indicating dirty water in machine 47 FrA Fractionated vacuum with 3 peaks before sterilizing 48 ElP For technicians only Vacuum pump N C s...

Page 28: ... there may be a short circuit in the N O solenoid valve coil replace the coil jamming or foreign bodies under the solenoid valve seals Clean or replace the part NOTE this operation must only be carried out by After sales Service staff water fails to enter the chamber even though the level gauge gives the green signal the internal temperature governor type PT 100 is badly calibrated Regulate it by ...

Page 29: ...collects used water is not too full If connections between the autoclave and drain pipe are incorrect Faults involving the drain pipe clogged or partially blocked Remove the pipe from the direct drain and place it in the supplied can 1 1 M A I N T E N A N C E Carry out the maintenance operations with the machine at a standstill after having removed the plug from the power socket and after having a...

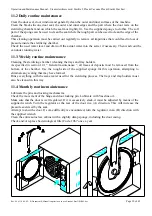
Page 30: ...kly routine maintenance Cleaning the sterilizing chamber cleaning the trays and tray holders As specified in section 12 1 General maintenance all traces of deposits must be removed from the bottom of the chamber Use the rough side of the supplied sponge for this operation attempting to eliminate any scaling that may have formed Rinse everything with the same water used for the sterilizing process ...

Page 31: ...ve the protective casing Carry out the 134 cycle and when the maximum pressure has been reached 2 2 bar unscrew and retighten the knurled ring nut on the safety valve Check to make sure that steam issues by unscrewing the ring nut and vice versa that total retention is achieved by tightening the same knurled ring nut again 2 Replace the bacteriological filter 3 Clean and inspect the sterilizing ch...

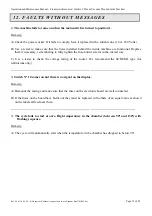
Page 32: ...al Replace them if necessary remembering to fully tighten the fuse holder screws in the correct way C Use a tester to check the voltage rating of the socket We recommend the SCHUKO type for technicians only 2 Switch N 10 comes on but there is no signal on the display Remedy A Demount the casing and make sure that the fuses on the electronic board are well connected B If the fuses on the board have...

Page 33: ... Maintenance Manual Steam sterilizers mod Sterilix 2 Plus Vacuum Plus Star Star Fast Rev 09 of 18 04 02 E Documenti1 Manuali superati non in uso Vacuum Star GB R09 doc Page 33 of 42 STERILIX 2 PLUS ELECTRICAL SYSTEM ...

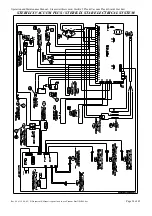
Page 34: ...ce Manual Steam sterilizers mod Sterilix 2 Plus Vacuum Plus Star Star Fast Rev 09 of 18 04 02 E Documenti1 Manuali superati non in uso Vacuum Star GB R09 doc Page 34 of 42 STERILIX VACUUM PLUS STERILIX STAR ELECTRICAL SYSTEM ...

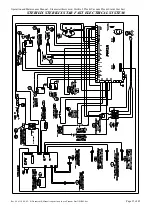
Page 35: ...enance Manual Steam sterilizers mod Sterilix 2 Plus Vacuum Plus Star Star Fast Rev 09 of 18 04 02 E Documenti1 Manuali superati non in uso Vacuum Star GB R09 doc Page 35 of 42 STERILIX STERILIX STAR FAST ELECTRICAL SYSTEM ...

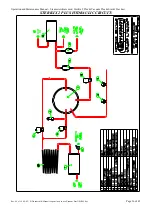
Page 36: ... Maintenance Manual Steam sterilizers mod Sterilix 2 Plus Vacuum Plus Star Star Fast Rev 09 of 18 04 02 E Documenti1 Manuali superati non in uso Vacuum Star GB R09 doc Page 36 of 42 STERILIX 2 PLUS HYDRAULIC CIRCUIT ...

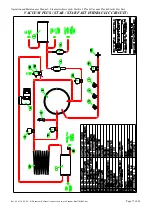
Page 37: ...enance Manual Steam sterilizers mod Sterilix 2 Plus Vacuum Plus Star Star Fast Rev 09 of 18 04 02 E Documenti1 Manuali superati non in uso Vacuum Star GB R09 doc Page 37 of 42 VACUUM PLUS STAR STAR FAST HYDRAULIC CIRCUIT ...

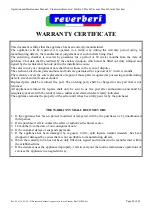
Page 38: ...fill out this form and send it via fax to N 0039 0522 875579 then await our instructions for dispatch 2 The warranty will become void if the machine is sent back without prior authorization 3 If possible allow the machine to operate until the minimum level Led comes on 4 Empty the used water from the tank 5 Place a folded piece of newspaper between the door and chamber and then shut the autoclave ...

Page 39: ... conditions ensuring that the appliance is correctly installed in compliance with sect 5 2 of the instruction manual The installer also declares that he has duly trained the user to operate the machine with the help of the instruction manual The technician declares that he has attached the printer ticket to this form along with the warranty form duly filled out in all parts The above mentioned doc...

Page 40: ...facturing defects travel and call costs excluded Replaced parts shall be returned free port The ordering party shall be charged for any part that is not returned All appliances returned for repairs shall only be sent to us free port after authorization and shall be adequately packed with the sender s name address and claimed defect clearly indicated The appliance remains the property of the seller...

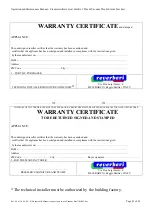
Page 41: ...TECHNICAL INSTALLER SIGNATURE AND STAMP Via Don Luigi Sturzo 6 42020 BARCO Reggio Emilia ITALY THIS PART OF THE CERTIFICATE MUST BE SENT BACK BY REGISTERED LETTER WITHIN 8 DAYS FROM THE DATE OF PURCHASE WARRANTY CERTIFICATE TO BE RETURNED SIGNED AND STAMPED APPLIANCE The undersigned reseller certifies that the warranty has been examined and certifies that the appliance has been consigned and insta...

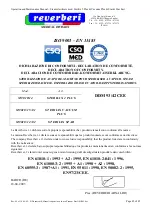
Page 42: ...15 01 STERILIX VACUUM PLUS M9010 12 02 STERILIX STAR DDM 93 42 CEE La Reverberi s r l dichiara sotto la propria responsabilità che i prodotti elencati sono conformi alle norme La maison Reverberi s r l déclare sous sa responsabilité que les produit enumeres sont conformes aux directives The company Reverberi s r l declare under own exclusive responsability that the product listed are in conformity...

Reviews: