- 2 -
STORAGE TANK INSALLATION:
Wrap 4 to 5 winds of Teflon tape around metal tank threads.
■
Hand tighten plastic ball valve to tank. (Firm but not too tight.)
■
Tank should be coming form the factory with 8 to 4 lbs/PSI of air when measured empty.
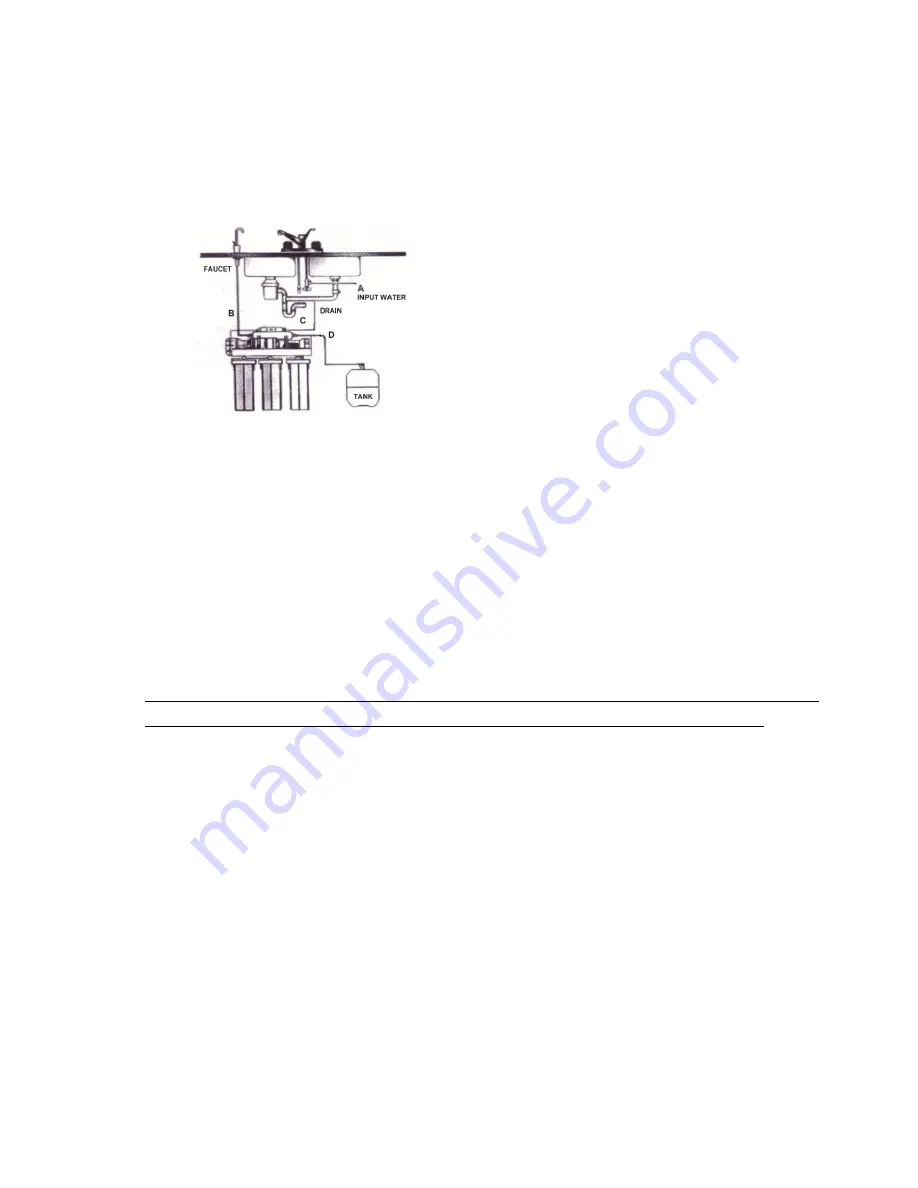
CONNECTING THE TUBING:
A. feed water in.
B. sink top faucet.
C. drain clamp.
D. storage tank.
START UP PROCEDURE:
With everything connected, turn on the water for leak checking.
1. Make sure the storage tank shut-off valve is
‘OFF’. Open the sink top faucet.
2. Within a few minutes (up to 15) the water will start to run from the faucet slowly.
3. Let the water run for at least 30 minutes. This flushes the carbon filters on the first time use.
4. After initial flushing, open the shut-off valve on the tank and close the sink top faucet.
5. Tank will now fill with water purified (Usually 2 to 3 hours). After the tank has full (you will hear no
water running to the tank), open the sink top faucet and drain all the water until the storage tank is
empty and there is only a small flow from the sink top faucet.
Do not drink the water from the first tank produced by your newly purchased system or newly
replaced membrane. If the system is only used infrequently, drain the tank at least a week.
6. Check for leaks dally for the first week and periodically thereafter.
7. Close the sink top faucet. The system is now ready to serve.
Suggest:
Please do
it’s the steps under if you do not use it one week or more days.
1. Turn off the feeding switch.
2. Remove the plug of power.
3. Turn on the switch of feeding after coming back, then insert the plug of power, and turn on the
faucet, after the water in the water tank draining away, then the purifier will start purifying the water,
and the water can be drank (Please change the filter if the purifier didn
’t use so long).


