background image

 -5 - 

System Components

System Components

System Components

System Components    

Your Revolabs xTag™ System package contains: 


Compact Charger Base 


Wearable xTag wireless microphone 


Earpiece with volume control 


Quick release lanyard 


USB cable 


Installation and Operation Guide 


xTag 

Quick Start

 Guide 

Revolabs

Revolabs

Revolabs

Revolabs    xTag

xTag

xTag

xTag™

™    Charger Base  

Charger Base  

Charger Base  

Charger Base      

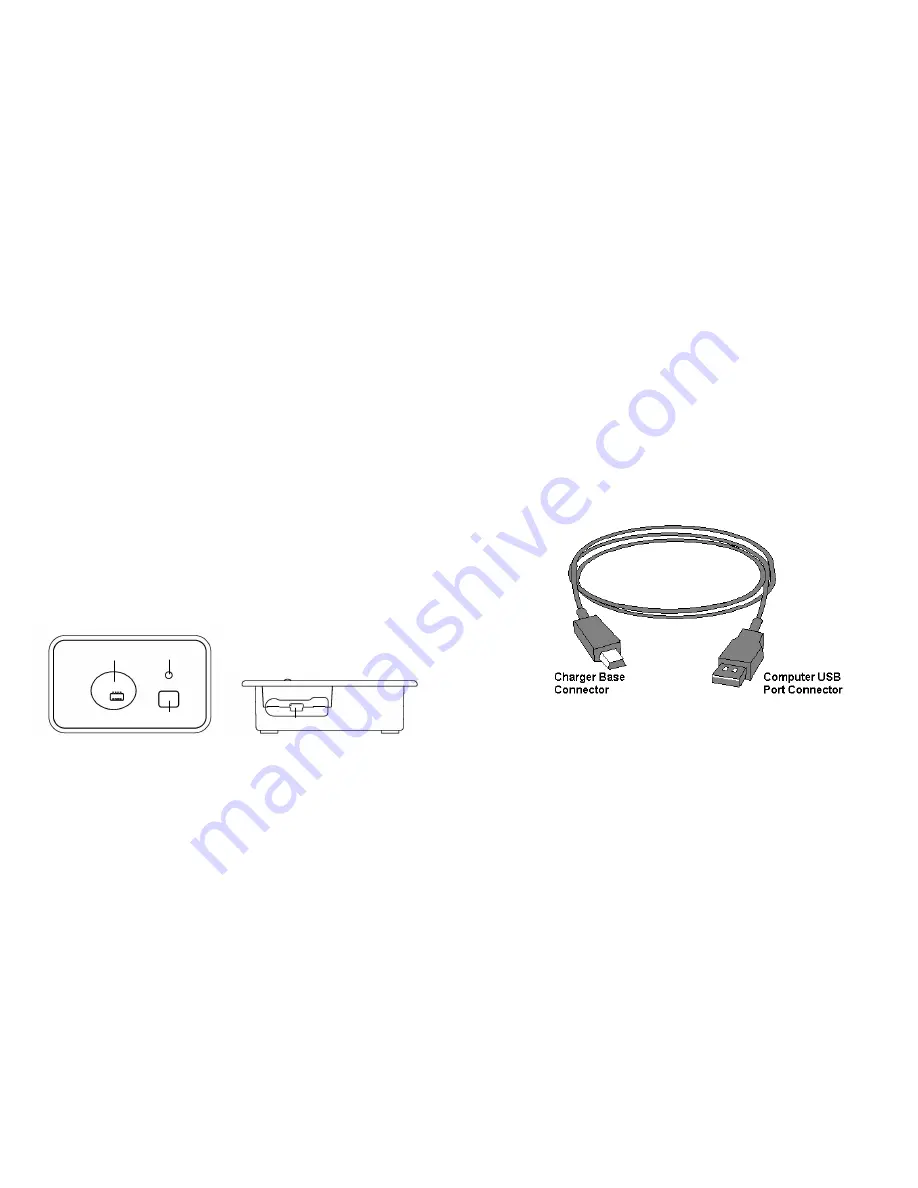
Use the Charger Base to store and charge the 
Microphone when not in use. The Microphone must be 
properly inserted into the base and seated flush for 
charging to occur.  


1. 

Charger Bay

 — charges Microphone 

2. 

LED indicator

 — mute and pairing status indicator 

3. 

MUTE

 button

 — duplicates the Microphone mute function 

4. 

Mini 

USB

 connector

 — computer audio and power connection 

 -6 - 

Mute Button


Pressing the 

MUTE

 button toggles between muting 

(flashing RED LED status) and un-muting (flashing 
GREEN LED status) on the Wireless Microphone. 


Note

:  Press

 the 

MUTE

 button on a Microphone will 

similarly toggle between mute and un-mute and display 
on both status LEDs. 

USB Connection


Use the supplied cable to connect the mini USB 
connector to the Charger Base and the standard end 
to your computer USB port.  


Installing the 

Installing the 

Installing the 

Installing the xTag

xTag

xTag

xTag    USB

USB

USB

USB System

 System

 System

 System    

The xTag


USB system is easily installed in the home or 

office. Simply follow the instructions below to attach 
the unit to your equipment. 

Computer Software Set-up


Use the supplied USB cable to connect the mini USB 
connector to the Charger Base and the standard end 

Summary of Contents for xTag 02-DSKSYS-D

Page 1: ...SYS D 04 DSKSYSEU D Revolabs Inc Revolabs Inc Revolabs Inc Revolabs Inc 2007 REVOLABS INC All rights reserved No part of this document may be reproduced in any form or by any means without express wri...

Page 2: ...ection 6 Installing the xTag USB System 6 Computer Software Set up 6 Revolabs xTag Wireless Microphone 11 Using the xTag Microphone 11 Charging the Batteries 14 When to Charge 14 Setting the Broadcast...

Page 3: ...ed based on a Declaration of Conformity indicating that Industry Canada technical specifications were met It does not imply that Industry Canada approved the equipment See Ref IC Self Marking 6 f and...

Page 4: ...EU directive 2003 11 EC and EU directive 2002 95 EC 4 Introduction Introduction Introduction Introduction Congratulations on the purchase of your Revolabs xTag USB wireless microphone system This wir...

Page 5: ...one mute function 4 Mini USB connector computer audio and power connection 2 3 1 4 6 Mute Button Pressing the MUTE button toggles between muting flashing RED LED status and un muting flashing GREEN LE...

Page 6: ...em Classic settings You may notice slight differences in appearance when using other Windows operating systems To modify the default microphone earpiece audio output settings 1 At the lower right of y...

Page 7: ...d computer telephony applications e g Skype may also offer options for controlling the audio levels and playback capabilities Please consult the application guide for the software package for addition...

Page 8: ...the microphone port pointed up toward mouth 3 With the microphone in the wearing position un mute the microphone by pressing and releasing the Mute button confirm by viewing flashing GREEN LED If the...

Page 9: ...solid RED to solid GREEN as charging completes The Charger Base status indicator remains off during charging The Microphone is always muted while in the Charger Base The battery charges from fully de...

Page 10: ...the Charger Base Pairing creates an encrypted association between the Wireless Microphone and the Charger Base with a unique electronic serial number Once the Microphone and Charger Base have been pa...

Page 11: ...18 LED Status Indications LED Status Indications LED Status Indications LED Status Indications The following LED patterns are shown on either the Microphone or the Charger Base LED pattern Meaning So...

Page 12: ...0 Wireless Microphone Power proprietary 4 pin connector Audio 2 5mm mono audio Microphone pattern Unidirectional cardioid Battery Lithium Polymer up to 8 hours talk time Charge Time 2 0 hours approx R...

Reviews: