4
EN
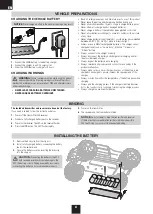
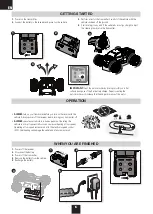
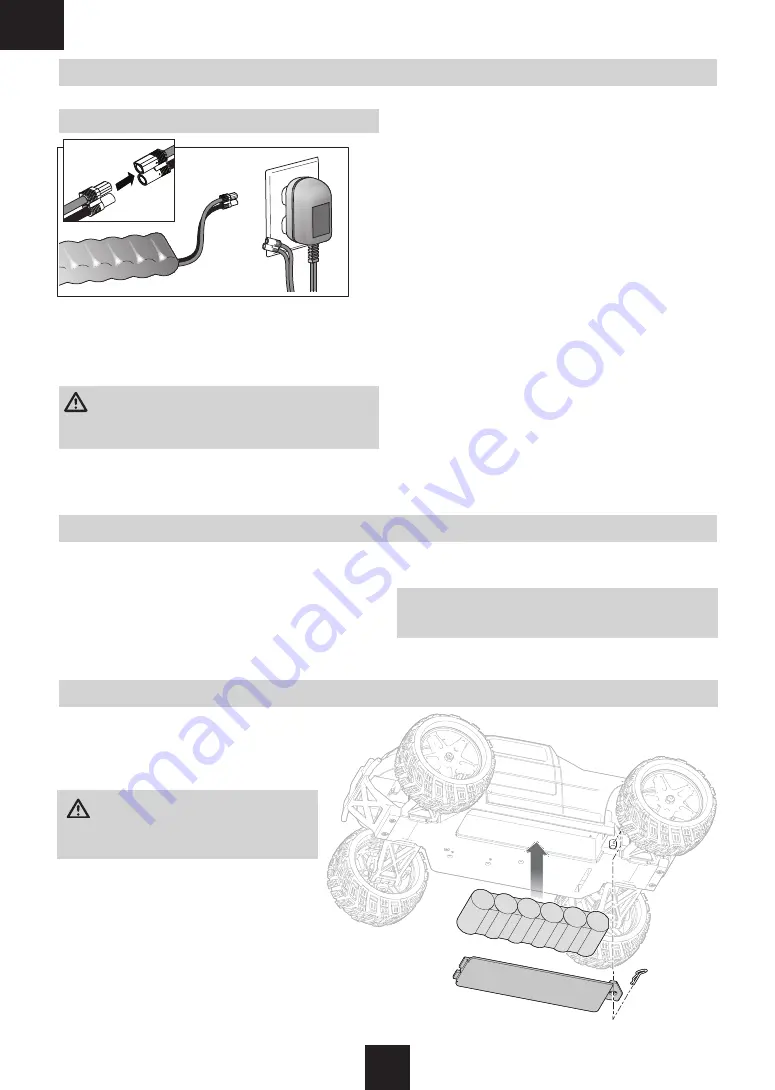
1.
Remove the body clip from the clip post.
2.
Install a fully charged battery, connecting the battery
lead to the vehicle lead.
3.
Secure the battery cover by inserting the body clip
into the clip post.
CAUTION:
Connecting the battery to the ESC
with reversed polarity will cause damage to the
ESC, the battery or both. Damage caused by incorrectly
connecting the battery is not covered under warranty.
VEHICLE PREPARATIONS
INSTALLING THE BATTERY
The included transmitter and receiver are bound at the factory.
If you need to rebind, follow the instructions below.
1.
Power off the transmitter and receiver.
2.
Connect a fully charged battery pack to the receiver.
3.
Power on the receiver. The LED on the receiver flashes.
4.
Press the BIND button. The LED flashes rapidly.
5.
Power on the transmitter.
6.
The receiver and the transmitter will bind.
NOTICE:
Do not attempt to bind the transmitter and receiver
if there are other compatible transmitters in bind mode within
400 feet. Doing so may result in unexpected binding.
BINDING
CHARGING THE VEHICLE BATTERY
NOTICE:
Never charge a battery in the vehicle or damage may result.
1.
Connect the NiMH battery to the battery charger.
2.
Connect the charger to an AC power outlet.
3.
Allow the NiMH battery to charge for 9 hours.
CHARGING WARNINGS
WARNING:
Failure to exercise caution while using this product
and comply with the following warnings could result in product
malfunction, electrical issues, excessive heat, FIRE, and ultimately injury
and property damage.
• NEVER LEAVE CHARGING BATTERIES UNATTENDED.
• NEVER CHARGE BATTERIES OVERNIGHT.
• Read all safety precautions and literature prior to use of this product.
• Never leave the battery and charger unattended during use.
• Never allow children under 14 years of age to charge battery packs.
• Never attempt to charge dead or damaged batteries.
• Never charge a battery if the cable has been pinched or shorted.
• Never allow batteries or charger to come into contact with moisture
at any time.
• Never charge batteries in extremely hot or cold places (recommended
between 50–80°F [10–26°C]) or place in direct sunlight.
• Always use only NiMH rechargeable batteries. This charger cannot
charge batteries such as “heavy duty,” “alkaline,” “mercury” or
“lithium” battery.
• Always connect to the charger correctly.
• Always disconnect the battery and charger after charging and let
them cool between charges.
• Always inspect the battery before charging.
• Always terminate all processes and contact Horizon Hobby if the
product malfunctions.
• Always make sure you know the specifications of the battery to be
charged or discharged to ensure it meets the requirements of this
charger.
• Always constantly monitor the temperature of the battery pack while
charging.
• Always end the charging process if the charger or battery becomes
hot to the touch or starts to change form during the charge process.
• Always charge in a well ventilated area.

