


I-85
IT
ALIANO
Istruzioni per l’allenamento · Utilizzo
F
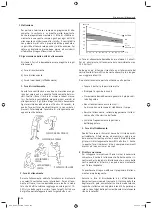
Perdita di peso
Il corpo, proprio come un motore, ha bisogno di „carbu-
rante“ per lavorare correttamente. La muscolatura riceve
ossigeno dall’apparato cardiovascolare del corpo. Questo
ossigeno viene utilizzato per fornire energia ai muscoli,
ma anche per bruciare i carboidrati o i grassi. A causa
della composizione chimica, la trasformazione del grasso
corporeo in energia può avvenire solo se si svolge un
allenamento aerobico, ossia se è presente una quantità
suffi
ciente di ossigeno durante l’allenamento.
Nell’allenamento anaerobico („senza respiro“) predomina
una condizione di carenza d’ossigeno, per cui non è pos-
sibile bruciare i grassi. Il corpo, tra il 50% e l’80% delle
pulsazioni massime (pulsazioni massime = 220-l’età),
dispone ancora di suffi ciente ossigeno e in questo inter-
vallo può ottenere i migliori risultati in riferimento alla
combustione dei grassi. La combustione dei grassi
aumenta quanto più frequentemente e a lungo si compie
un allenamento di questo tipo.
Uso
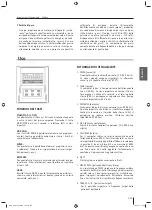
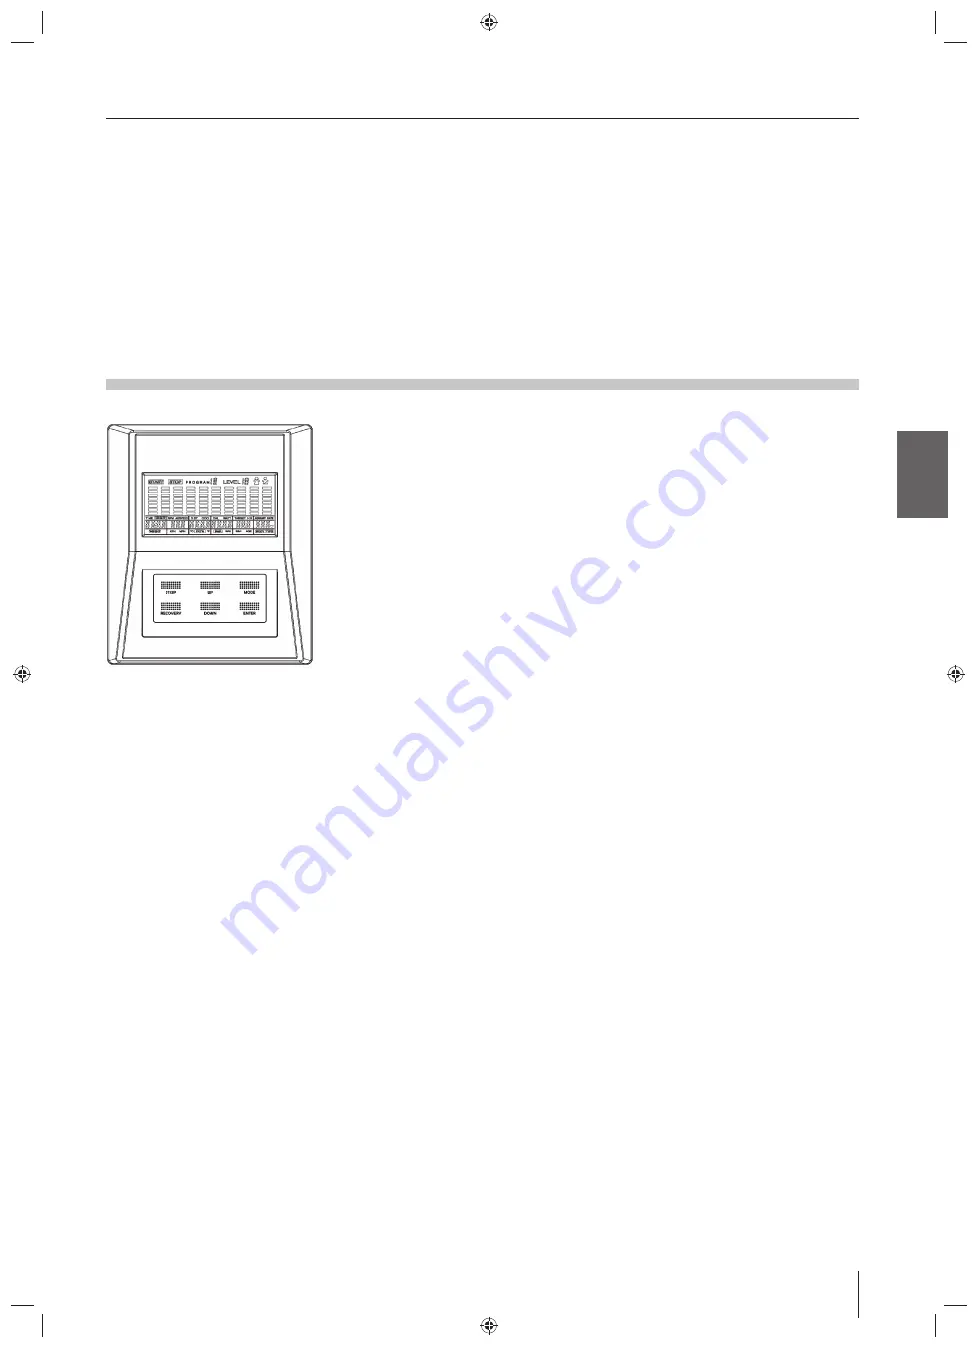
FUNZIONI DEI TASTI
START/STOP: (ST/SP)
Con questo tasto si inizia e si fi nisce un allenamento oppure
si avvia l’analisi del grasso corporeo. Premendo il tasto
START/STOP per circa 3 secondi si resettano tutti i valori
impostati.
UP/DOWN:
Con i tasti UP/DOWN è possibile selezionare vari programmi
e valori. Inoltre è possibile aumentare o ridurre i livelli di
carico durante l’allenamento.
ENTER:
Con questo tasto è possibile confermare i programmi e valo-
ri selezionati (come ad es. impostazione dei valori target,
dati personali, ecc.).
RECOVERY:
Con questo tasto si avvia la misurazione del tasso di recupe-
ro cardiaco. Altre informazioni sono riportate nel capitolo
„Fitness test“.
MODE:
Tramite il tasto MODE, durante l’allenamento è possibile ri-
chiamare varie informazioni sul display (come ad es. calorie
consumate, watt, ecc.).
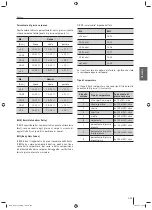
INFORMAZIONI VISUALIZZATE
1. SPEED (velocità)
Il computer indica la velocità corrente. (0,0–99.9 km/h).
In alcuni modelli vengono visualizzati in alternanza
anche i giri di pedale al minuto (“RPM”).
2. TIME (tempo)
Il computer indica il tempo corrente dell’allenamento
(max. 5-99:00). Se viene impostato un tempo, il conta-
tore esegue un conto alla rovescia e al termine dello
stesso (0:00) si percepisce un segnale acustico. (Tempo
massimo impostabile: 99 minuti)
3. DISTANCE (distanza)
Il computer indica la distanza percorsa (max. 999,9 km).
Se viene impostata una distanza, il contatore esegue un
conto alla rovescia e al termine dello stesso (0:00) si
percepisce un segnale acustico. (Distanza massima
impostabile: 999,9 km)
4. ODO (distanza complessiva):
Indica la distanza complessiva percorsa. (0.0-999.9 km/
miglia)
5. CALORIES (calorie)
Qui il computer indica le calorie consumate durante
l’allenamento (max. 9995). Per l’inserimento di un nume-
ro impostabile di calorie è possibile effettuare la selezione
in passi da 5, da un minimo di 5 a un massimo di 9995
kcal. In questo caso il display esegue un conto alla rove-
scia fi no a zero. Una volta raggiunto, l’allenamento si
conclude e si percepisce un segnale acustico.
6. WATT
Il display indica la potenza corrente in Watt.
7. HEART RATE (pulsazioni/battito cardiaco)
La visualizzazione PULSE riproduce la frequenza cardiaca
corrente in battiti al minuto. Il display può indicare valori
corretti solo se i due sensori presenti sul manubrio ven-
gono impugnati correttamente. Potrebbero trascorrere
fi no a 2 minuti prima di visualizzare la frequenza cardiaca.
8. TARGET .H. R.: (pulsazioni target)
Qui è possibile impostare la frequenza target delle
pulsazioni desiderata.
REX_Trainer_CX200E_12.indd I-85
REX_Trainer_CX200E_12.indd I-85
08.05.12 12:58
08.05.12 12:58


