10/25
INSTALLATION
4.1 Unpacking and preparation
Prior to dispatch, the air heater was operated and
tested at the factory. If the heater has incurred any
damage in shipment, file a report claim within 2
working days from receipt.
Check the shipping label and data plate to ensure
the specification of gas and electrical supplies are
compatible. Read this document and become
familiar with the installation requirements and the
appliance before commencing installation.
4.2 Suspending the air heater
Before installing the appliance, check to ensure that
the supporting structure is adequate to carry the
weight of the appliance and its ancillaries i.e. flue
system.
Table 7 Approximate Net weights (kg)
LCSA-4
12
20
30
35
45
50
60
75
100
120
145
Weight 59
64
94
99
114
126
184
242
279
When the heater is lifted for suspension, support the
bottom of the heater with plywood or other
appropriately placed material. If the bottom is not
supported, damage could occur.
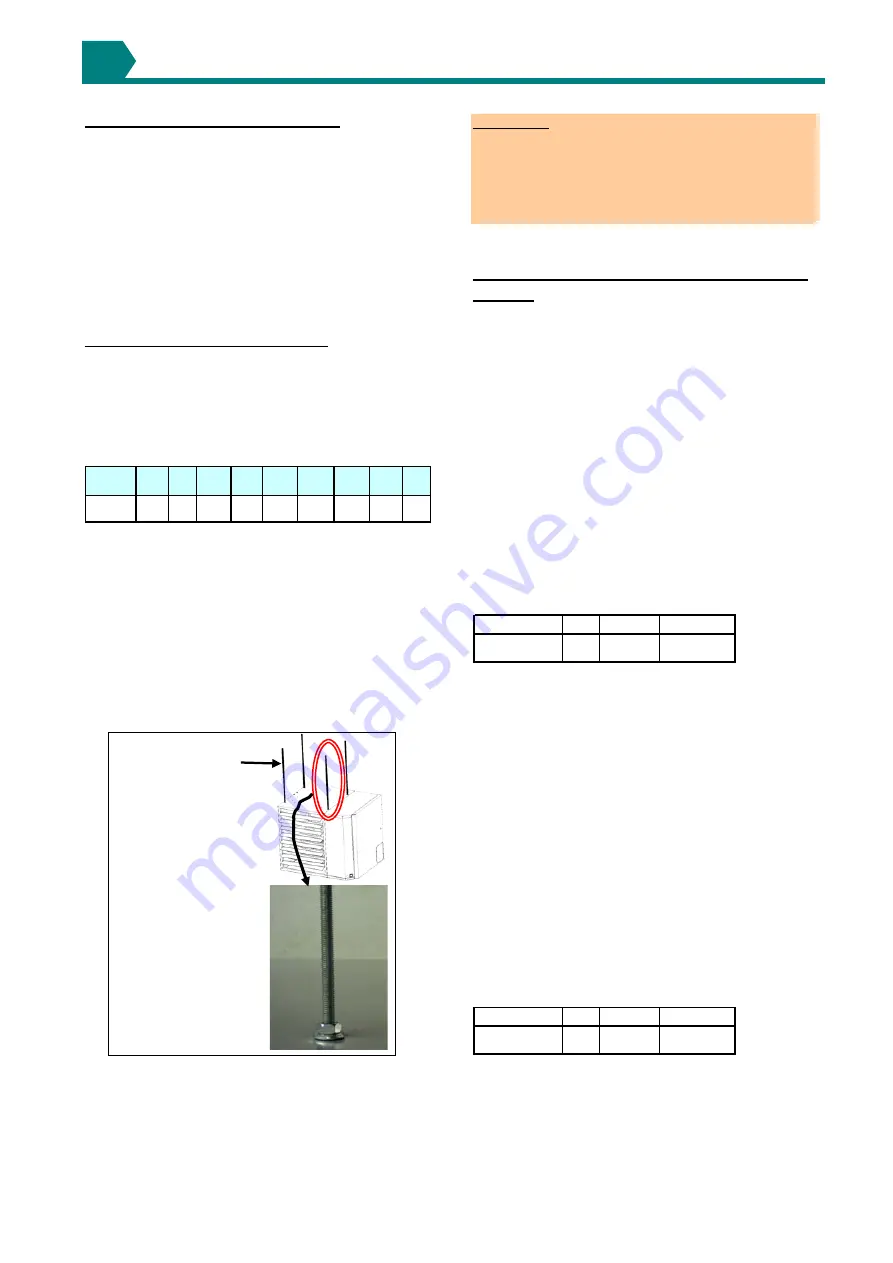
The heater is supplied with four point suspension.
All points must be used. Two threaded nut retainers
are provided on each side of the top of the heater.
See dimensions in section 2.2 and figure 3.
Figure 3 Suspension detail
Add a nut to lock the
M10x1.5 hanger rod to
the heater
Be sure that the threaded hanger rods are locked to the
heater as illustrated. Recommended maximum hanger
rod length is 1.8m.
IMPORTANT:
Suspend the heater from the threaded nut retainers. Do
not suspend from the heater cabinet panels.
Do not place or add additional weight to the suspended
air heater. See hazard levels, page 2.
The heater must be installed in a level plane to ensure
proper operation.
4.3 Fitting the Combustion air inlet/Flue
system
Flue pipe runs may be horizontal or vertical and
terminate either through the wall or roof. See table 5
for maximum pipe length for an appliance installed
as type B or table 6 for maximum lengths and
approved supplied concentric terminals for a heater
installed as a type C appliance.
All pipe runs must be independently supported so
that the heater does not carry any of the weight of
the flue system.
4.3.1 Fitting the flue pipe
The flue pipe socket is located on the back of the air
heater.
Flue pipes must be sealed. Use seamless,
aluminium pipe or equivalent. Follow pipe
manufacturer's instructions (see figures 4 & 5).
Table 8 Flue pipe socket size (dia mm)
12
20,30
35 -> 145
80
100
130
LCSA-4
Socket
4.3.2 Installing a guard on the combustion air
inlet pipe for power vent (Type B installations)
The combustion air inlet socket is located at the
back of the heater. When installed as a type B
appliance, protect the inlet by fitting an access
guard on the socket.
Do not block this socket as it
supplies combustion air for the burner (see
figure 4).
4.3.3 Fitting the combustion air inlet pipe for
balanced flue (Type C installations)
The combustion air pipe attaches directly to the inlet
socket at the back of the heater. Air inlet pipes must
be sealed. Use seamless aluminium or equivalent.
Follow the pipe manufacturer's installation
instructions. See typical installations in figure 5.
Table 9 Air inlet socket size (dia mm)
12
20,30
35 -> 145
80
100
130
LCSA-4
Socket
4


