10
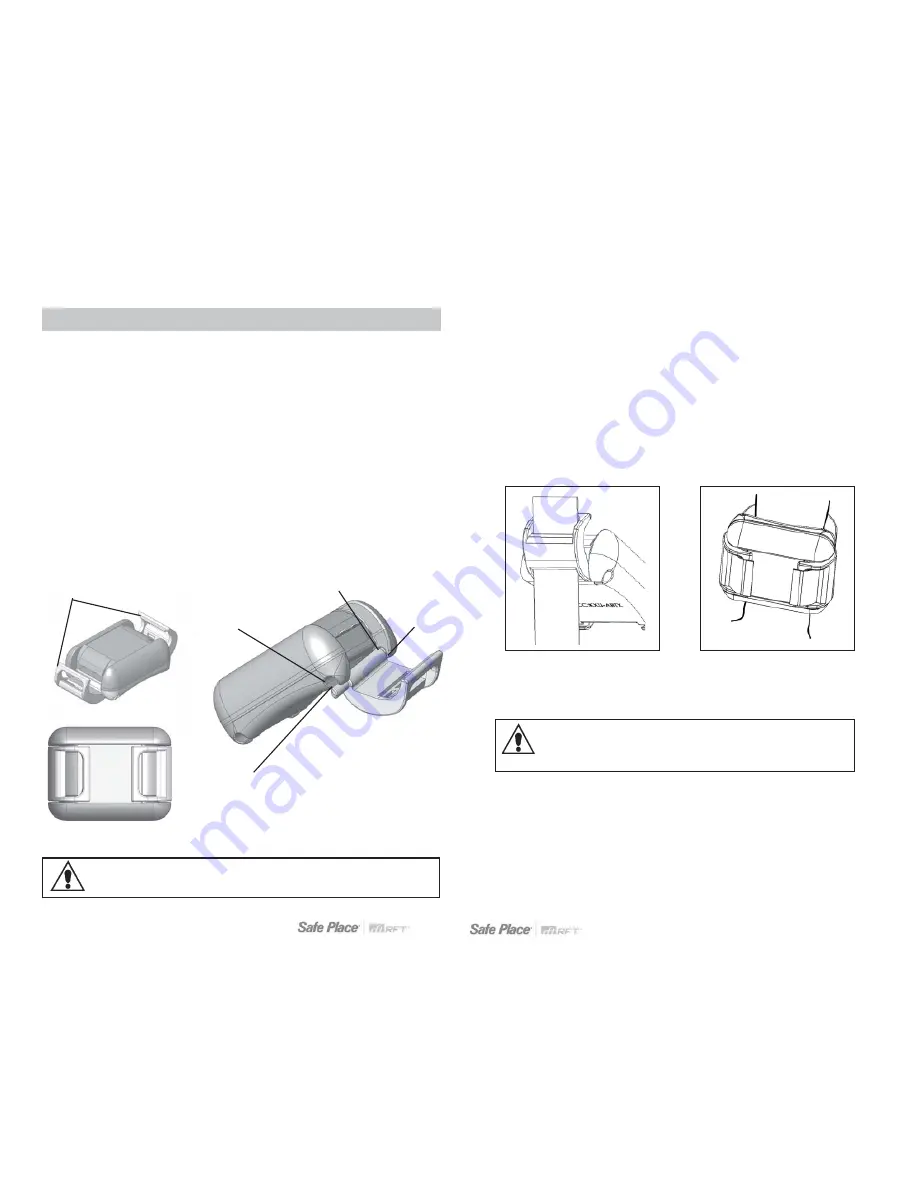
Replacing a Mother Transmitter Clamp
WARNING
: Use care around the piercing contacts on the Mother Transmitter.
Placing your fingers directly on the piercing contact may result in injury.
7
Open Clamps
1
Open the clamps all the way and gently remove them from the transmitter.
2
Insert the first clamp into the Mother Transmitter by inserting the right
oval shaped pin into the hole on the right of the Mother transmitter.
3
Next, line the left oval-shaped pin up with the hole on the left side of the
Mother Transmitter.
4
Gently snap the left oval shaped pin into the hole.
5
Close and secure the clamp.
6
Repeat the steps above for the second clamp.
In some cases, it may be necessary to replace damaged Mother Transmitter clamps.
This done by opening the existing clamps, snapping them off of the Mother Transmitter,
and inserting new clamps.
To replace a Mother Transmitter clamp
Transmitter with both Clamps snapped
closed
Left Oval-Shaped pin
Right Hole
Right Oval-Shaped pin
Left Hole
5
Place the Transmitter and alarming band onto the wrist of the mother.
6
Insert the alarming band material through the slot on the other side of the
Mother Transmitter, from bottom to top.
7
Again, guide the alarming band material through the slot at the top of the
clamp.
8
Adjust the band so that the Mother Transmitter is in a comfortable position on
the mother’s wrist; the band should be snug enough to prevent the Transmitter
from slipping off, and loose enough to prevent discomfort.
9
Snap the clamp into place.
Insert alarming band material
through slot, printed side out
If the Mother Transmitter is clear,
it displays a Red LED indicating it is
ready to be linked.
WARNING
: Use care around the piercing contacts on the Mother
Transmitter. Placing your fingers directly on the piercing contact may
result in injury.


