


DTR_301-D3-XX-001_EN_a
5
5.1
ZAS10-L PoE application
The ZAS10-L PoE device is designed to display time and date. Additionally the clock could be used as a time
standard for other devices. For the proper operation of the device, it should be correctly configured.
5.2
ZAS10-L PoE configuration
The configuration process consists in personalising the device by a user. In standard the device is configured
using LAN interface and optionally it could be done using IR remote sold separately.
5.2.1
Configuration of the device through the embedded website - Web panel
To connect with the clock, first you should configure the network card of the computer to which it is connected.
The proper configuration of the network card can be downloaded from http://rgbtechnology.pl/soft/. Having
configured the network connection correctly, you can, through a Web browser, connect with the embedded
website (Web panel), where you can personalise the device. On the embedded clock website, you may use the
following tabs
:
TIME
-> tab allowing you to configure the parameters connected with time;
DISPLAY
-> tab allowing you to configure the parameters connected with the device display;
ADVANCED -> tab allowing you to configure the advanced parameters of the device;
STATUS
-> tab allowing you to read the device status.
The detailed description of the tabs is available in the device operation manual instr_hardware_037.
5.2.2
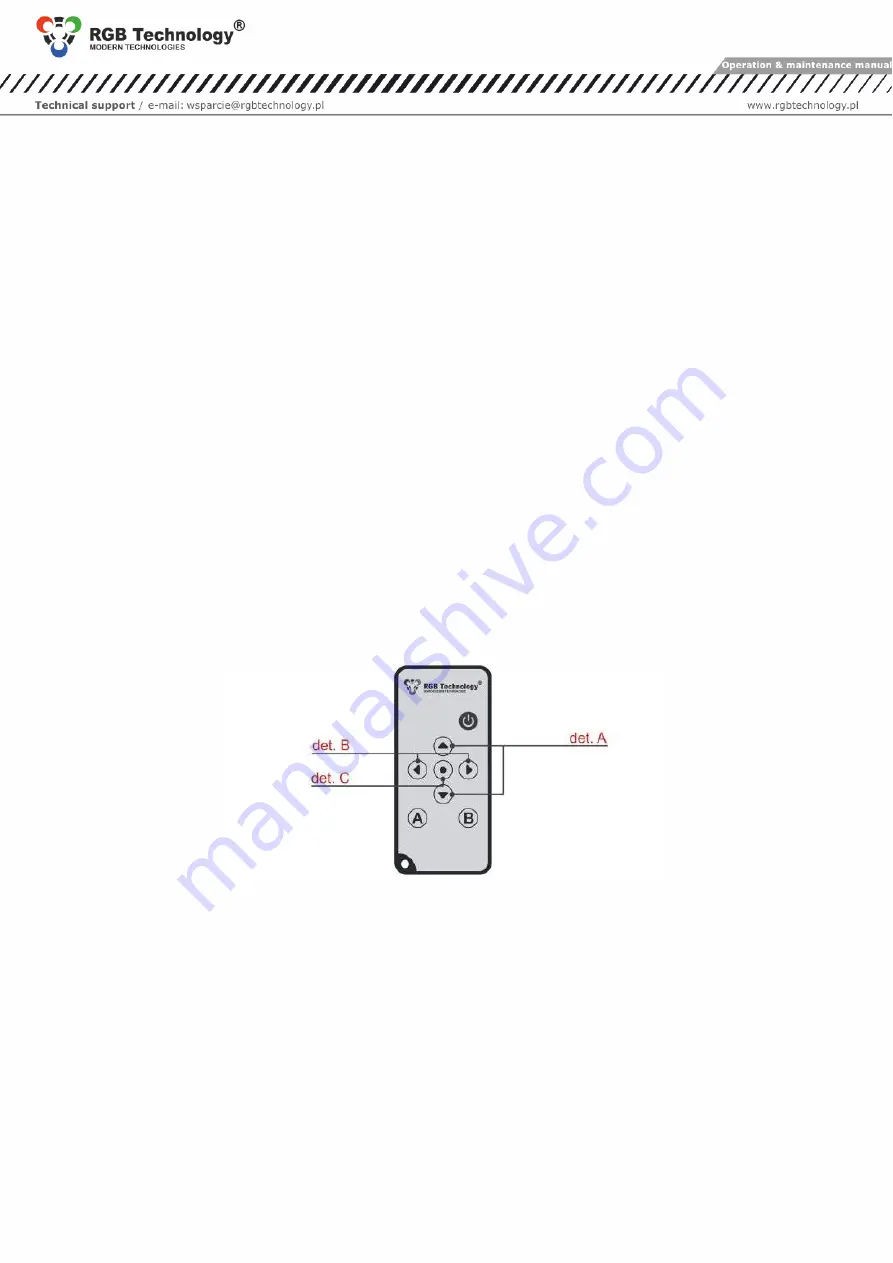
Configuration of the device through the IR remote
The basic configuration method is by means of the remote control through the user menu. fig. 4 shows the
remote control, along with the explanation of the function of each button. You enter the user menu using the
MENU
button. You navigate and modify the respective parameters using the buttons
↑
,
↓
,
←
and
→
.
det. A
– Change the parameter (VALUE PLUS/VALUE MINUS)
det. B
– move to the next position (PREVIOUS/NEXT);
det. C
–„MENU" button
fig. 4
Main menu structure:
Menu position
Function description
F1
Manual setting of the time and the date
F2
Configuration of the presented parameters
F3
Configuration of the time and date format, time colon behavior
F4
Configuration of the time synchronization
F5
Configuration of the display brightness
F6
Unavailable
F7
Configuration of the ECO mode
F8
Unavailable
F9
Restoring the default settings
F10
Unavailable
F11
Configuration of display synchronization
F12
Unavailable
F13
Regional settings, such as location, time zones, daylight saving time/standard time
F14
Stopwatch function / timer counting up / timer counting down


