background image

■取外し

1. ライトモジュールのロックレバーを引き、ロックリングの

OPEN ◎を▲まで回します。

2. ロックリングを OPEN 方向に回しきった後、ライトモ

ジュールを下向きに固定しバッテリーモジュールを左側
に回します。

13

Summary of Contents for BM3400B

Page 1: ...Thank you for purchasing an RGBlue product Before using this product please read this Instruction Manual thoroughly This manual contains the Warranty Card Please retain it carefully LM5K2500V Light Mo...

Page 2: ...RGBlue 1 2 1 IPX6 100M IPX6 1 COB Chip on Board LED LED 2 2 Ra80 5000K 3 100 4 2500lm 5 100 60 2 LED ON OFF 3 3 2...

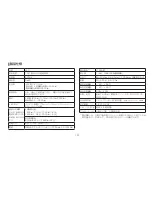
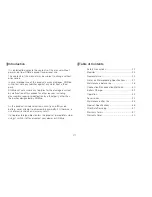
Page 3: ...4 6 7 9 10 12 14 15 16 17 18 19 19 40 3...

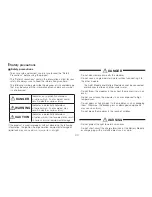
Page 4: ...AC AC100V 240V AC 4...

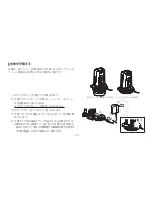
Page 5: ...AC AC AC AC 5 O AC 5...

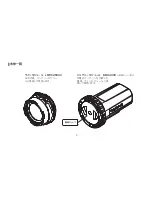
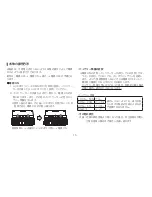
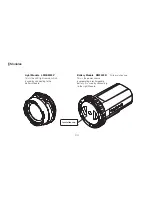
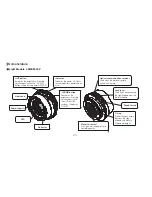
Page 6: ...6 LM5K2500V BM3400B LED...

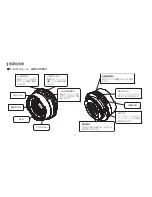
Page 7: ...LM5K2500V 7 LED UP DOWN ON OFF DOWN UP ON OFF ON O...

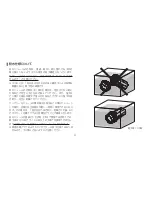
Page 8: ...BM3400B 8...

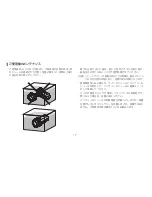
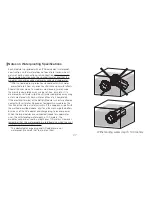
Page 9: ...IPX6 IPX6 AC 100M 100M AC 100M 9...

Page 10: ...100M O O O O 1 O 10 O O...

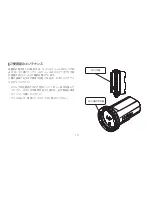
Page 11: ...1 O O 2 O O 3 O 4 O 5 O O 6 O 11...

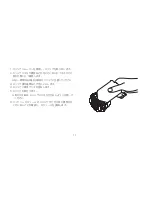
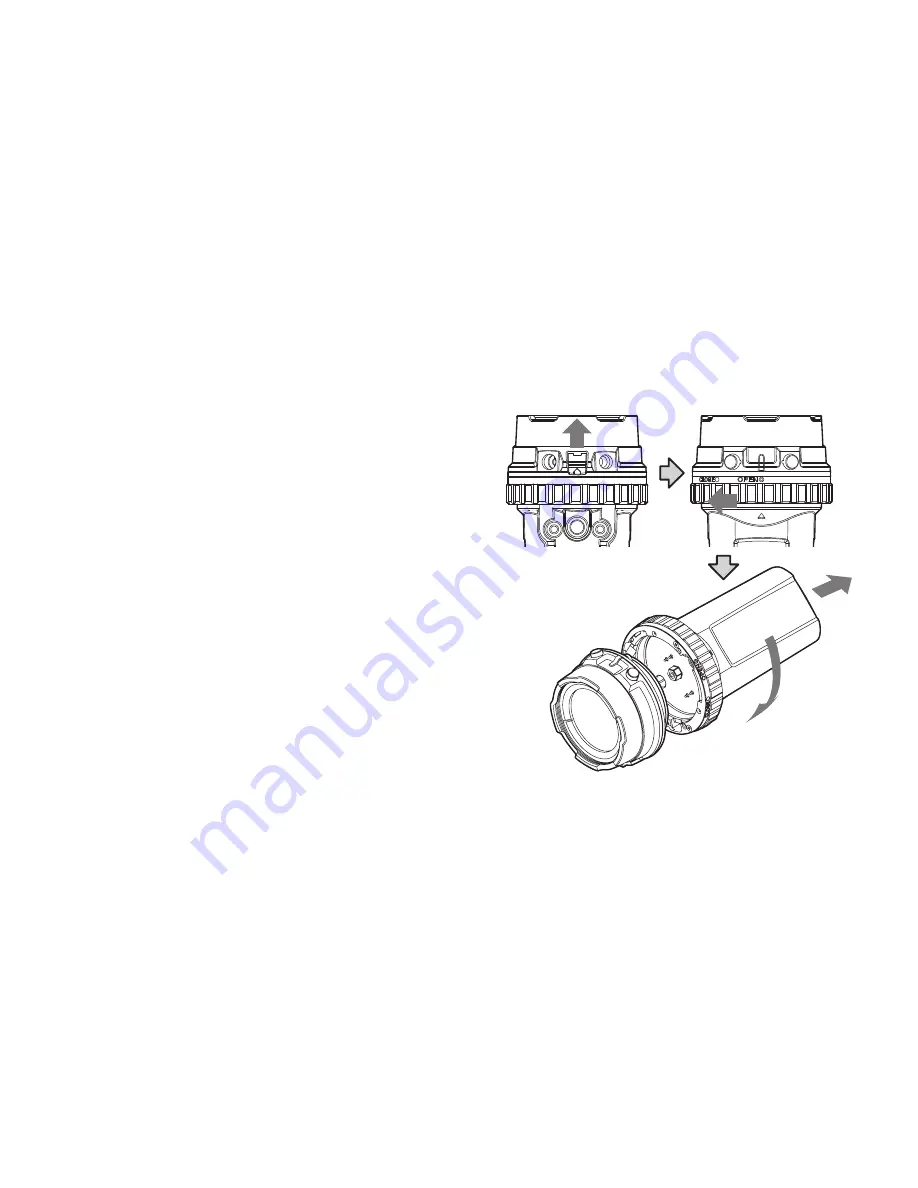
Page 12: ...O 1 2 OPEN OPEN 3 3 CLOSE 12...

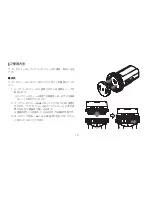
Page 13: ...1 OPEN 2 OPEN 13...

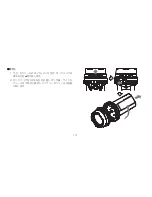
Page 14: ...1 AC 2 3 AC 4 5 3 14...

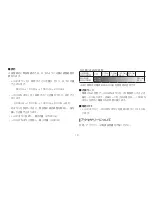
Page 15: ...OFF ON OFF ON 1 UP DOWN UP 1 2 ON UP 5 OFF UP ON ON OFF ON 5 100 50 50 20 20 5 5 15...

Page 16: ...UP 1 600lm 1000lm 1500lm 2000lm DOWN 1 2000lm 1500lm 1000lm 600lm UP 2500lm DOWN 400lm OFF 600lm 310 1000lm 160 1500lm 95 2000lm 60 400lm 550 2500lm 45 BM3400B ON DOWN DOWN ON OFF UP DOWN OFF 16...

Page 17: ...1 O O 17...

Page 18: ...2500lm 4 600lm 1000lm 1500lm 2000lm 400 2500lm LED BM3100G 4 600lm 310 1000lm 160 1500lm 95 2000lm 60 400lm 550 2500lm 45 AC 3350mA 7 2V 24Wh 1 500 100M IPX8 JIS Max 64 2mm 123 5mm 420g 170g 5 45 5 4...

Page 19: ...http www rgblue jp 1 2 1 3 4 Tel 03 3984 2993 10 00 17 00 170 0013 1 47 6 2F 1 1 2 3 4 5 6 7 2 3 4 19...

Page 20: ...ight source optimized for photography 1 A COB Chip On Board type LED that emits light from a single plane is used so the problems observed with multi LED type light source such as multi shadow phenome...

Page 21: ...by a third party other than the parties designated by RGBlue As this product includes electronic circuitry and lithium ion battery never attempt to disassembly or modify it Otherwise a risk of electr...

Page 22: ...r equipment damage If the product is used improperly without observing the following information fire ignition heat generation equipment damage or liquid leak may cause a burn injury or loss of sight...

Page 23: ...t switch the light on for an extended period more than 5 min overland Do not emit switch the light on when the light source is placed downward on a floor or desktop Do not use the modules if any irreg...

Page 24: ...LM5K2500V Battery Module BM3400B With insulation cap This is the power source incorporating a rechargeable battery It is used by connecting to the Light Module This is the LED light source which is us...

Page 25: ...with the UP button switches the power ON OFF Indicator Indicates the power ON status remaining battery power and an error Lock lever Used when disconnecting the Light Module from the Battery Module O...

Page 26: ...t is short circuited by contact with salt water it becomes temporarily unusable by the function of the safety circuitry For the recovery method see Notes on Waterproofing Specifications Lock ring Acce...

Page 27: ...the salt water completely away using a cloth moistened with fresh water and then dry it completely If the electrical terminal of the Battery Module is short circuited by contact with salt water it bec...

Page 28: ...Module Including the first use after purchase be sure to perform the following maintenance before using this product underwater The O ring is a consumable part which should be replaced at least every...

Page 29: ...gularity is found replace it with a brand new O ring 3 Clean the O ring groove with a cotton swab etc 4 Apply special grease on the O ring 5 Attach the O ring Be careful not to damage the O ring durin...

Page 30: ...e insulation cap to the Battery Module when storing it without connecting to the Light Module 2 After aligning the OPEN index with the index on the lock ring and the OPEN index with the indicator on t...

Page 31: ...ever turn the lock ring on the Battery Module until the OPEN index is aligned with 2 After the lock ring has been turned until the OPEN marking hold the product so that the Light Module faces down and...

Page 32: ...cified for the plug 3 Plug the AC adapter into a power outlet 4 The charge indicator on the charge plug lights to indicate the start of charging 5 Charging is complete when the charge indicator on the...

Page 33: ...ressing UP during flashing Power ON Remaining battery power indication When power is on when the indicator light is steady battery power is used even when the light is not on It is recommended to swit...

Page 34: ...ached by pressing holding the UP button 2500 lm Minimum light intensity reached by pressing holding the DOWN button 400 lm Light intensity levels and continuous lighting period 4 step brightness contr...

Page 35: ...irect sunlight as this may cause degradation or deformation of the product and O ring which may eventually lead to a failure or water penetration When the product is not to be used for a long period d...

Page 36: ...0 min to 2500 lm 45 min Charge method AC adapter Special plug Power supply Rechargeable lithium ion battery 3350 mA 7 2 V 24 Wh Battery life 1 Approx 500 times Withstanding water depth 100 meters IPX8...

Page 37: ...llowing cases 1 Malfunction or damage due to misuse modification or improper repair 2 Malfunction or damage due to improper handling e g dropping after purchase or caused during transportation or movi...

Page 38: ...Memo 38...

Page 39: ...39...

Page 40: ...date of purchase we will service the instrument free of charge in accordance with the terms and conditions of this Warranty Card Please request servicing from your dealer by submitting the Warranty Ca...

Reviews: