background image

20

Summary of Contents for (-)LKBA180CL

Page 1: ...FORE ATTEMPTING INSTALLATION OR OPERATION FAILURE TO FOLLOW THESE INSTRUCTIONS MAY RESULT IN IMPROPER INSTALLATION ADJUSTMENT SERVICE OR MAINTENANCE POSSIBLY RESULT ING IN FIRE ELECTRICAL SHOCK PROPERTY DAMAGE PER SONAL INJURY OR DEATH WARNING 92 23577 58 01 SUPERSEDES 92 23577 58 00 INSTALLATION INSTRUCTIONS FOR PACKAGE AIR CONDITIONERS NOMINAL 15 20 25 TON LKB MODELS AND 15 20 TON LMB MODELS Rec...

Page 2: ...s booklet and any instructions packaged with separate equipment required to make up the system prior to installation Give this booklet to the owner and explain its provisions The owner should retain this booklet for future reference III CHECKING PRODUCT RECEIVED Upon receiving the unit inspect it for any damage from ship ment Claims for damage either shipping or concealed should be filed immediate...

Page 3: ...3 FIGURE 1 UNIT DIMENSIONS BOTTOM VIEW FIGURE 2 UNIT DIMENSIONS BOTTOM VIEW A0886 16 A0886 20 ...

Page 4: ...4 FIGURE 3 UNIT DIMENSIONS FIGURE 4 UNIT DIMENSIONS A0886 17 A0886 21 FIGURE 5 COMPONENT LOCATION A0886 33 ...

Page 5: ...5 FIGURE 6 UNIT DIMENSIONS COM PONENT ACCESS A0886 18 FIGURE 7 UNIT DIMENSIONS COMPONENT ACCESS A0886 19 FIGURE 8 INTERNAL COMPONENT LOCATIONS A0886 32 ...

Page 6: ... LKB MODELS A180DL BELT 3 2 x 18 x 18 3 2 x 18 x 24 36 0 1 0 16 000 82 72 1677 1897 A180DM BELT 3 2 x 18 x 18 3 2 x 18 x 24 36 0 1 0 16 000 82 72 1707 1927 A180YL BELT 3 2 x 18 x 18 3 2 x 18 x 24 36 0 1 0 16 000 82 72 1677 1897 A180YM BELT 3 2 x 18 x 18 3 2 x 18 x 24 36 0 1 0 16 000 82 72 1707 1927 A240CL BELT 3 2 x 18 x 18 3 2 x 18 x 24 36 0 1 0 16 000 77 72 77 72 77 72 77 72 77 72 77 72 1755 197...

Page 7: ...OR HACR CIRCUIT BREAKER TABLE C ELECTRICAL DATA LMB MODELS MODEL NUMBER LMB PHYSICAL DRIVE TYPE FILTER OUTDOOR COIL WEIGHT RECOMMENDED NO AND SIZE AREA SQ FT NO ROWS CFM R22 OZ SYSTEMS 1 2 3 4 NET LBS SHIPPING LBS TABLE D PHYSICAL DATA LMB MODELS A180CL BELT 3 2 x 18 0 x 18 0 3 2 x 18 0 x 24 0 3 2 x 18 0 x 18 0 3 2 x 18 0 x 24 0 3 2 x 18 0 x 18 0 3 2 x 18 0 x 24 0 3 2 x 18 0 x 18 0 3 2 x 18 0 x 24...

Page 8: ...t The slab should be sufficient above grade to prevent ground water from entering the unit IMPORTANT To prevent transmission of noise or vibration slab should not be connected to building struc ture 3 The location of the unit should be such as to provide proper access for inspection and servicing 4 Locate unit where operating sounds will not disturb owner or neighbors 5 Locate unit so roof runoff ...

Page 9: ... the roofcurb is not used provisions for disposing of condensate water runoff must be provided 5 The unit should be placed on a solid and level roofcurb or platform of adequate strength See Figure 13 6 The location of the unit on the roof should be such as to provide proper access for inspection and servicing IMPORTANT If unit will not be put into service immediately cover supply and return openin...

Page 10: ...ide the air conditioned space Balancing dampers should be provided for each branch duct in the supply system Ductwork should be properly supported from the structure When installing ductwork consider the following items 1 Noncombustible flexible connectors should be used between ductwork and unit to reduce noise and vibration transmission into the ductwork 2 When auxiliary heaters are installed us...

Page 11: ... the terminal block and the adjacent ground lug c Remove the heater kit block off panel and install the heater kit in its place using the screws previously removed d Connect the unit contactor wires 1L1 1L2 1L3 to the compressor fuse block on the heater kit e Re install the power entry panel run conduit and the proper size field wiring through the opening in the panel f Connect field wiring to the...

Page 12: ...ve the floor in a location where it will not be affected by unconditioned air sun or drafts from open doors or other sources READ installation instructions in heat pump thermostat package CAREFULLY because each has some different wiring requirements XI INDOOR AIR FLOW DATA Belt drive blower models have motor sheaves set for proper CFM at a typical external static See Tables E and F for blower perf...

Page 13: ... 1812 2056 2299 2543 2786 2759 3064 3369 3675 3980 4285 4591 4896 767 783 799 815 896 905 914 923 932 941 950 959 968 1956 2199 2443 2686 2632 2938 3243 3548 3854 4159 4464 4770 5075 786 802 818 900 909 918 927 936 945 954 963 972 2100 2343 2586 2506 2812 3117 3422 3727 4033 4338 4643 4949 806 822 904 913 922 931 940 949 958 967 976 2243 2487 2380 2685 2991 3296 3601 3907 4212 4517 4823 899 908 91...

Page 14: ...6 3860 4106 4411 4717 5022 5327 5633 5938 6243 6549 6854 7159 876 928 937 946 955 964 973 982 991 1000 1009 1018 1027 3760 3980 4285 4591 4896 5201 5506 5812 6117 6422 6728 7033 7338 932 941 950 959 968 977 986 995 1004 1013 1022 1031 3854 4159 4464 4770 5075 5380 5686 5991 6296 6602 6907 7212 945 954 963 972 981 990 999 1008 1017 1026 1035 1044 4033 4338 4643 4949 5254 5559 5865 6170 6475 6781 70...

Page 15: ... installed should come on 9 Check the refrigerant charge using the instructions located on unit charging chart Replace service port caps Service port cores are for system access only and will leak if not tightly capped 10 Adjust discharge air grilles and balance system 11 Check ducts for condensation and air leaks 12 Check unit for tubing and sheet metal rattles 13 Instruct the owner on operation ...

Page 16: ...25 250 NONE 46 50 CD20D 19 2 23 1 46 50 A180DM CD40D 38 4 46 2 71 80 CD60D 57 6 69 3 100 100 CD75D 72 0 86 6 121 125 NONE 34 35 CD20Y 19 2 18 5 34 35 A180YM CD40Y 38 4 37 0 57 60 CD60Y 57 6 55 4 80 80 CD75Y 72 0 69 3 97 100 NONE 100 100 110 110 CD20C 14 4 19 2 40 0 46 2 100 100 110 110 A240CL CD40C 28 8 38 4 79 9 92 4 119 134 125 150 CD60C 43 2 57 6 119 9 138 6 169 192 175 200 CD75C 54 0 72 0 149 ...

Page 17: ...72 0 149 9 173 2 206 235 225 250 NONE 61 70 CD20D 19 2 23 1 61 70 A300DL CD40D 38 4 46 2 71 80 CD60D 57 6 69 3 100 100 CD75D 72 0 86 6 121 125 NONE 43 50 CD20Y 19 2 18 5 43 50 A300YL CD40Y 38 4 37 0 57 60 CD60Y 57 6 55 4 80 80 CD75Y 72 0 69 3 97 100 NONE 122 122 125 125 CD20C 14 4 19 2 40 0 46 2 122 122 125 125 A300CM CD40C 28 8 38 4 79 9 92 4 128 144 125 150 CD60C 43 2 57 6 119 9 138 6 178 202 20...

Page 18: ...9 9 173 2 206 235 225 250 NONE 46 50 CD20D 19 2 23 1 46 50 A180DM CD40D 38 4 46 2 71 80 CD60D 57 6 69 3 100 110 CD75D 72 0 86 6 121 125 NONE 34 35 CD20Y 19 2 18 5 34 35 A180YM CD40Y 38 4 37 0 57 60 CD60Y 57 6 55 4 80 80 CD75Y 72 0 69 3 97 100 NONE 99 99 110 110 CD20C 14 4 19 2 40 0 46 2 99 99 110 110 A240CL CD40C 28 8 38 4 79 9 92 4 119 134 125 150 CD60C 43 2 57 6 119 9 138 6 169 192 175 200 CD75C...

Page 19: ...inals voltage must be 10 of nameplate marking when unit is operating Defective overload protector Replace check for correct voltage Refrigerant undercharge Add refrigerant Registers sweat Low evaporator airflow Increase speed of blower or reduce restriction replace air filter High head low vapor pressures Restriction in liquid line expansion device or filter drier Remove or replace defective compo...

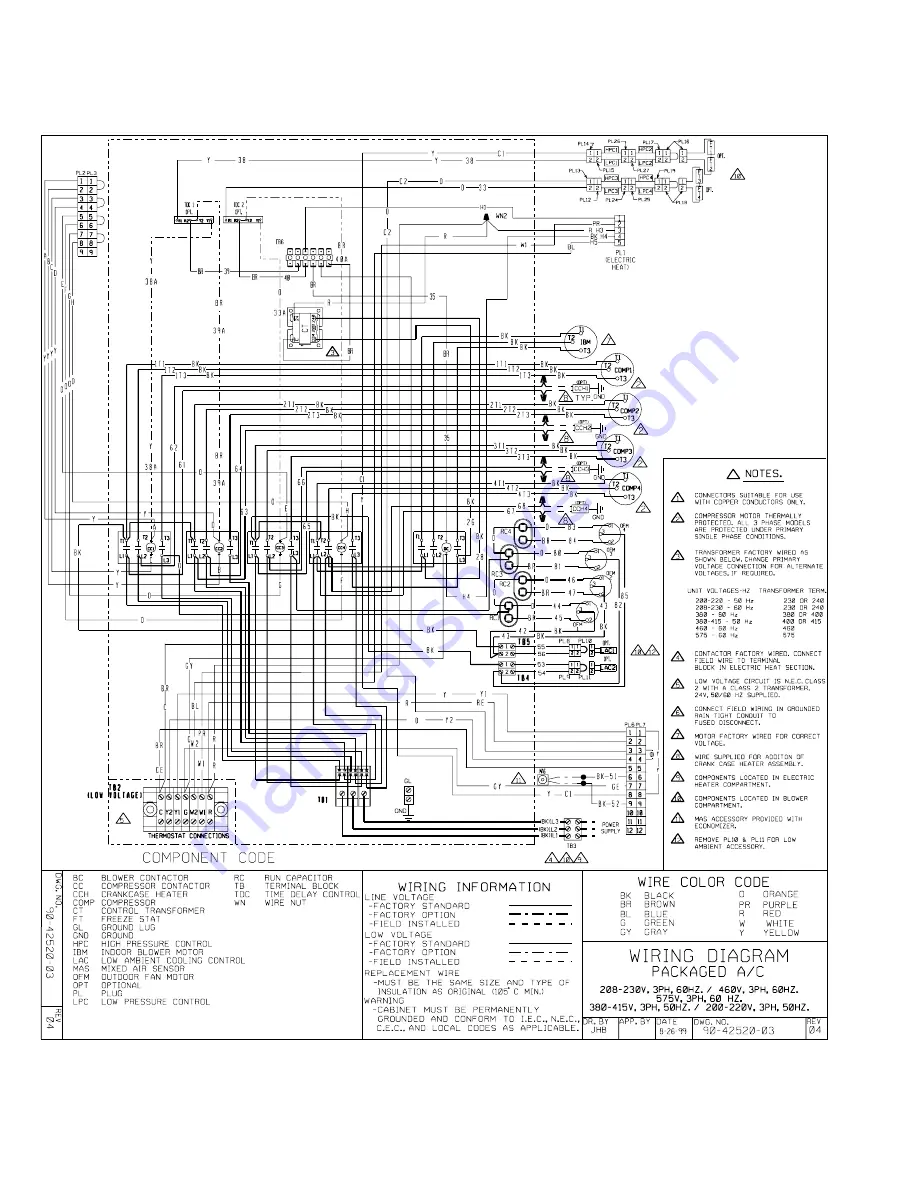
Page 20: ...20 ...

Page 21: ...21 ...

Page 22: ...22 ...

Page 23: ...23 ...

Page 24: ...24 ...

Page 25: ...25 ...

Page 26: ...26 ...

Page 27: ...27 ...

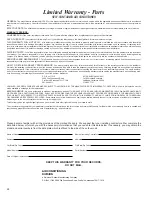
Page 28: ...r from whom the unit was purchased will be able to take the necessary corrective action by obtaining through his air conditioning distributor any replacement parts If the contractor is not available simply contact any other local contractor handling the manufacturer s air conditioning products The name and loca tion of a local contractor can usually be found in your telephone directory or by conta...

Reviews: