COMMISSIONING
42
Explain to the householder or a responsible officer the functions and operation of the solar water heater and
the timer if one is installed. Upon completion of the installation and commissioning of the water heater, leave
this guide with the householder or a responsible officer.
BLEEDING THE SOLAR COLLECTORS
Upon completion of the installation, it is necessary to purge the air from the collector circuit.
To purge air from the collector circuit:
Ensure the water heater is full of water and all of the
hot taps are turned off.
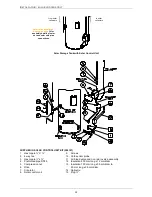
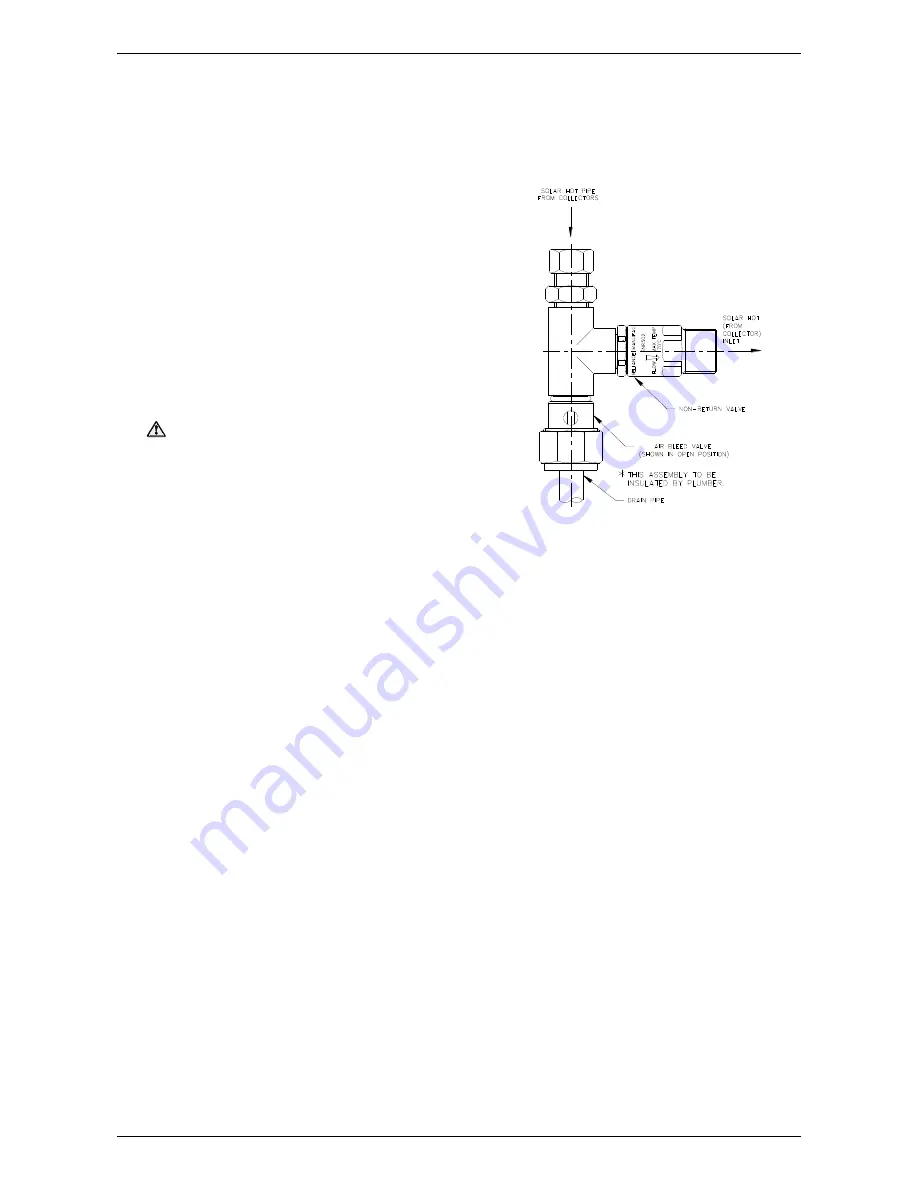
Using a flat blade screwdriver, open the bleed valve
fitted adjacent to the solar hot water inlet of the solar
storage tank (see diagram).
The mains pressure will force water to flow from the
tank and through the pipe work, forcing air from the
collector circuit through the bleed valve. This is
evidenced by spurting of water from the drain line
connected to the bleed valve.
Warning:
Exercise care to avoid any splashing of
water, as water discharged from the solar collectors
may be of a very high temperature.
Close the bleed valve when water runs freely from the
drain line.
TO TURN OFF THE WATER HEATER
If it is necessary to turn off the water heater on completion of the installation, such as on a building site or
where the premises is vacant, then:
Switch off the electrical supply at the isolating switch to the solar storage tank.
Switch off the electrical supply at the power outlet to the solar control unit (refer to note below).
Close the cold water isolation valve at the inlet to the water heater.
Notes:
The freeze protection system will be rendered inoperable if electrical power is not available at the solar
control unit. Damage caused by freezing due to no power at the solar control unit is not covered by
warranty.
If there is a risk of freezing, then it is necessary to drain the solar collectors and solar collectors and
solar flow and return pipe work (refer to
“Draining the Solar Collectors”
on page 44).
Refer to
“Warranty Exclusions”
on page 47.

