


8
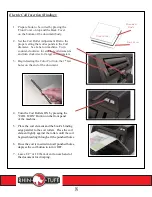
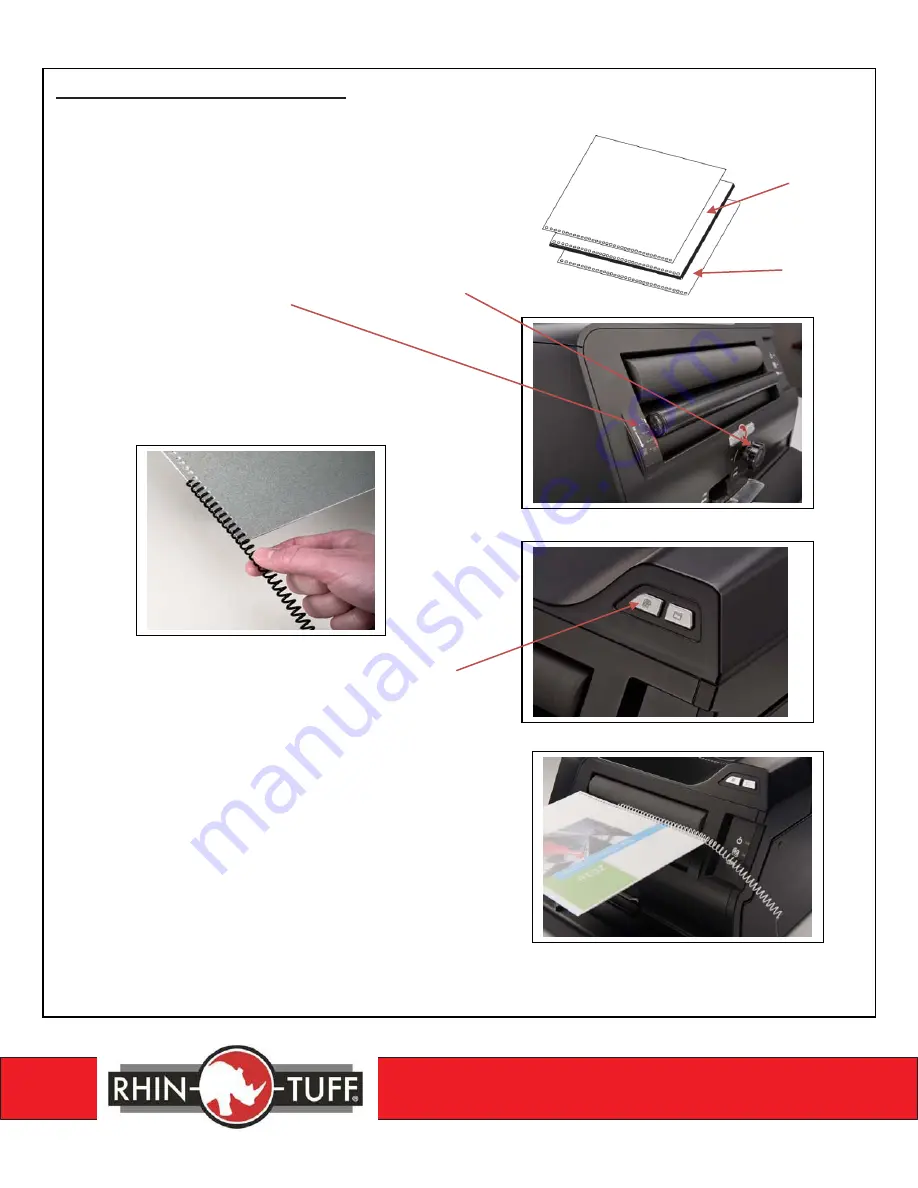
Electric Coil Insertion (Binding):
1.
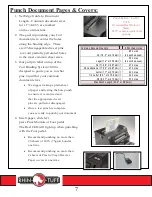
Prepare book to be coiled by placing the
Front Cover on top and the Back Cover
on the bottom of the document body.
2.
Set the Coil Roller Adjustment Dial to the
proper setting that corresponds to the Coil
diameter. See Label on machine. Turn
counter-clockwise for smaller coil diameters
and turn clockwise for larger coil diameters.
3.
Begin feeding the Color Coil into the 1
st
few
holes on the end of the document.
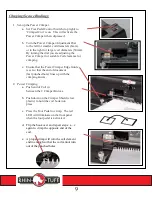
4.
Turn the Coil Rollers ON by pressing the
“COIL ICON” Button on the front panel
of the machine.
5.
Place the coil element and the book’s binding
edge parallel to the coil rollers. Press the coil
element lightly against the rollers until the coil
begins threading through all the punched holes.
6.
Once the coil is inserted into all punched holes,
depress the coil button to turn it OFF.
7.
Leave 1/2” or 12.7mm of coil on each end of
the document for crimping.
Front Cover
Document
Body
Back Cover
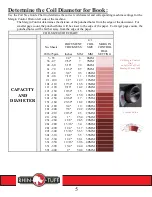
Summary of Contents for 3000
Page 7: ...6 ...


